I was super excited for the last release, I had two super cute stamp sets and some stencils ready to go, I really thought the Mid-Mod-city-stamp team was going to take the win, wow, was I wrong.
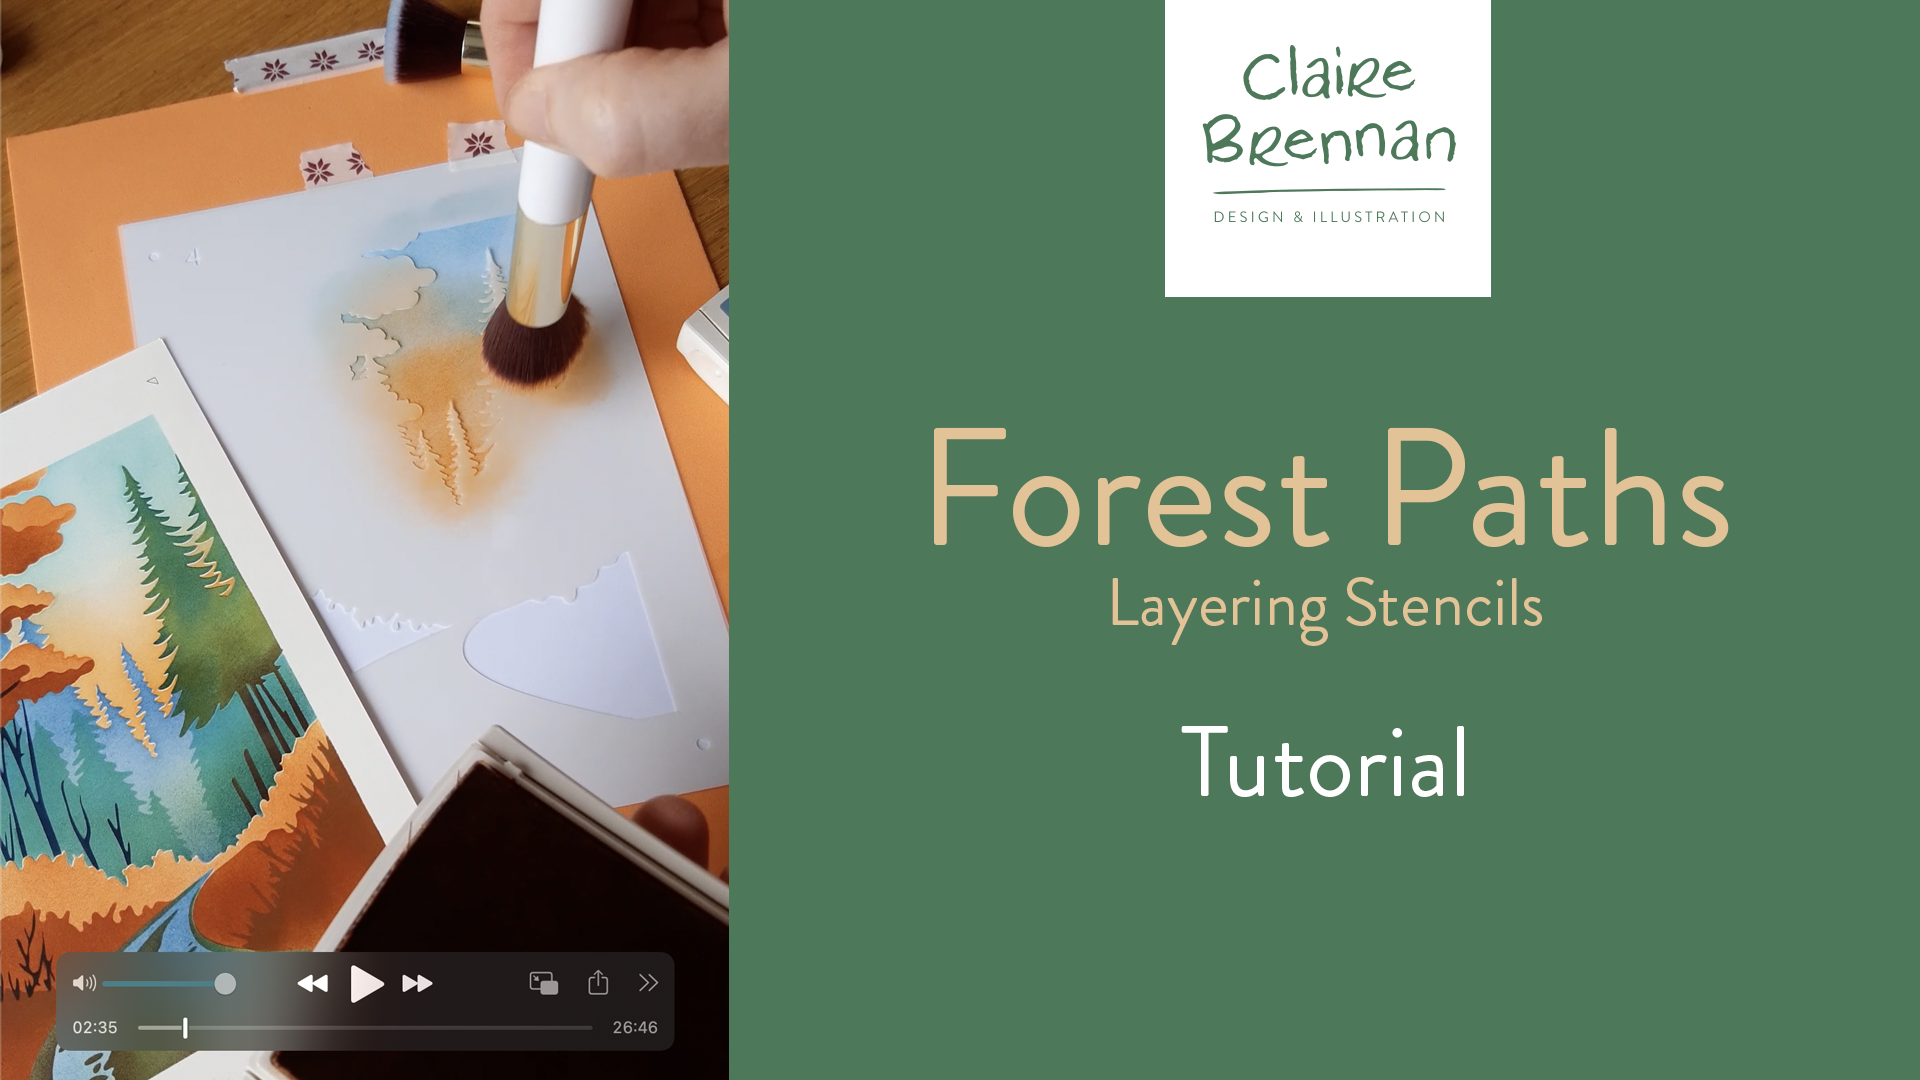
Turns out, folks love a stencil. This set of Forest Path Stencils completely stole the show. Serendipitously, these are what I made while I was impatiently waiting for the stamp samples to arrive, if the stamps had been quicker, these would not have happened!
I’m cutting these myself and I was underprepared for how many sets would be needed. It took nearly two weeks of cutting, and a new machine to fill all the orders. I get it though, I’ve kinda been down the stencilling rabbit hole myself since this began, so there’s probably more stencils in the pipeline.
Meantime, I put this tutorial together for folks who have ordered the stencils – I hope it gives you an insight into how I use them, I love creating scenes with this set.
If you have any questions, please don’t hesitate to comment here or on FB, Insta etc, wherever you are in touch with me.
The new goodies are here. See them all in store here. Today I’m releasing 3 new stamp sets and reloading stock of the layering stencils! There’s been a lot of interest in the stencils and the first bunch sold out – thank you! I have more for the store today and I am making more as we speak. Cottage industry is interesting for sure, and I’m loving it, but I must just give you the nod that orders from this release will begin to ship towards the end of the week.
Since I’m ‘back in business’ I’m doing most of it in house, designing product, managing supply, designing and making packaging, doing the packaging, running the online stuff, making samples and now making product too! Our polymer stamps are still made by the best in the business, but the stickers, stencils, and everything else is little ol’ me, so please bear with, I’m loving it, but it takes a moment!
Here are the new things – you can find these on the store by following this link, which will take you to all the latest goodies! There are some other bits and bobs in store, if you have time for a browse – slowly in the background I’m migrating my Etsy stock to my new store also.
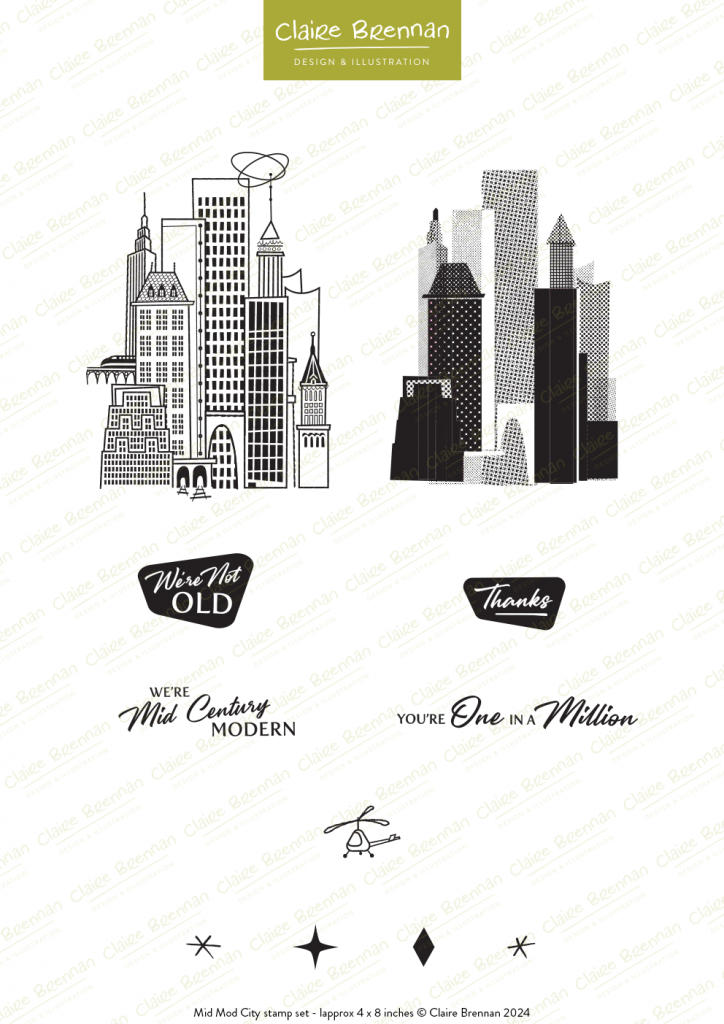
Perfect for batch card production for birthday wishes to folks of decent vintages, and ‘Thank You’ cards. Check out the halftone stamp that lets you cover the whole city in one fell swoop. Batman wishes he had this stamp.
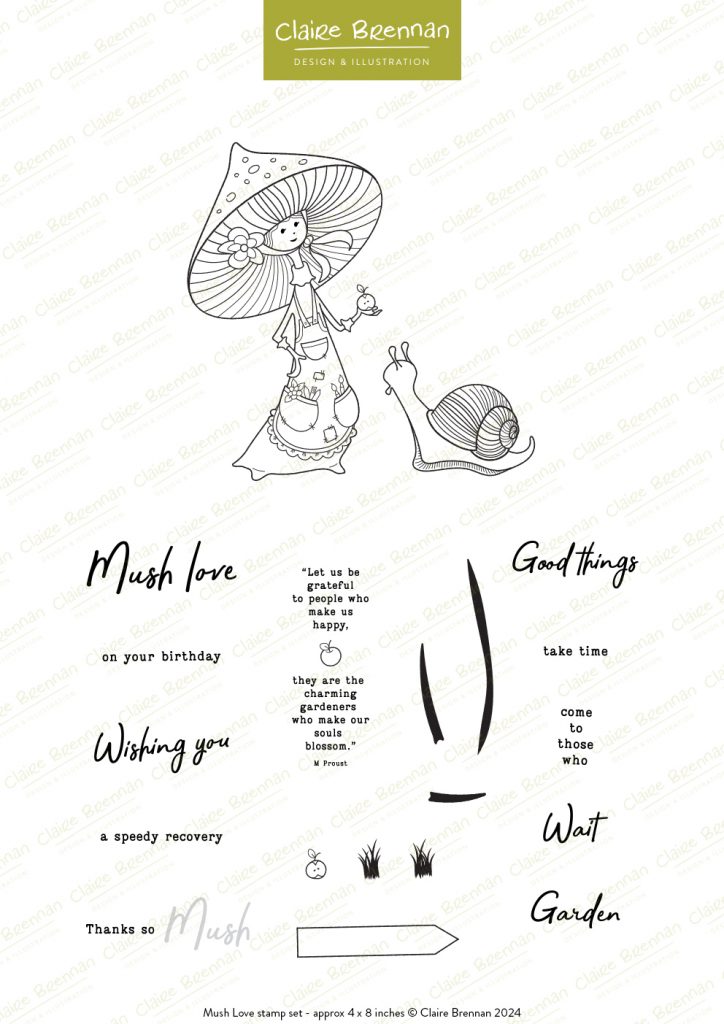
Perfect for birthdays, well wishes, speedy recoveries, encouragement cards etc, especially if your recipient has a bit of a gardening bent.
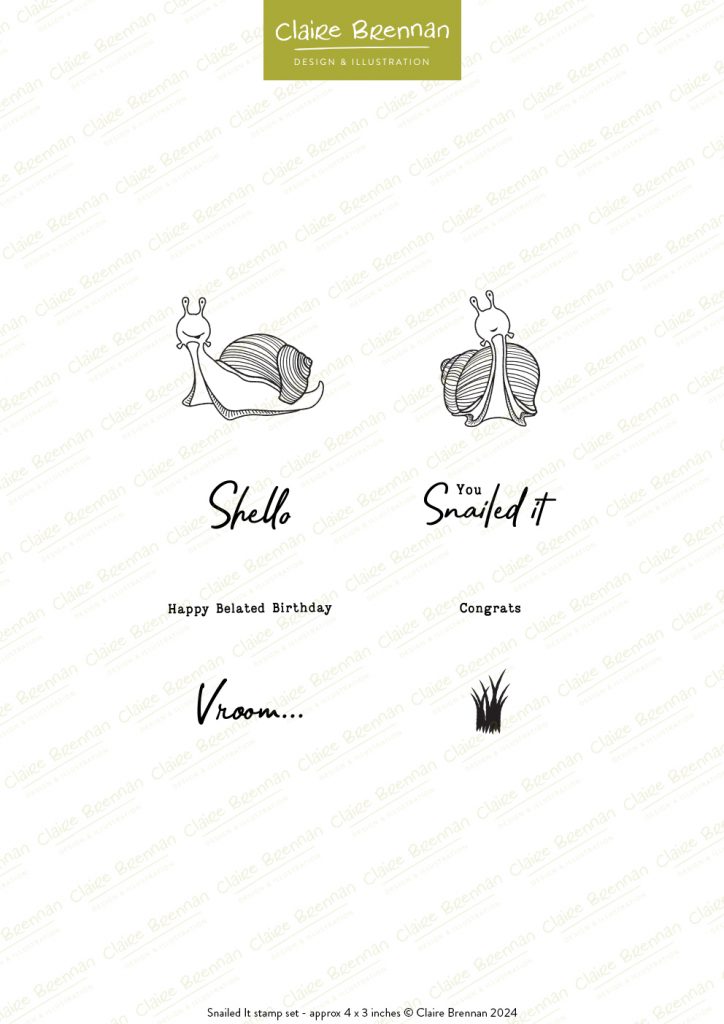
Snailed it Stamp set (3 x 4 inch set)
See them in store here.
Card samples for this companion set to Mush Love, will hopefully appear on the blog over the next few days! This little set is perfectly grand as a standalone set – it’s basically my dog, if he were a snail pet. Ideal for belated birthday folks everywhere, like me, I never remember on time. Or, if you just want to send a nice informal congrats to someone.
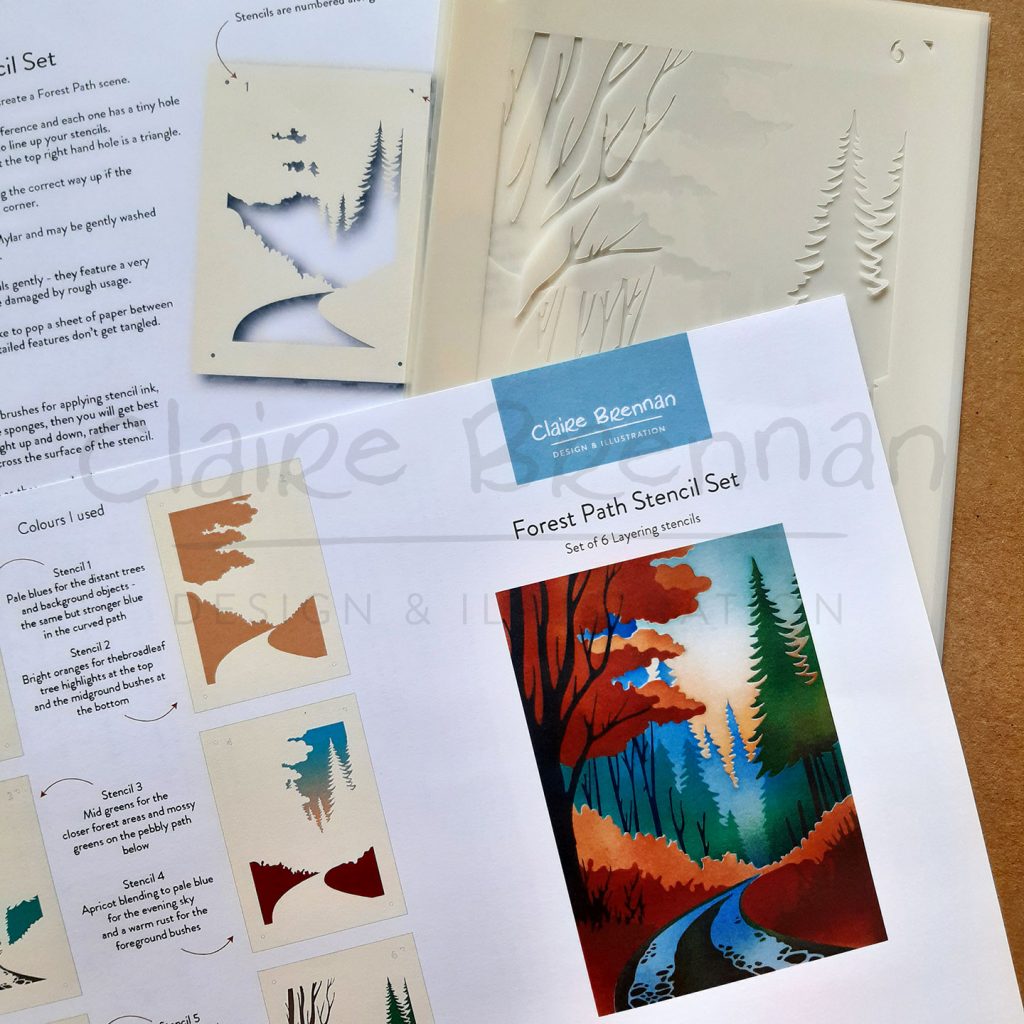
The Forest Path Layering stencils (set of 6, A5 stencils)
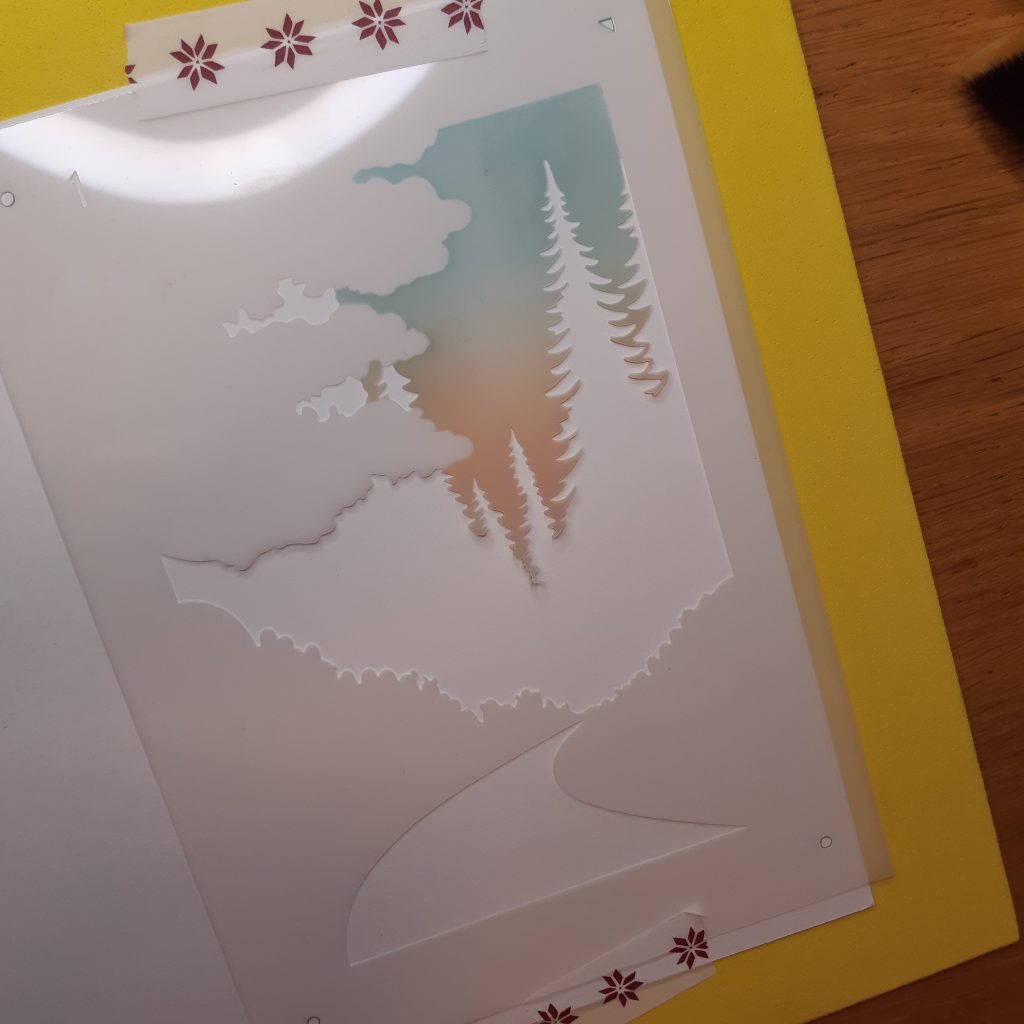
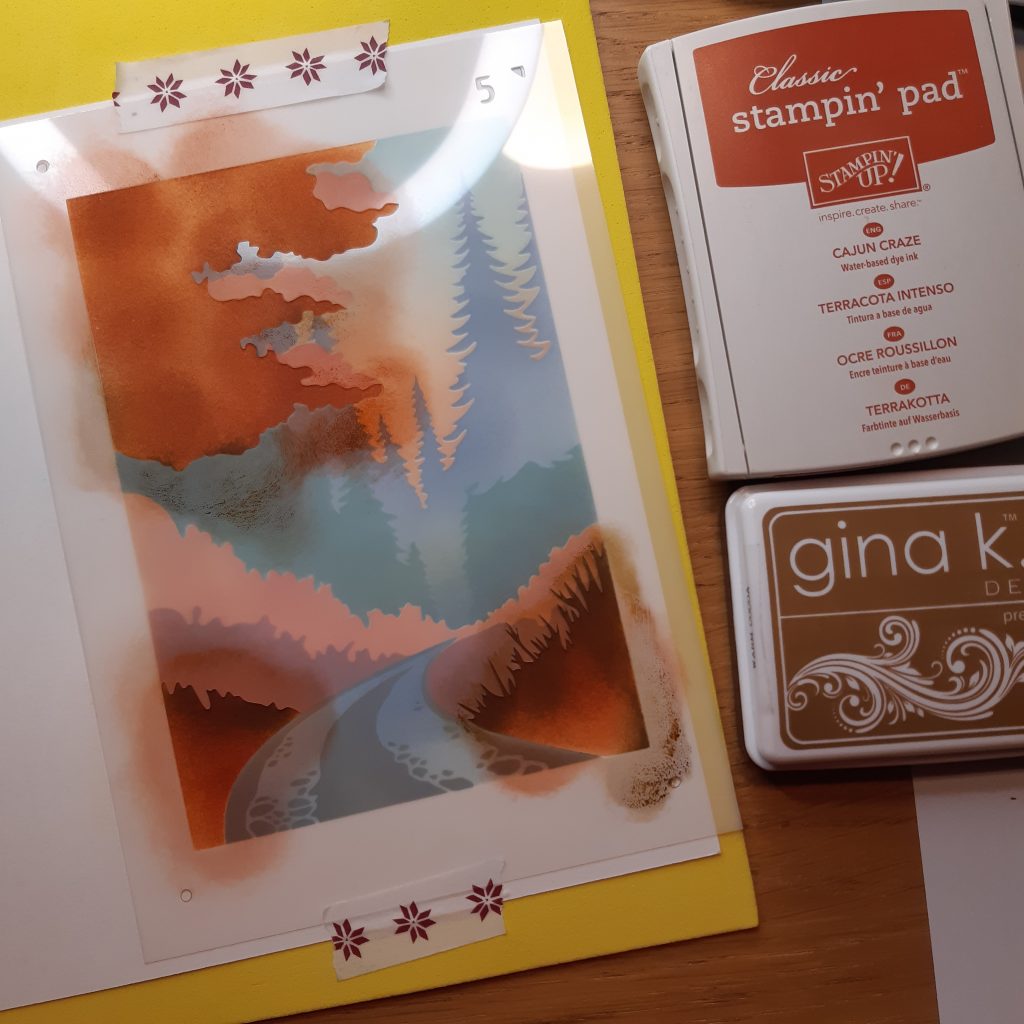
This highly detailed set of mylar stencils are best used with soft brushes, but all of the info you need to used them in on a handy instruction sheet, together with a colour guide, wrapped up in the stencil package. Expect to see a video of me demonstrating this as soon as I get time.
Stencils are all the rage right now – that feels very 1920’s to say, but I think it’s true, everyone seems to like stencils, layering stencils in particular. I will admit that I might have been a little bit of a stencil snob until recently – in that I didn’t really have much interest. My previous experience of stencilling being soggy wet card stencils made in primary school that slowly disintegrated across the face of the shiny paper pulp that the teacher called ‘art paper’.
Then, some stamp samples that I had ordered, entered that dead-slow-stop portion of the delivery-sphere reserved entirely for things that are needed in a hurry, and stayed there for 5 weeks. Unable to wait patiently, I thought I’d look into stencilling. I bought some plastic and cut a stencil. Disaster. Wrong material and the cutter was audibly upset. Then I thought I’d try a bit harder and discovered that mylar is actually the business in the stencil world. I got some and I made up a couple of stencil designs and cut them out. I was immediately bowled over, what great fun. I got a bit carried away and made a whole bunch for the store, you can see them here.
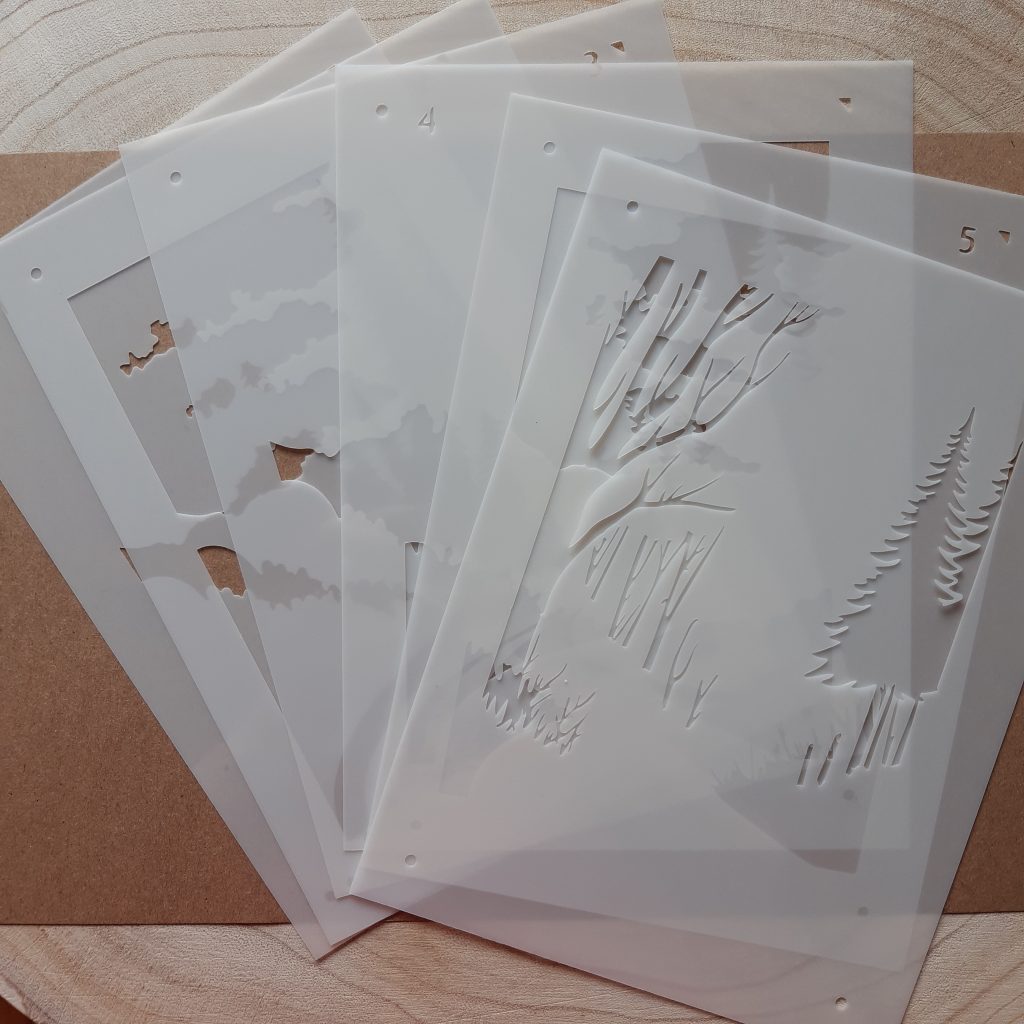
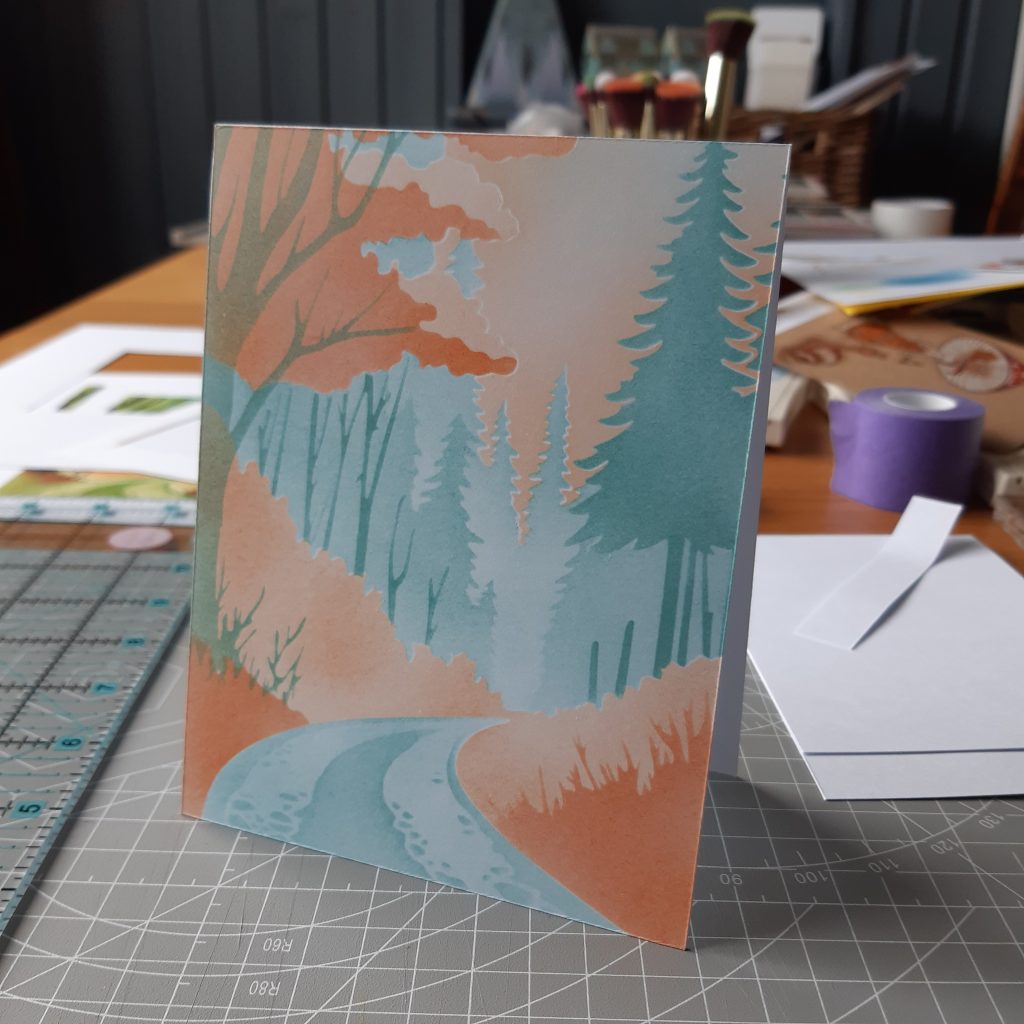
Next I thought it might be fun to create a scene – a forest path to complement the other stamp set I was waiting on, so I drew up a scene and then began taking it apart to create layers. This part was a bit of a head scratcher, but I’m pleased with how the layers work. There are 6 layers in all.
The Forest path layering stencils set available in my store comes with a handy guide on what order I use them in as well as suggestions for colours. I’ve made these quite detailed because I love detail. This presents a challenge though and while I cut these myself (with my plotter/cutter machine), I have to keep a really tight rein on them – I check every set to see that they line up. Mylar is slippy stuff and I keep them in place with a tacky matt while they cut, but there can be a little strain on the machine, so at the moment I’m making limited quantities and checking every set – this is a slow process, but I think it’s worth it.
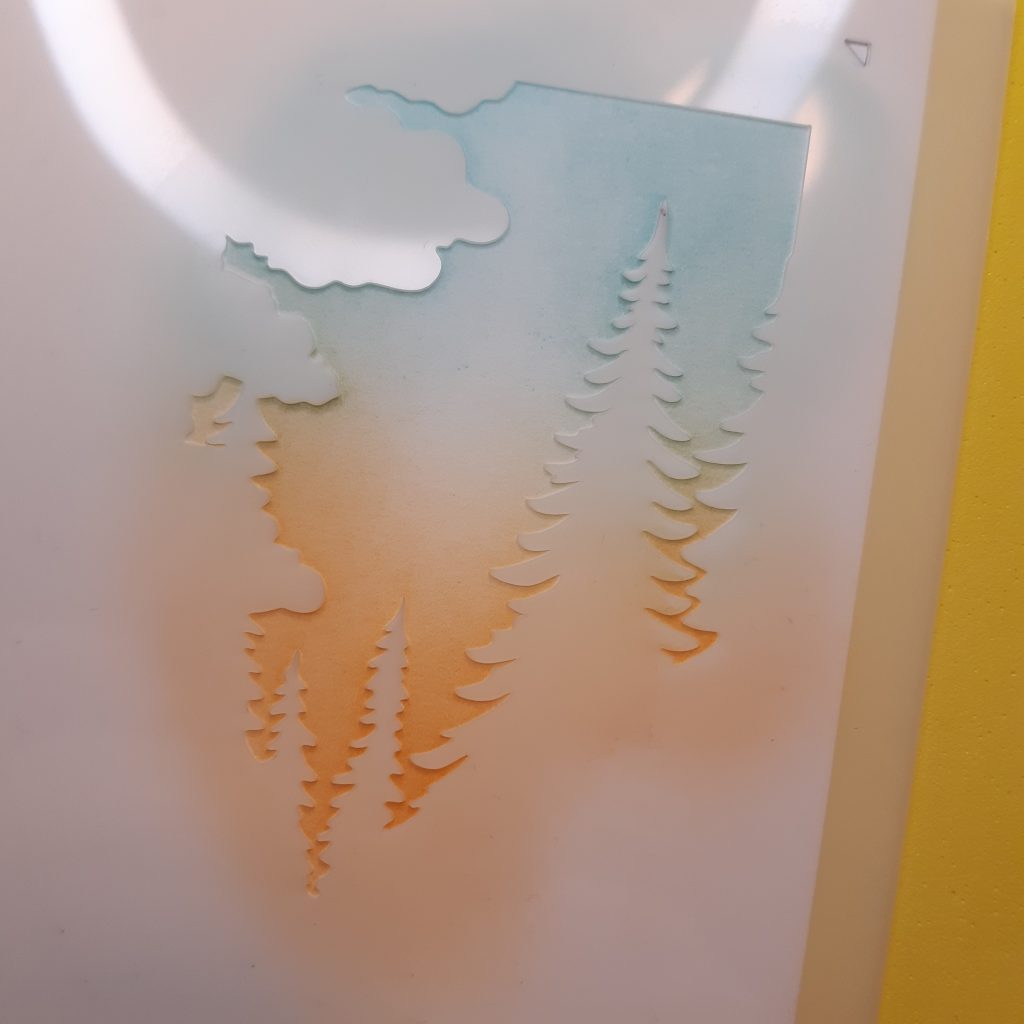
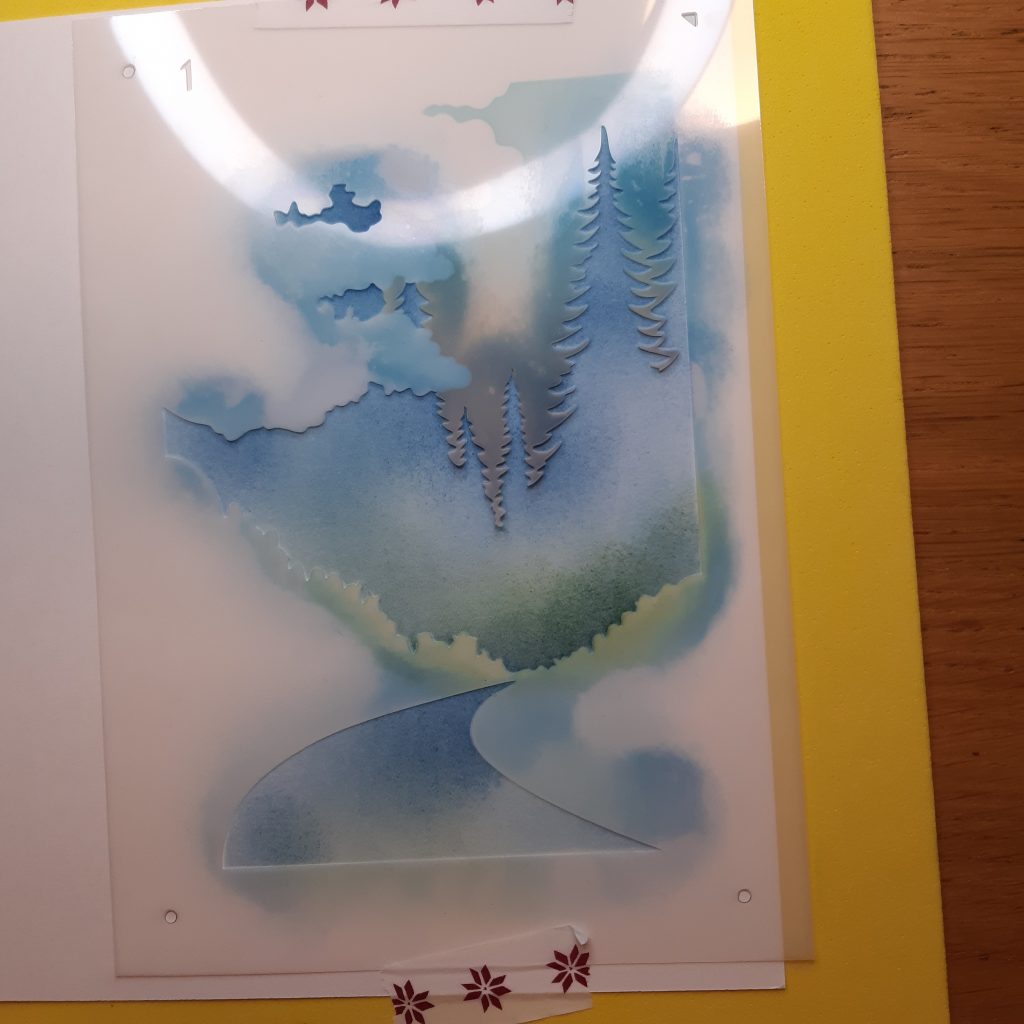
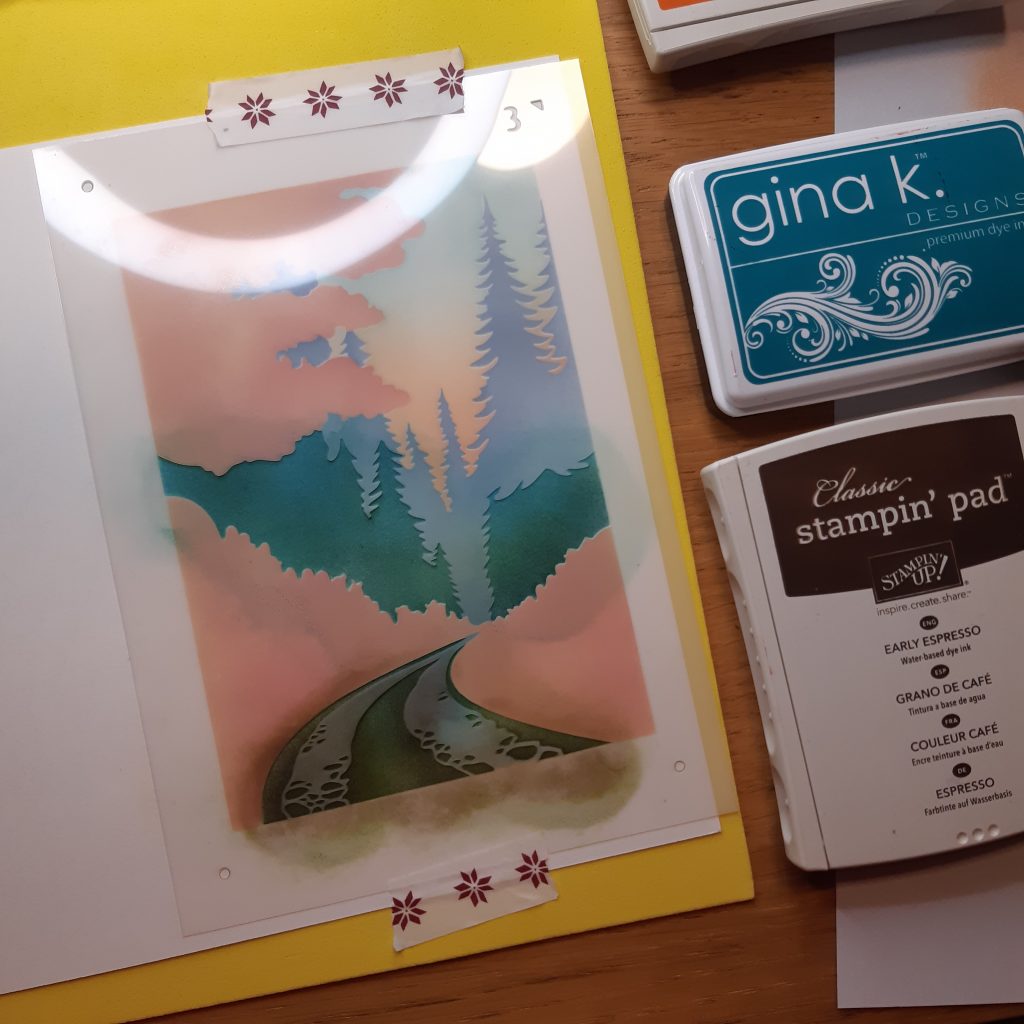
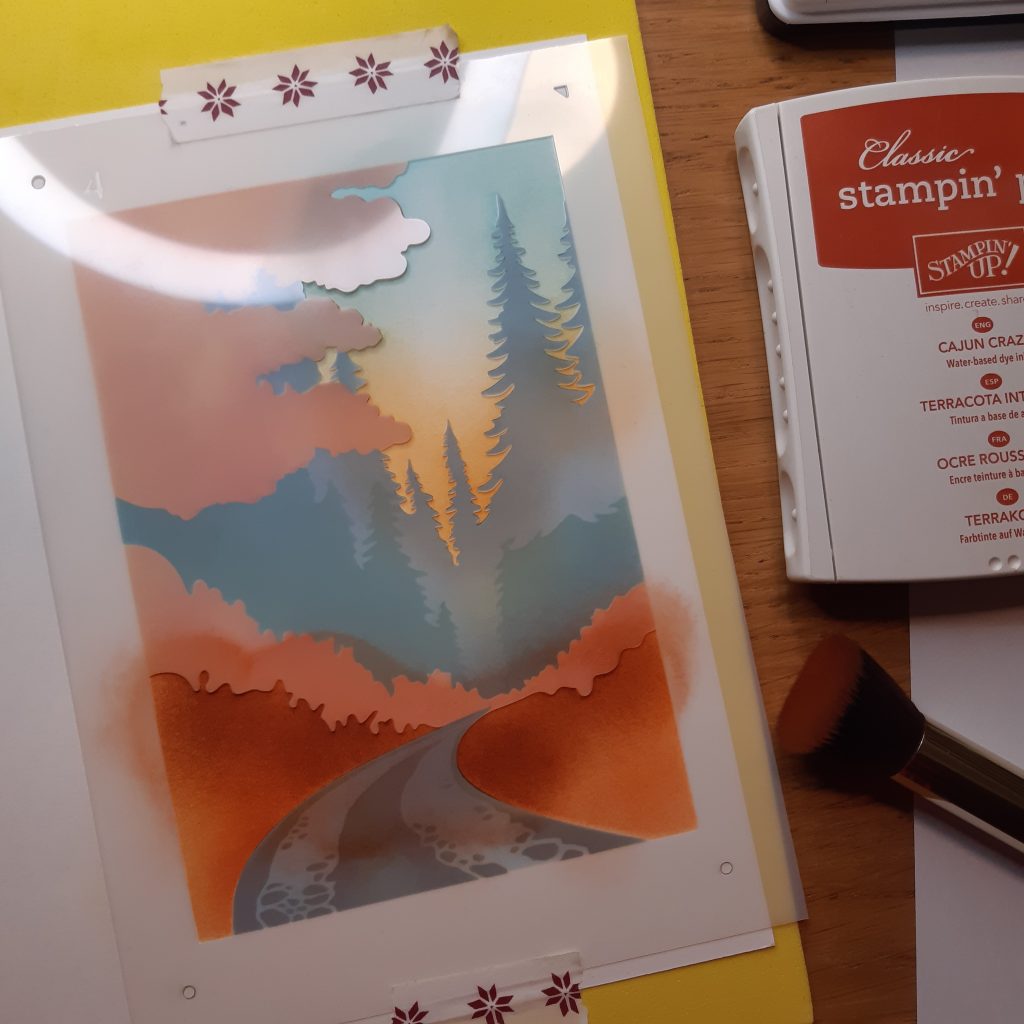
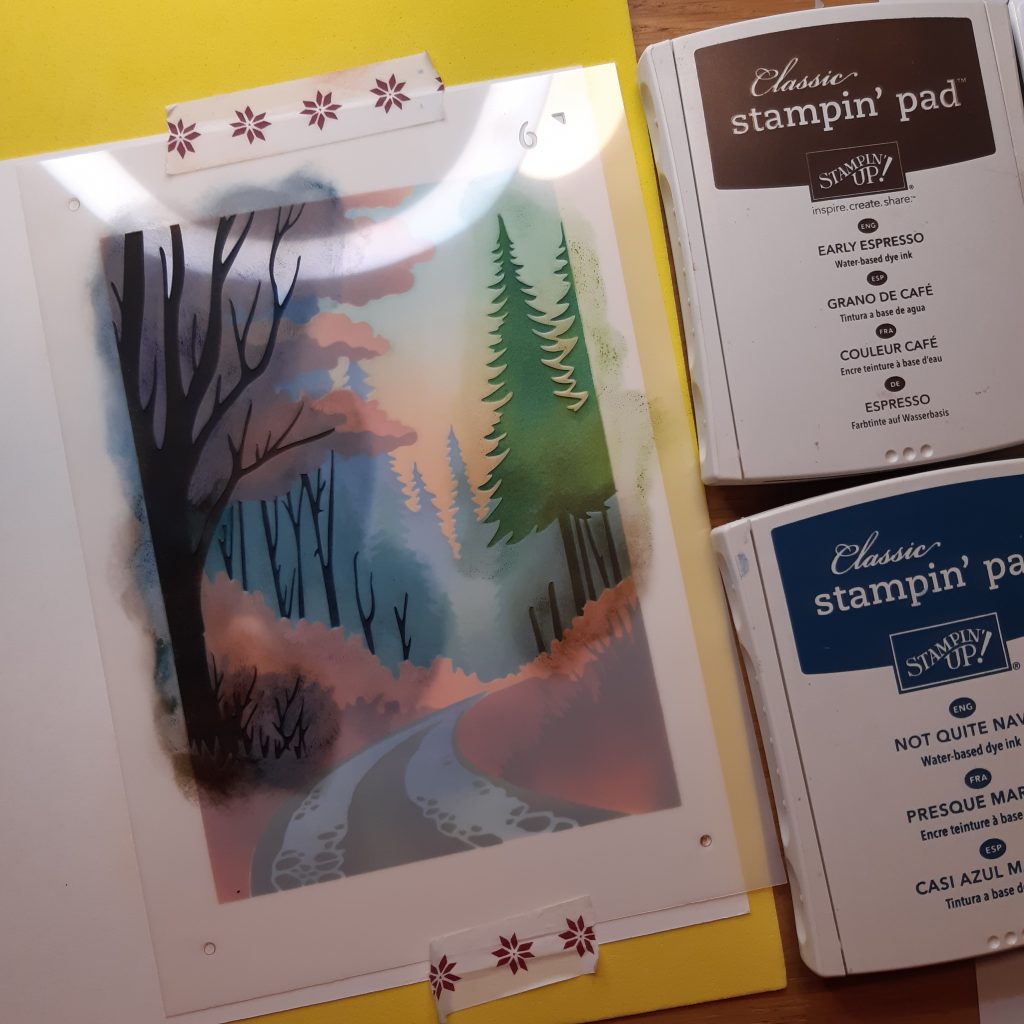
Here’s a small gallery of images I took as I worked through a complete image. You can see how detailed the pine trees are. One thing I will point out here is that these detailed stencils really do best with soft brushes – do not be tempted to used sponges on them unless you can sponge with an up and down motion, with no dragging – look how delicate the pine trees are and imagine pulling a sponge across that – you just are not going to get the lovely airbrushed look you want with delicate stencils and sponges.
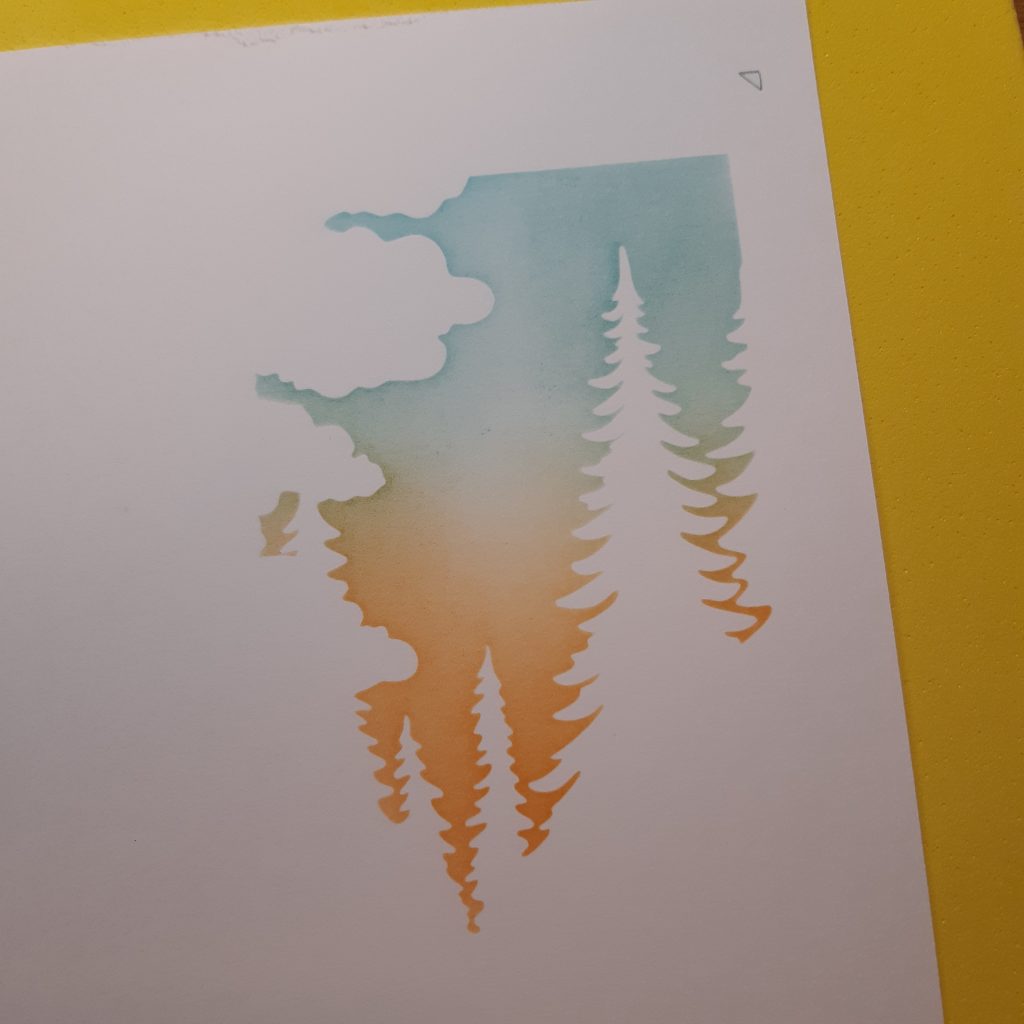
I bought cheap make-up brushes for the purpose and was delighted with them. I made small circular motions and the stencils behaved so well.
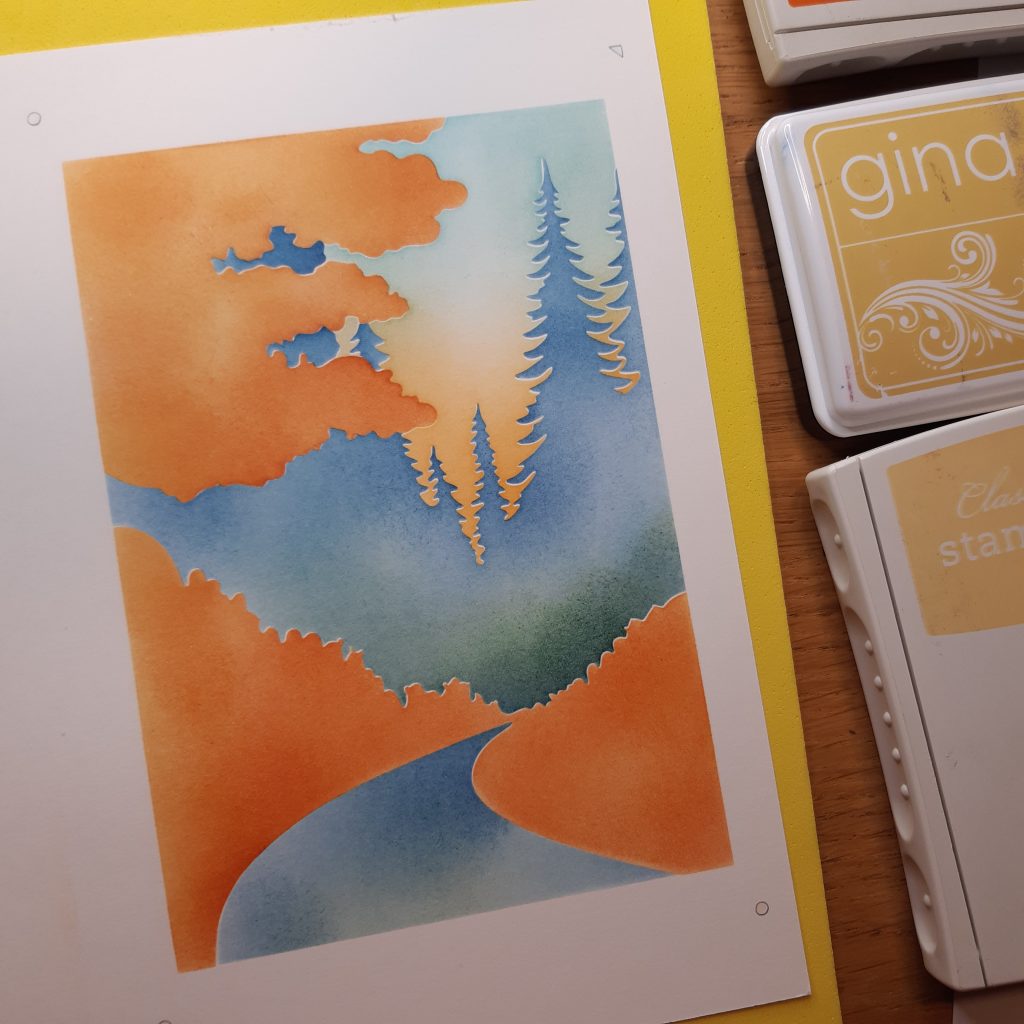
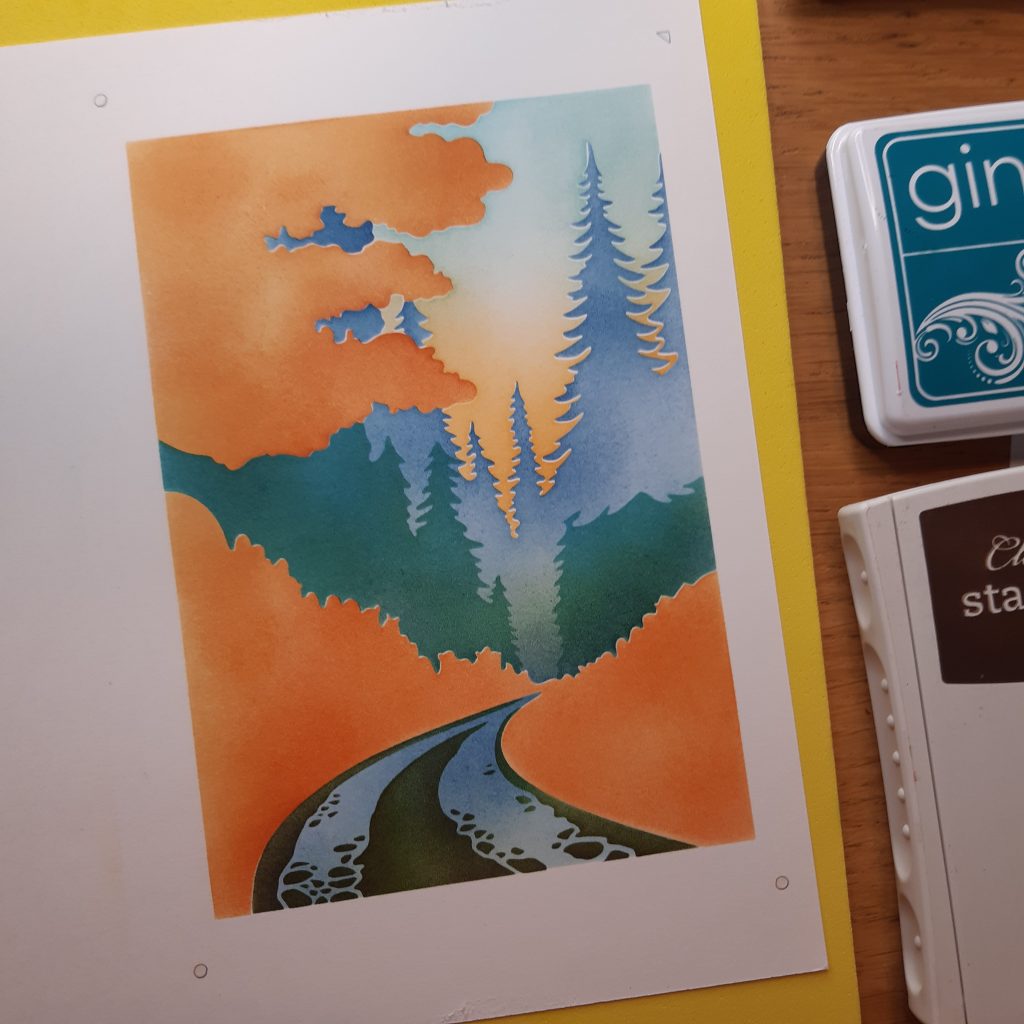
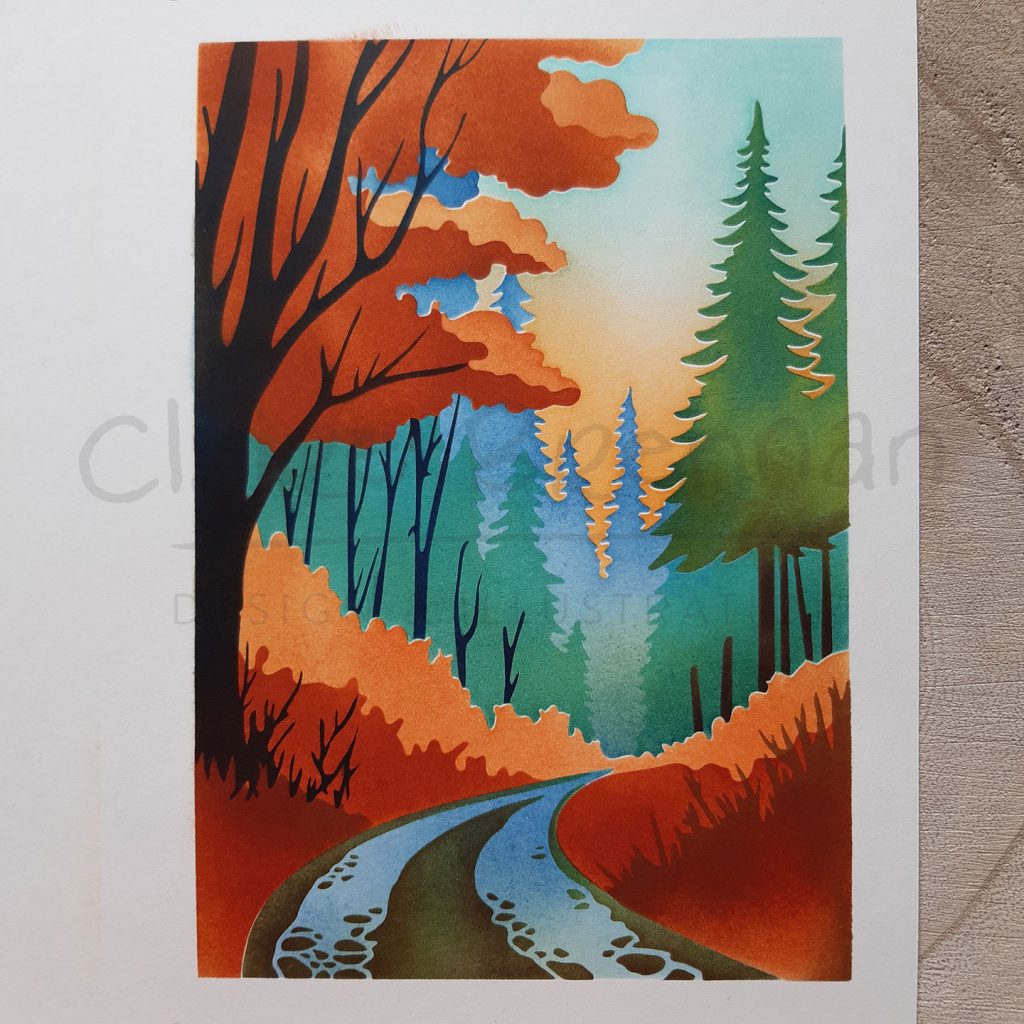
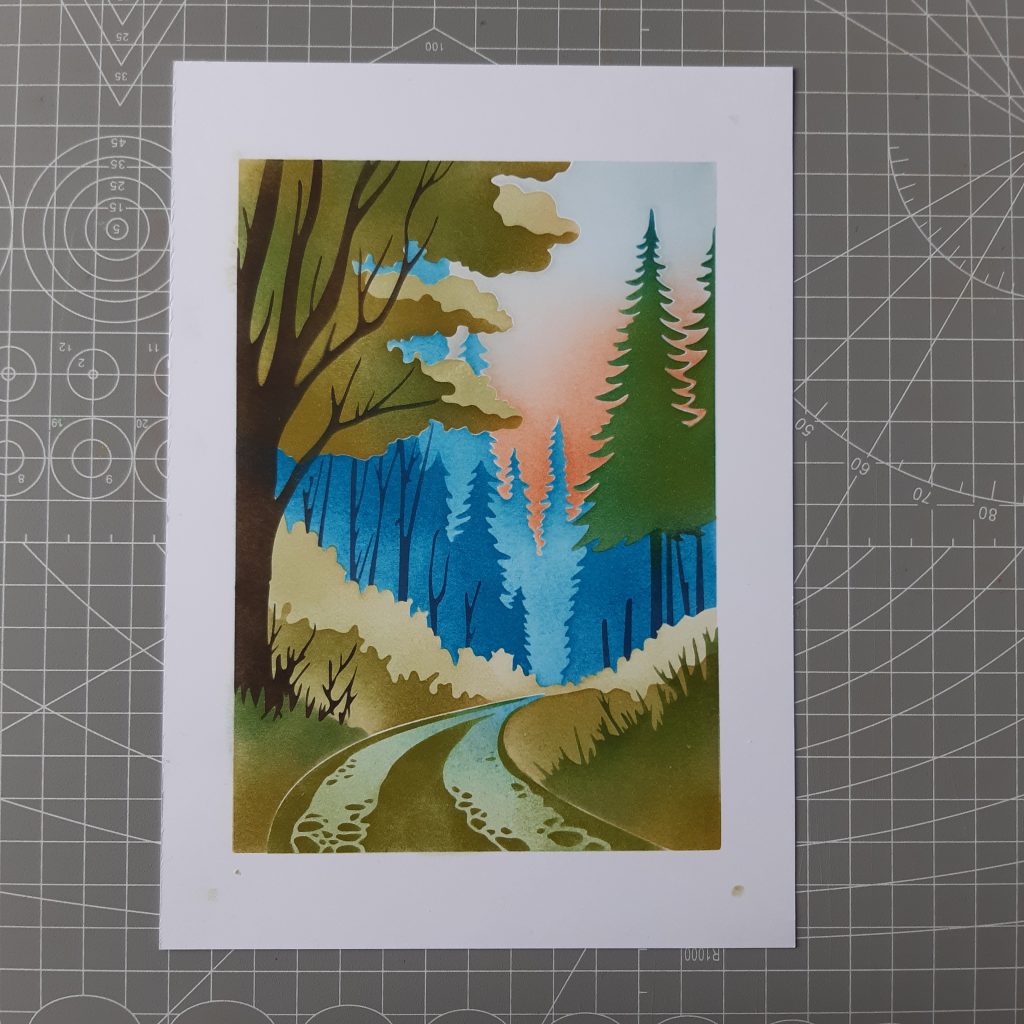
And here’s the finished image.
I added a little triangle in one corner and some circular holes in the corners of the stencils – these can help line things up, but I generally eyeball the next stencil in place based on the ink I have already applied. Mylar, being semi transparent makes it super easy to line it up perfectly. I use masking tape to keep things in place while I brush.
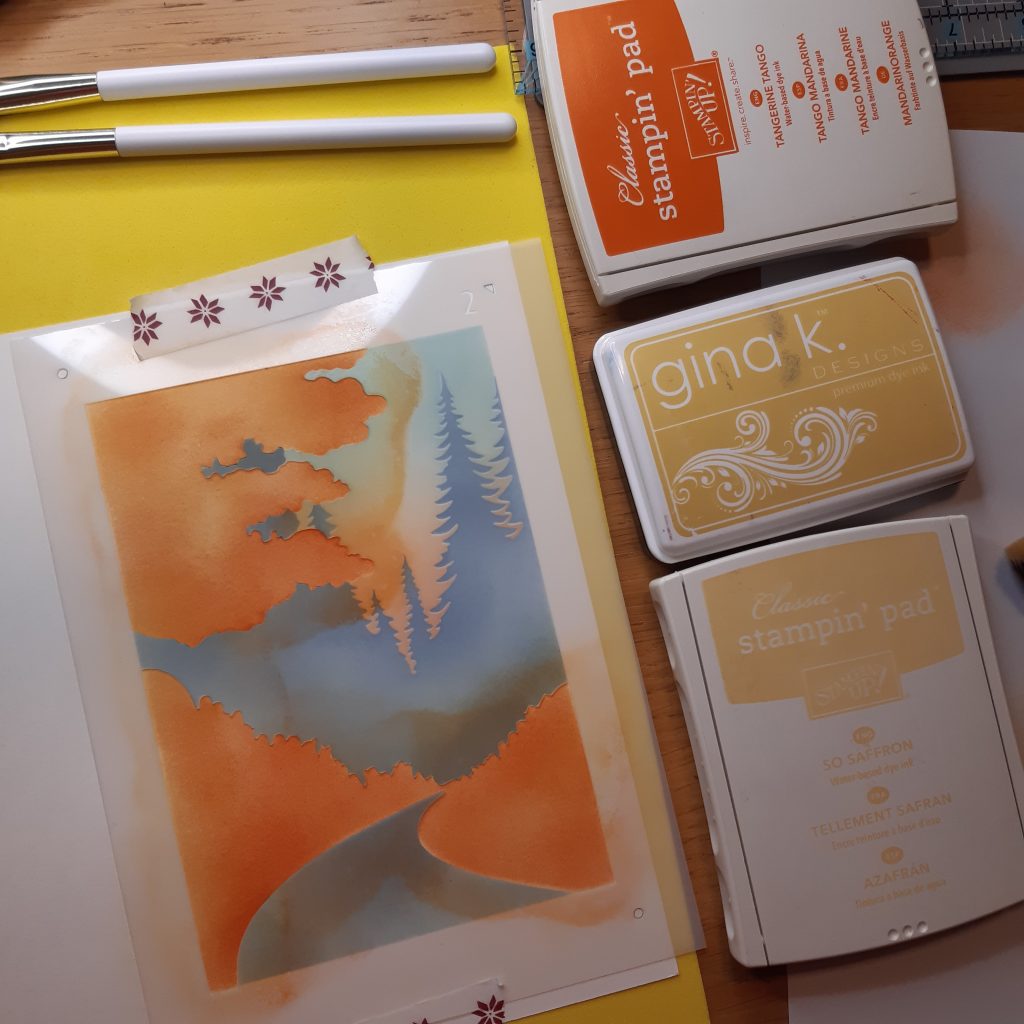
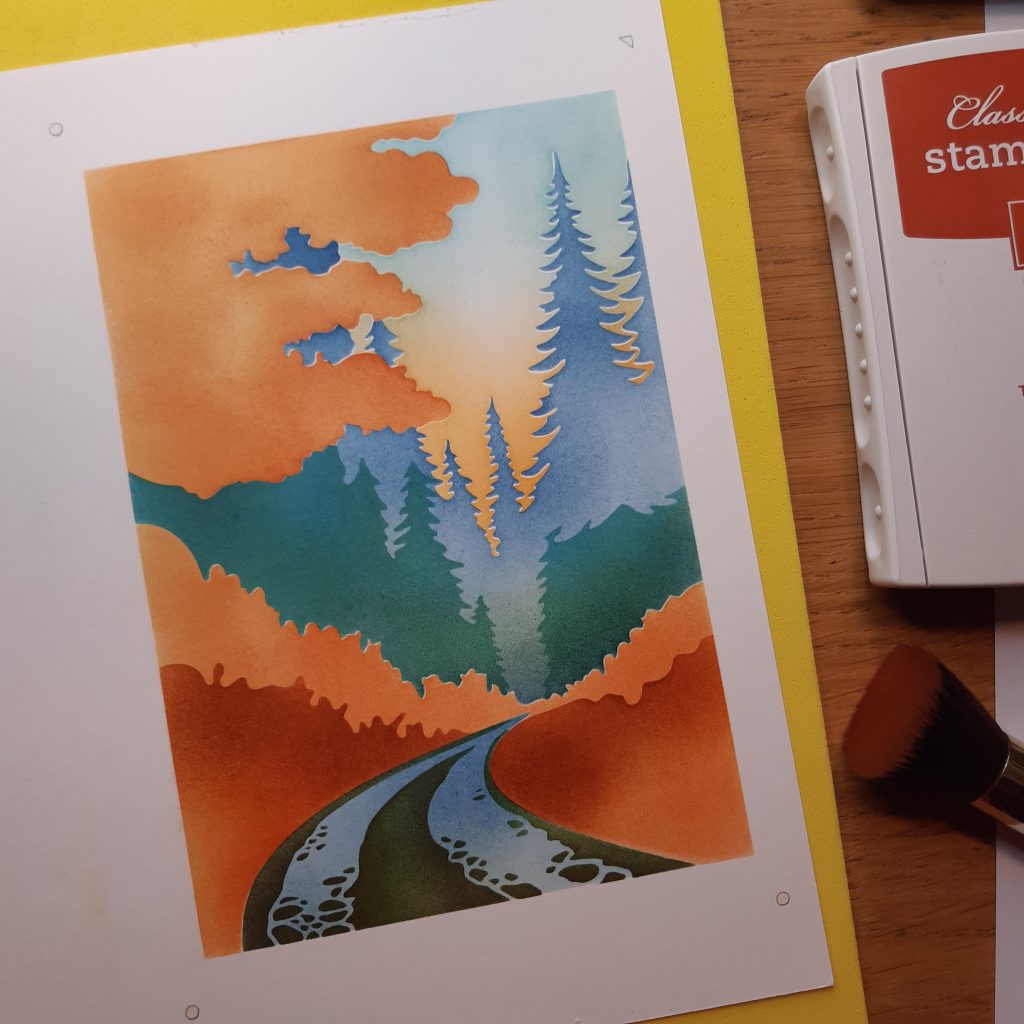
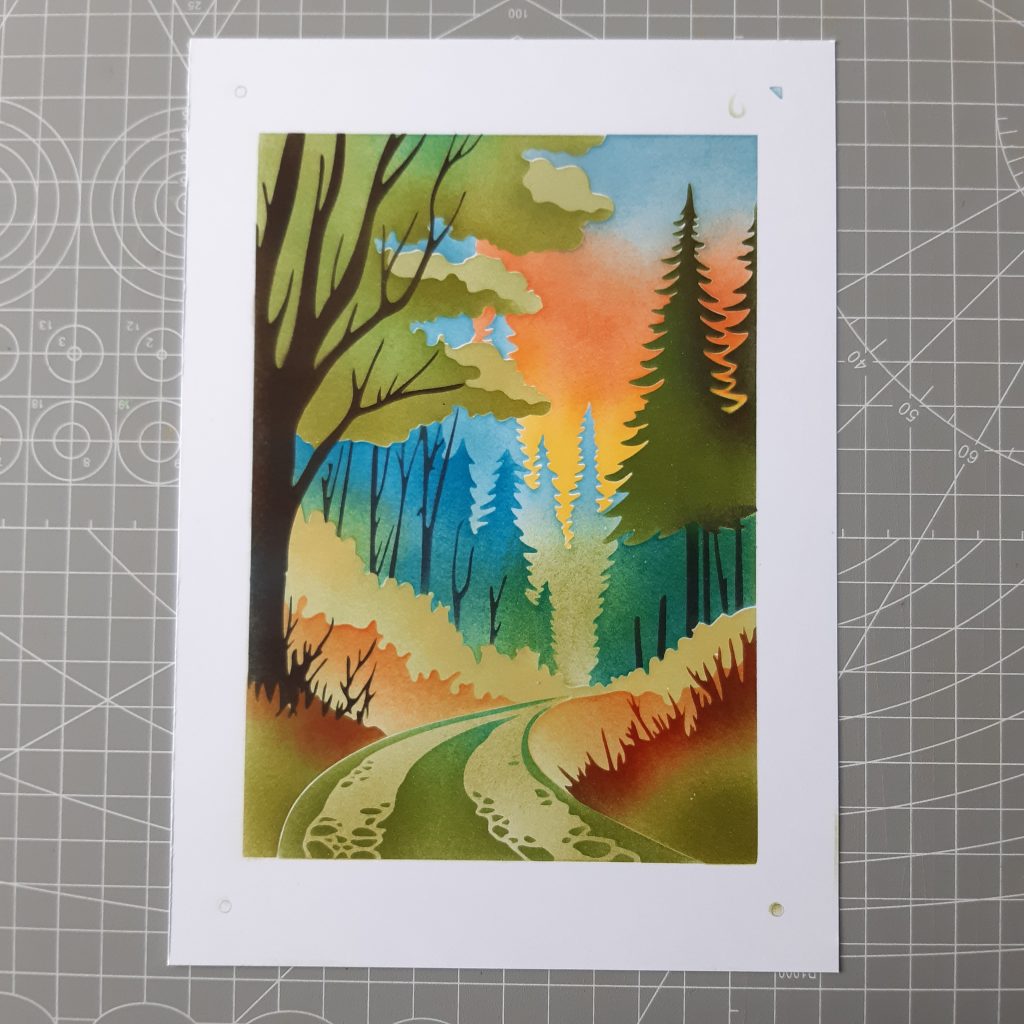
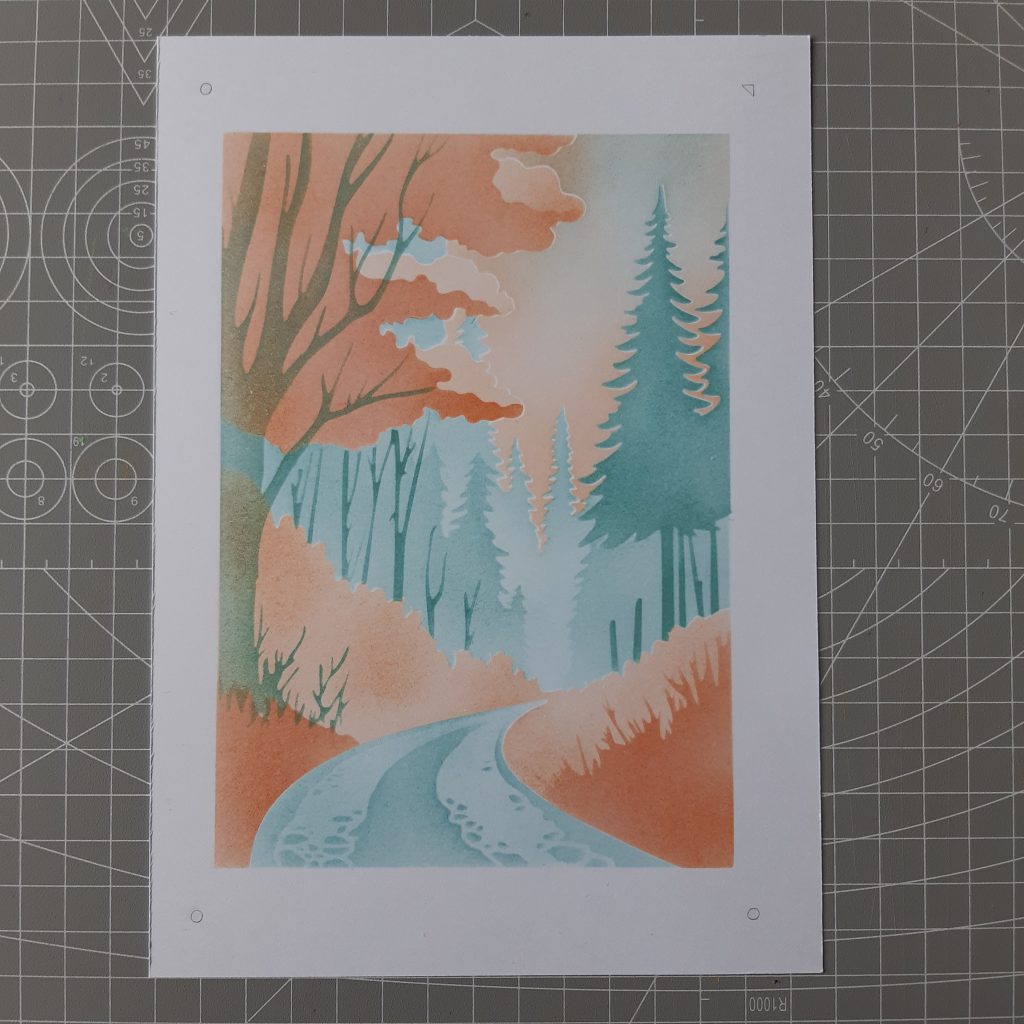
It’s easy to change the mood of your forest path illustration by making changes to the colours you use – here are two more versions I created. I used strong colours because the forest path itself is the focal point in the projects these are intended for.
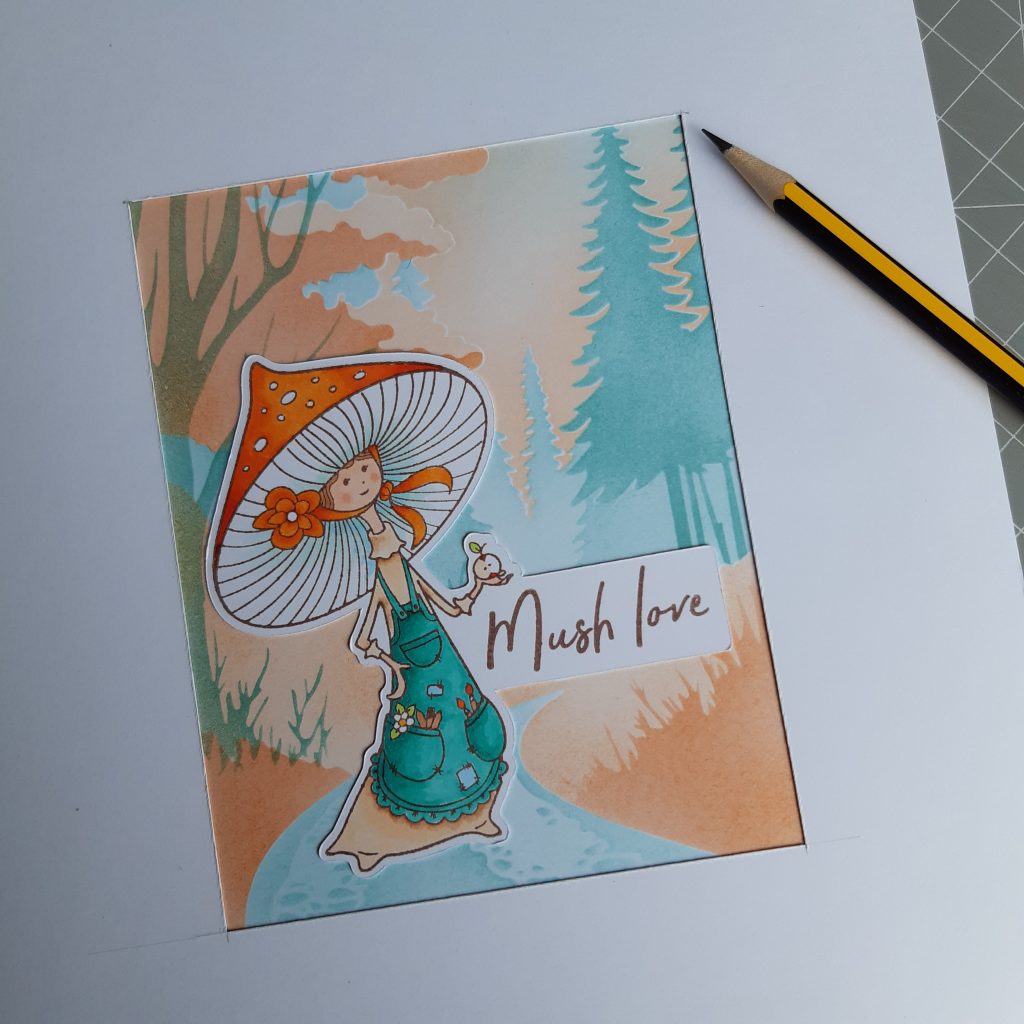
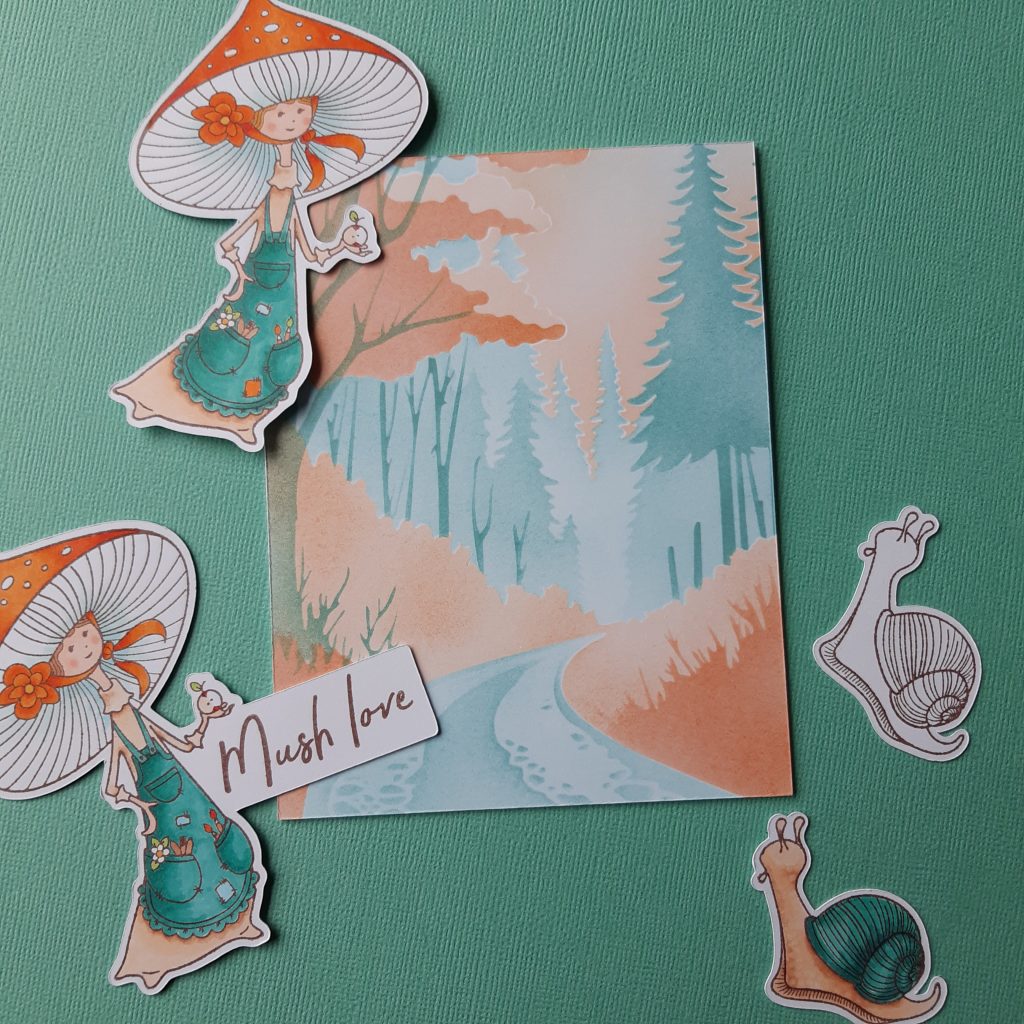
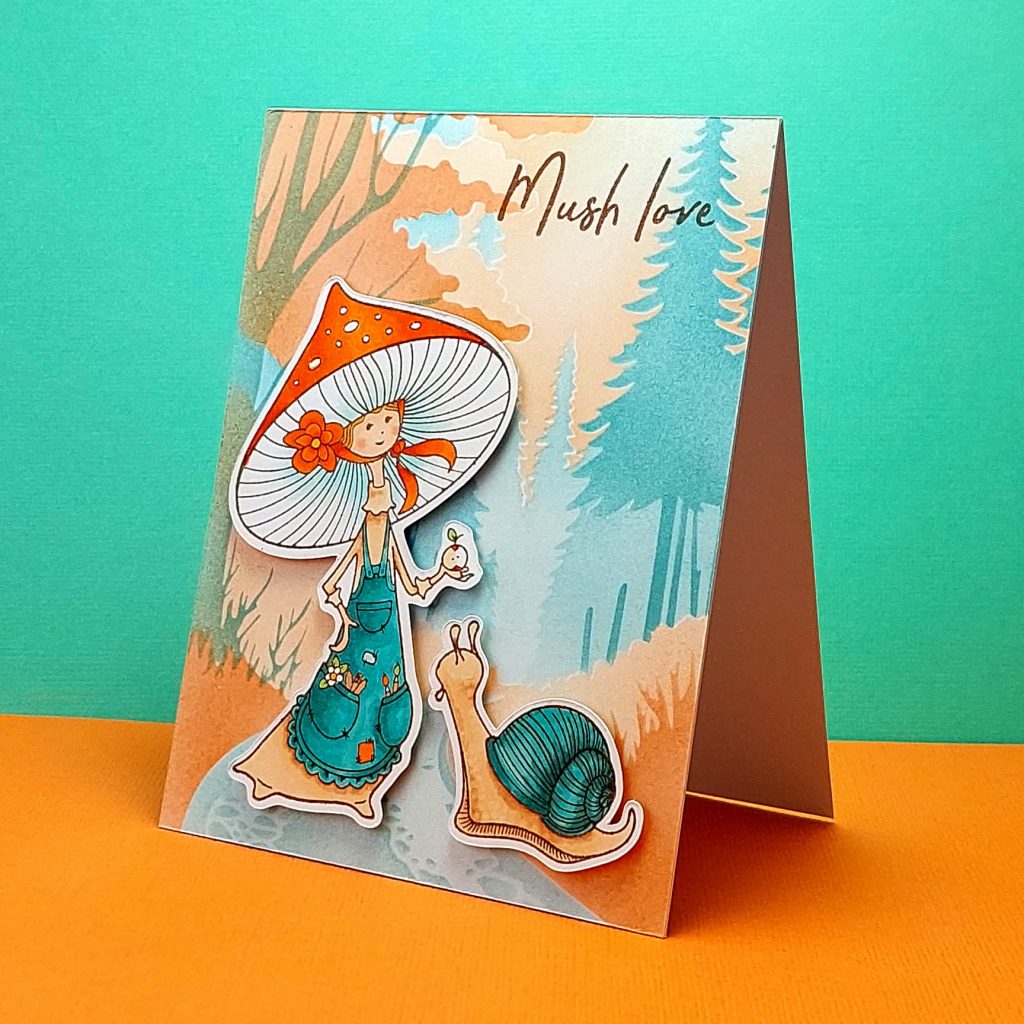
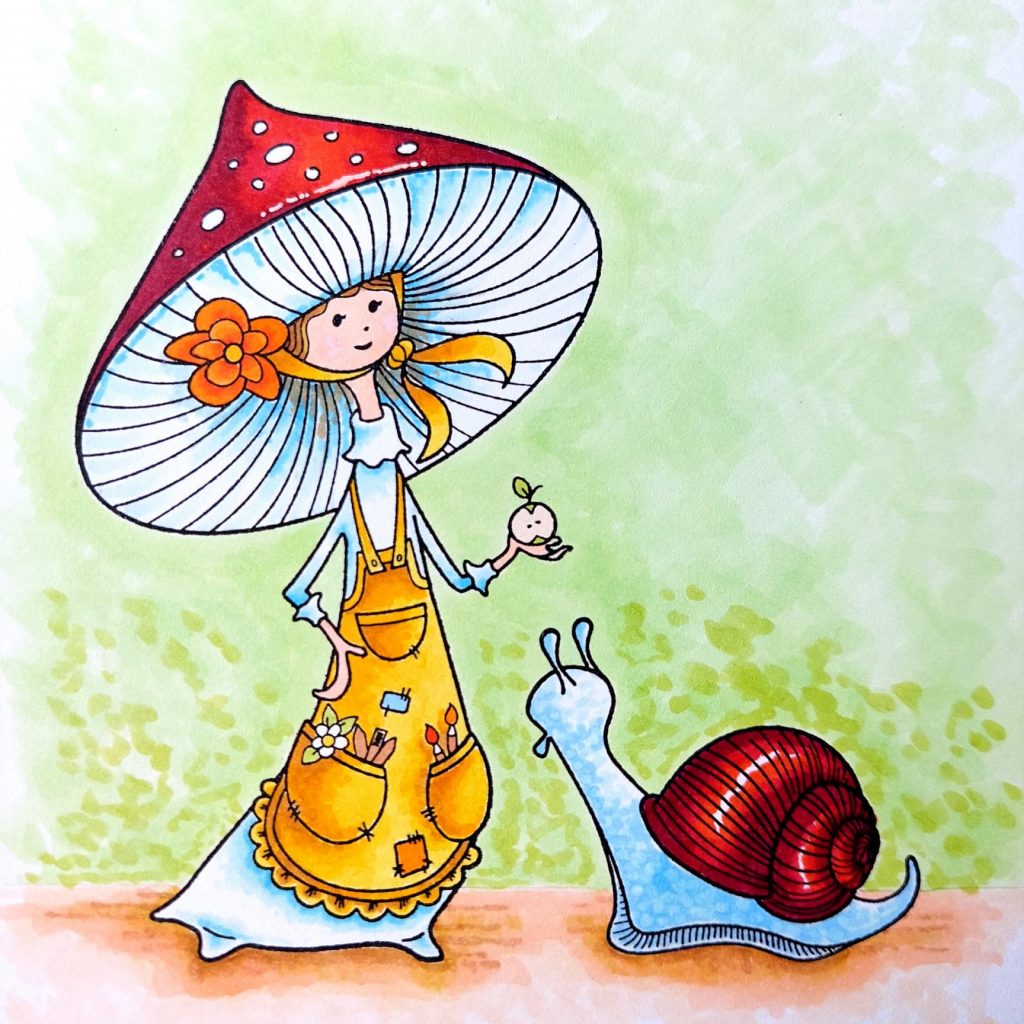
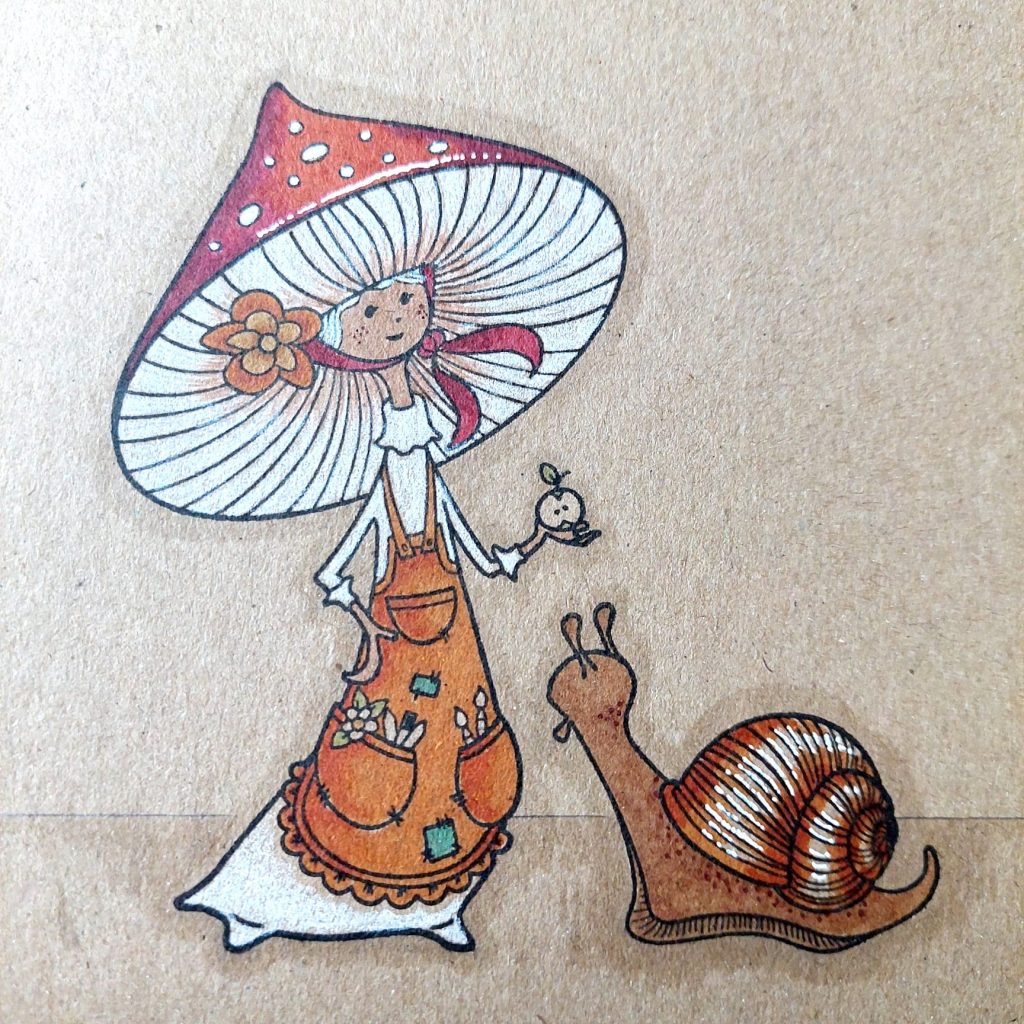
In the project below, I wanted the forest path to be a background, I wanted to make a card front from it and to pop on a mushroom lady and her pet snail (both stamps from the new Mush Love stamp set I previewed yesterday) . I stencilled the forest path in only two colours, and I coloured the lady and snail in stronger versions of the apricot and blue palette.
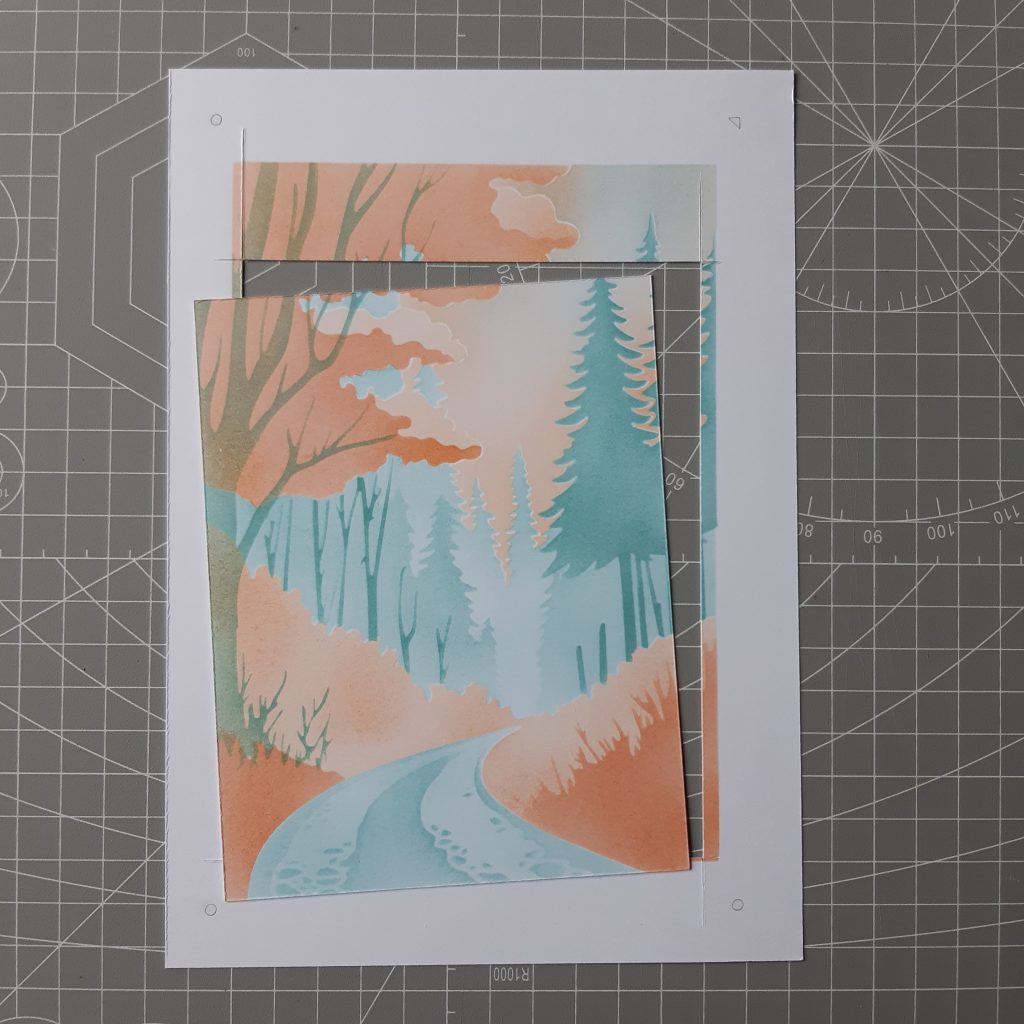
The layering stencils make an image that is 4.5 inches by 6.5 inches. This ensures that it will cover both US and UK card sizes. For my card I chose to make a standard US 4.25 by 5.5 inch card.
I used a viewfinder – which is simply a sheet of card with an aperture (4.25 by 5.5 inches) to lay over my finished forest path scene to help me decide where to cut – I simply put a dot in each corner of the window – when I’ve settled on an area and then I cut from dot to dot – using a ruler to keep the lines straight. You can see in the 3rd pic in this set, the section of image that I chose for this card. Then I had fun deciding what versions of my characters to add.
So right now I am full of ideas for more layering stencils – but what’s your experience – do you like layering stencils – do you like stencils at all? how do you find stencilling as a technique?
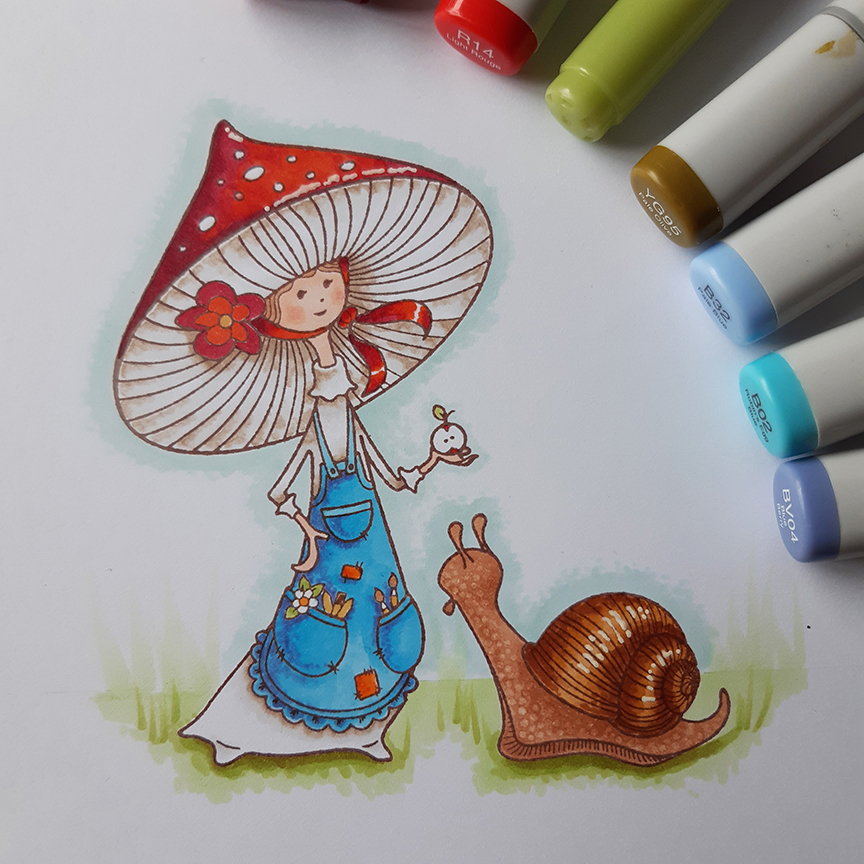
Good things do indeed take time. These are the new stamps that I waited for weeks to arrive in sample form. Ironic that this set features this mushroom lady with her pet snail, don’t you think? I have gone for a simple card to start this set off, featuring the main images from the set. The main character is a mushroom lady, a charming forest ‘gardener’ in my imagination – a Forestess. The stamp set is called ‘Mush Love’. It’s an 8 by 4 inch set.
I pictured her in a gardeners apron, looking after all the tiny forest details, and her many little pets. I have a notebook filled with doodles illustrating her story and if folks take a shine to her, she might pop up in a future stamp set also. These Fly Agaric mushrooms grow in a bank of grass outside my house every year and I find them very storybook-esque. I hope you like her!
Primarily designed for folks who like to colour, these new stamps features outline images of my forest lady and her favourite pet. I combined them with some of my favourite sentiments that seemed fitting. Here’s the complete set:
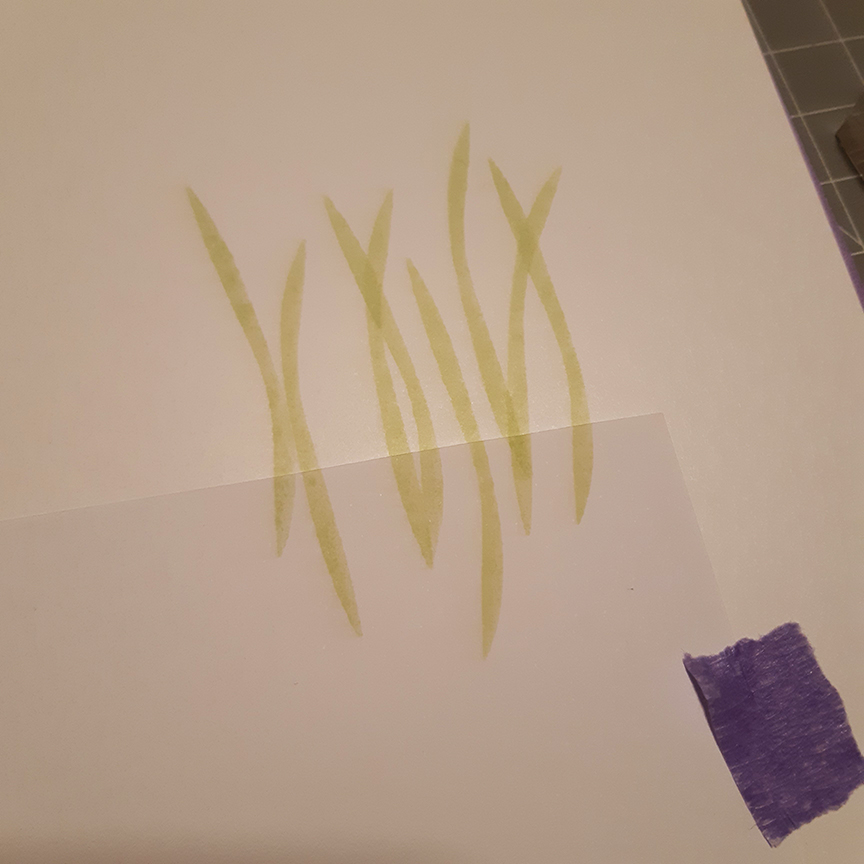
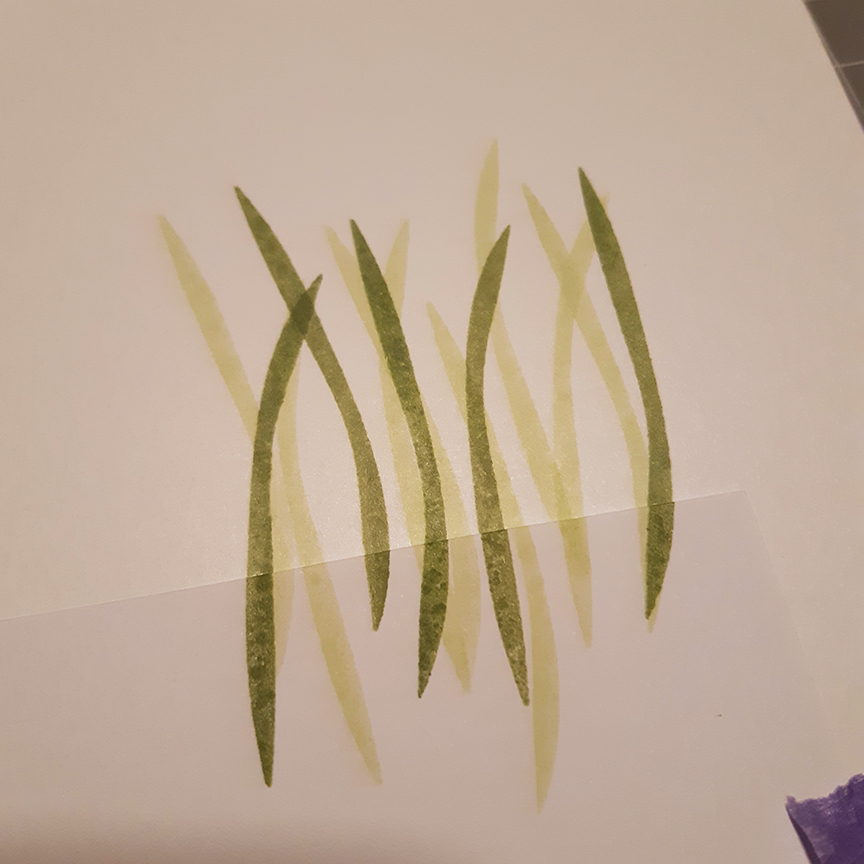
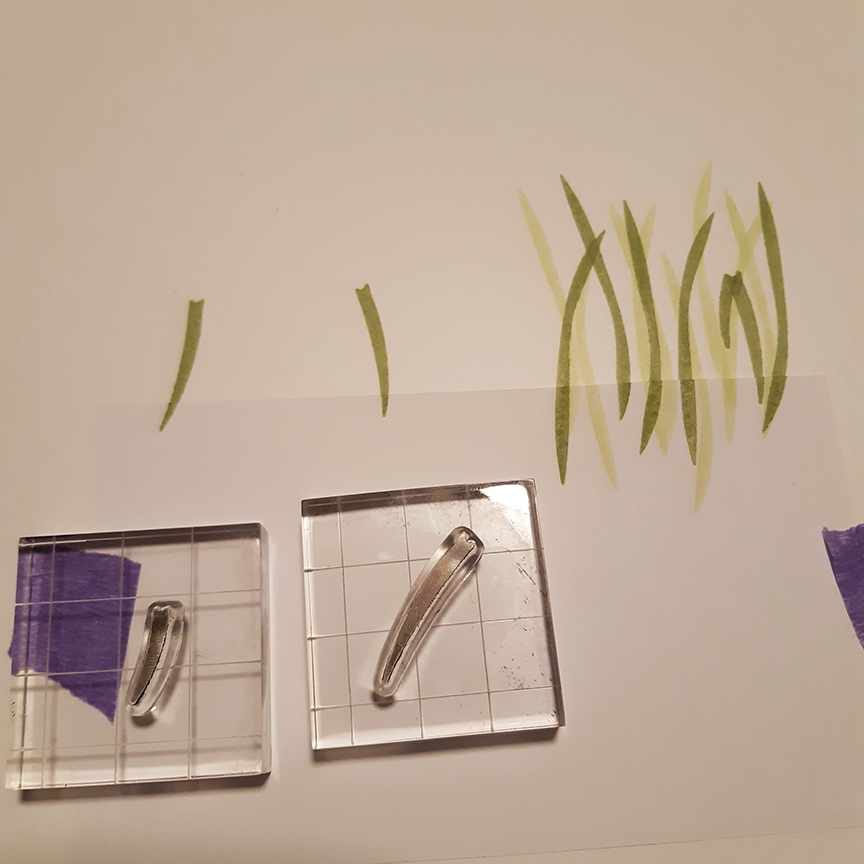
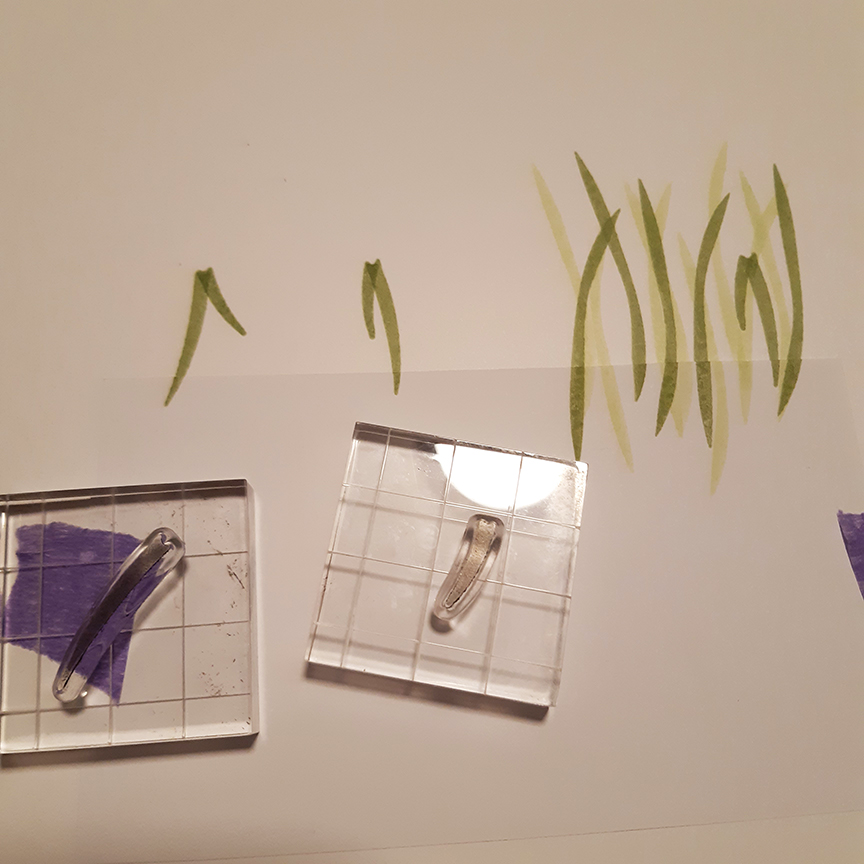
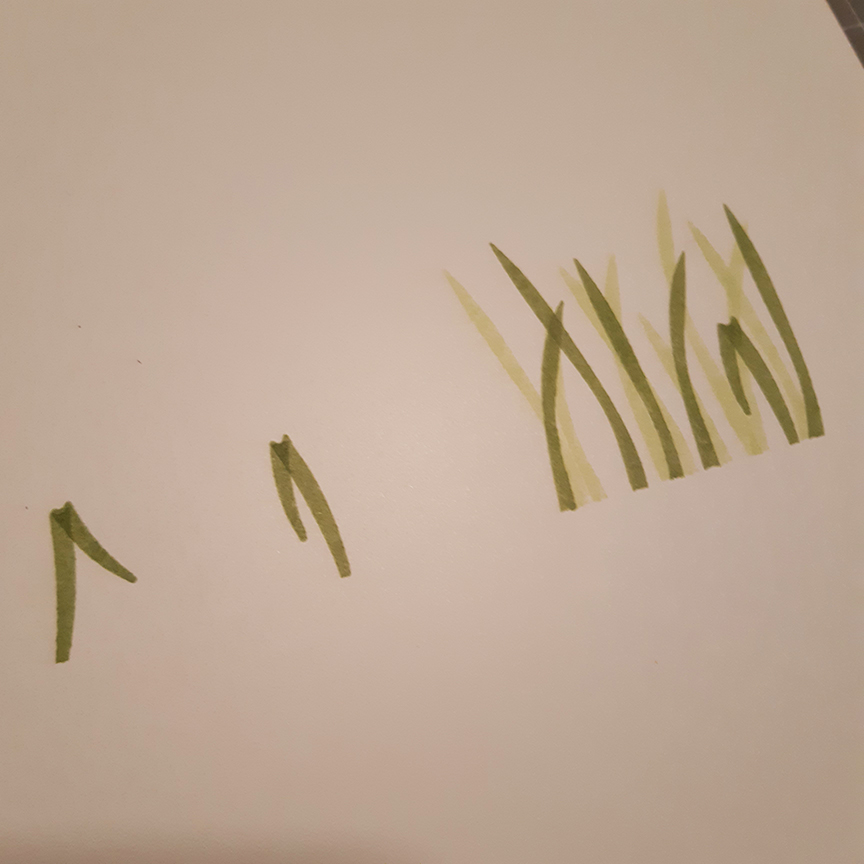
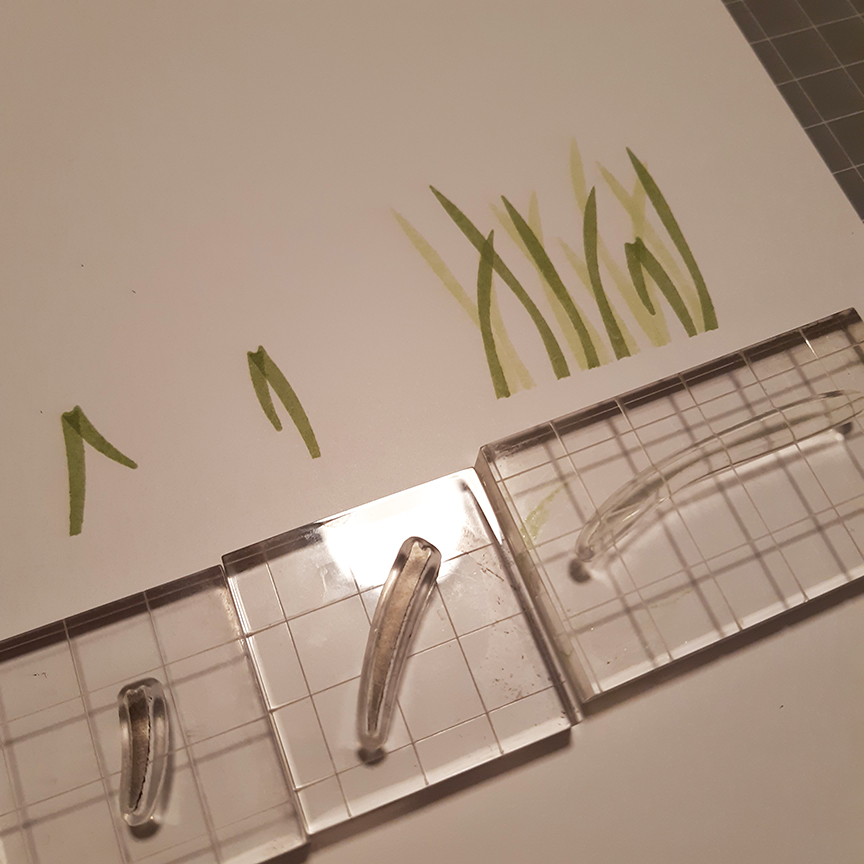
Those three black shapes are grass – here’s a quick demo on how to use them. The one longest blade of grass can be used any way up for variation and the other two pieces can be used together with each other to give a nice bent grass shape. My apologies for the terrible lighting!
I have more samples for you tomorrow and the actual release of sets will take place on Monday 27th with sets shipping beginning 30th. Ta for popping in!
I designed a whole bunch of stencils with a mid century modern feel – Mid Mod stencils, to co-ordinate with the mid Mod city stamps. You can see all of the new stencils already, here on the store. It was a project I sort of invented to occupy myself while waiting for samples of the stamps, I intended to make maybe one or two stencils – stencils are something I pretty much associated with lettering in tech drawing class in school, but I’ve been missing out!
Not anymore, I ended up with a bakers dozen single design Mid Mod stencils, as I’m calling them, plus a layering set of 6 stencils that will get their own introduction hopefully tomorrow. I’m taking the opportunity to showcase them here as part of my release sample posts because they were very much designed to complement the new stamp sets.
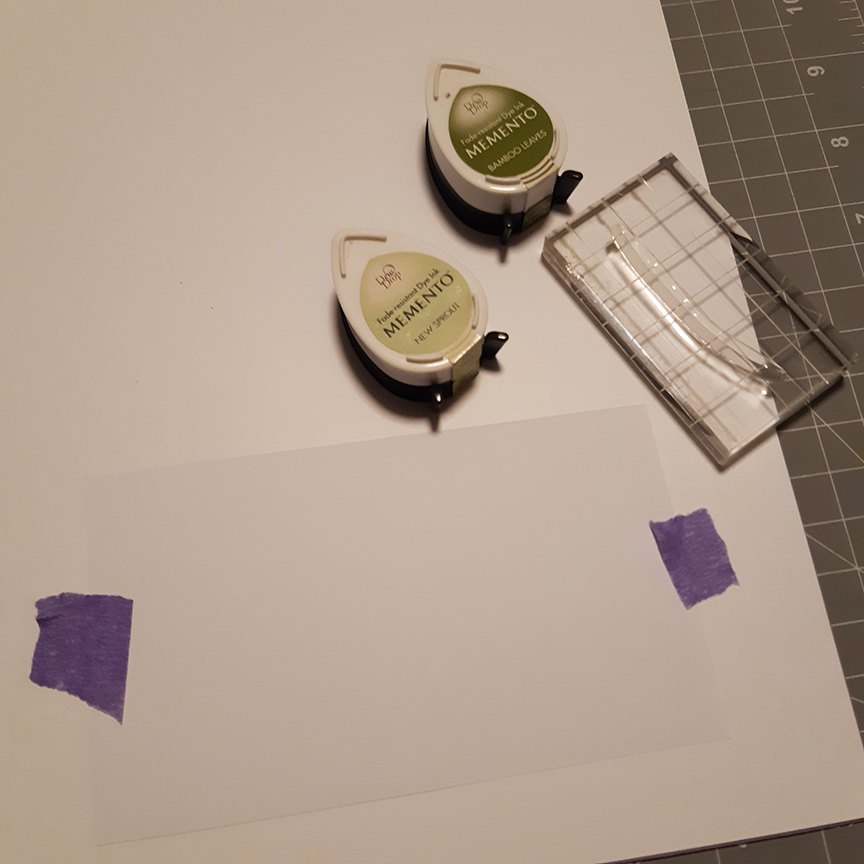
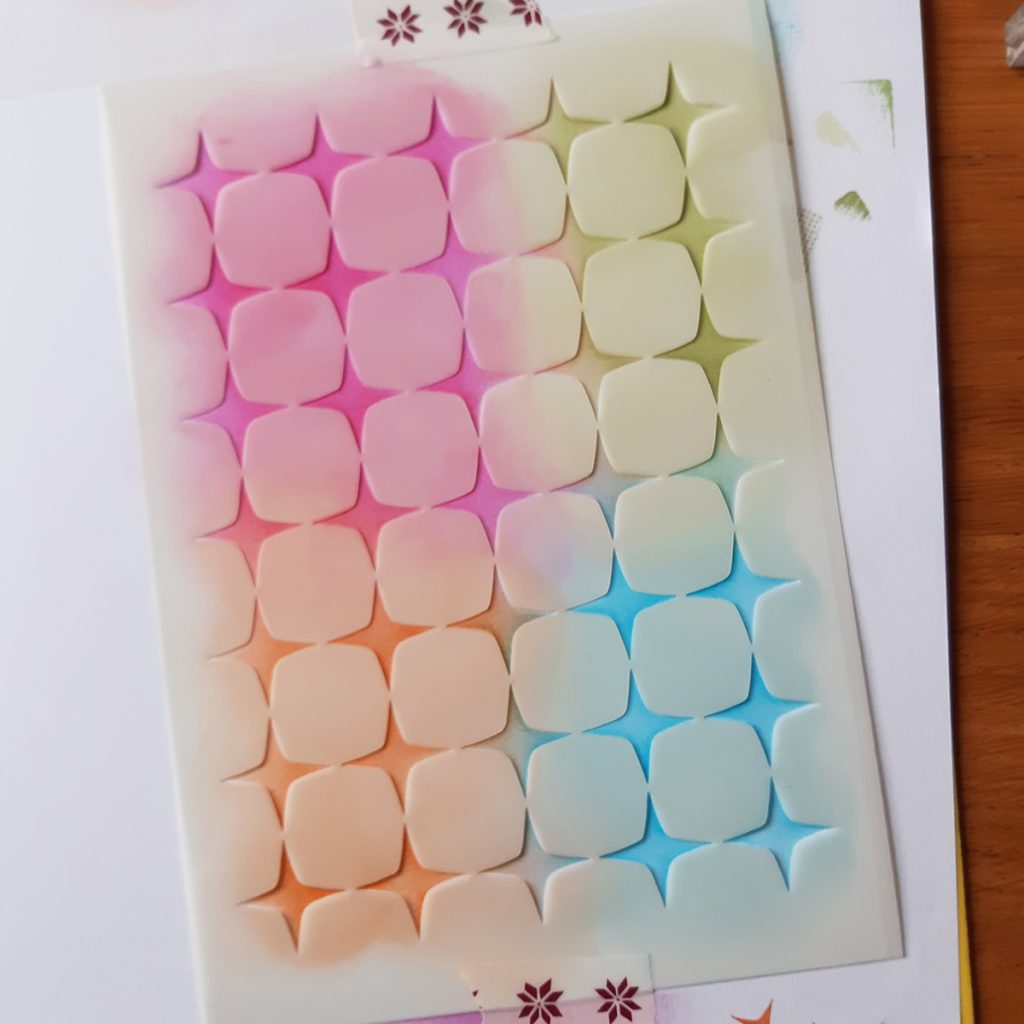
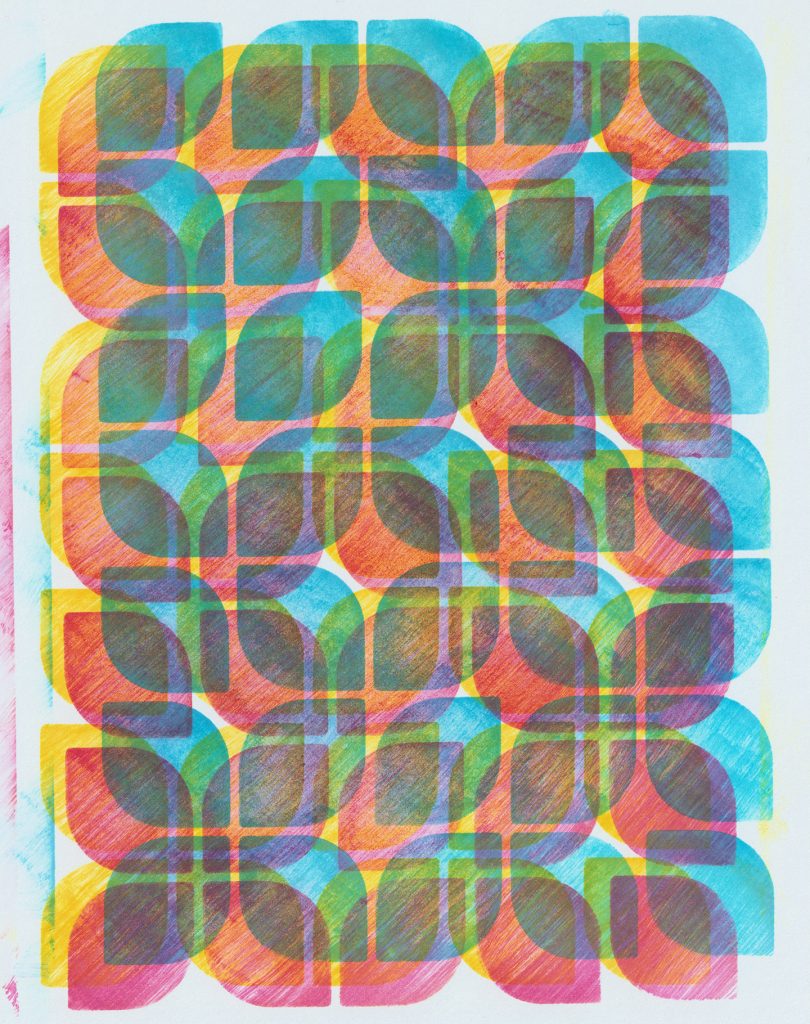
What’s terrific about stencils, particularly these Mid Mod Stencils is the possibilities for all-over patterns. I love a good pattern. The card at the top of this post was created with the Mid Century Modern geometric stencil – Quad Star, here it is:
I popped the stencil down on some white cardstock and secured it with some washi tapes. Then I brushed on some Magenta, orange, green and cyan inks. The stencils are thin mylar and I find that the soft brushes give an excellent crisp edge.
Next I lifted the stencil and turned it 180 degrees, and then placed it back on the card, this time with the stars in the vacant white spaces.
I brushed on the same colours as before, but this time i was guided by the ink already on the stencil on where to brush the orange, magenta etc. When I lifted the stencil I had a very pleasing mixture of coloured stars nicely distributed across the card. I paired this with a simple sentiment from the Mid Mod city set, releasing soon!
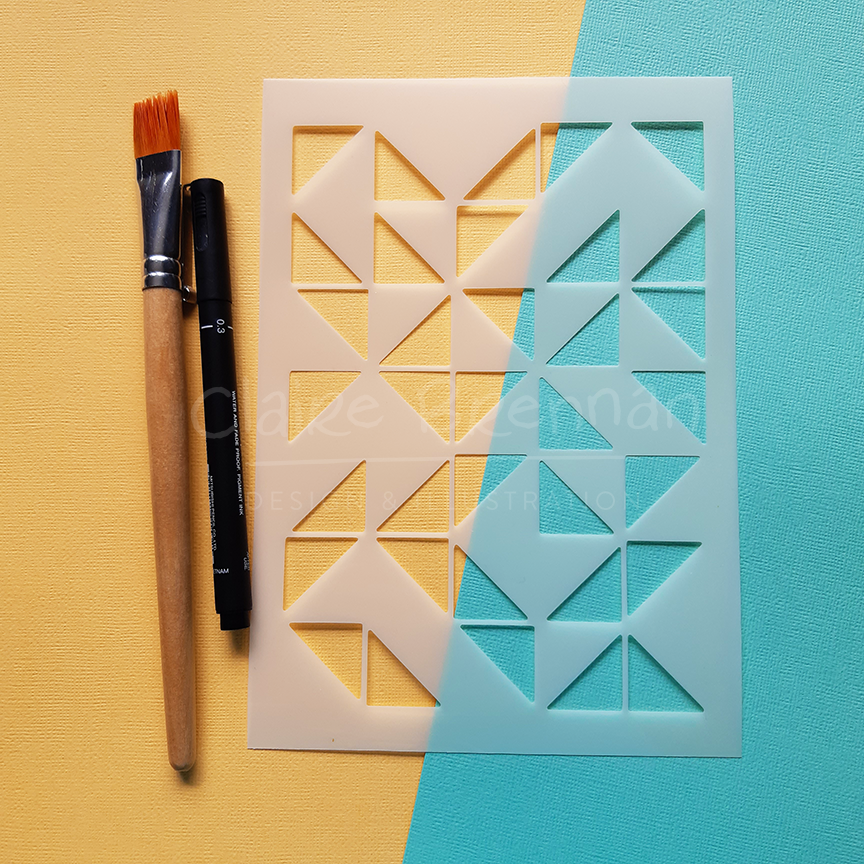
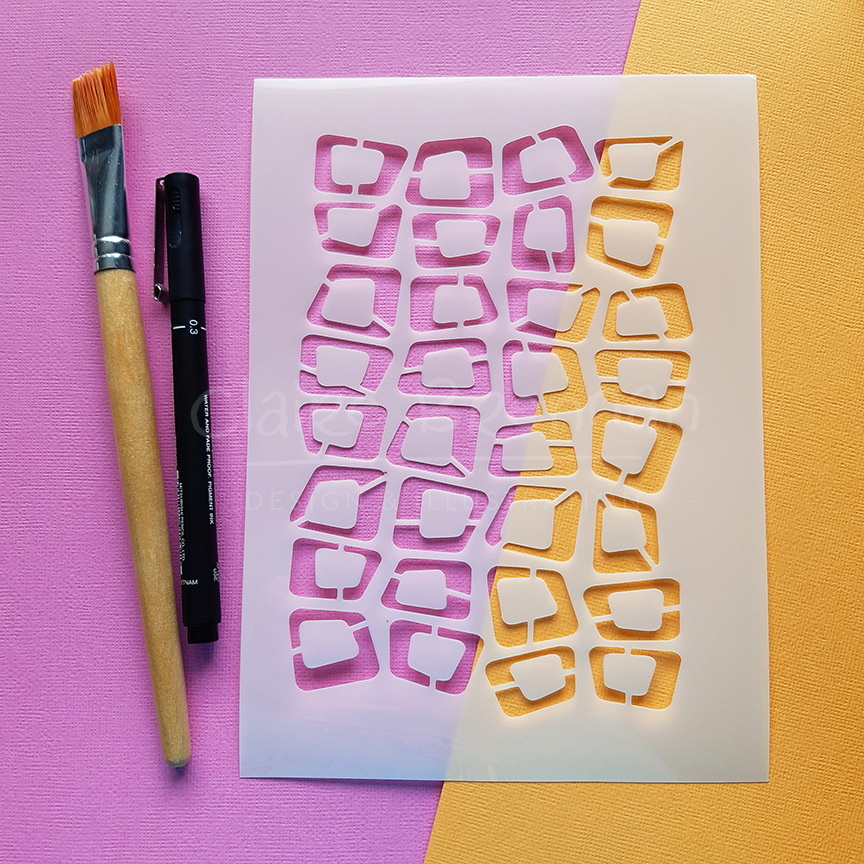
Here are some of the stencils I have designed. These stencils are This stencil is A5 size – which is 5.8 by 8.3 inches in size (148 by 210 mm) and are made from Mylar plastic. Our stencils are semi opaque and you can see through them to position them exactly where you want. The are easily cleaned with soapy water and are perfect for creating backgrounds and focal points.
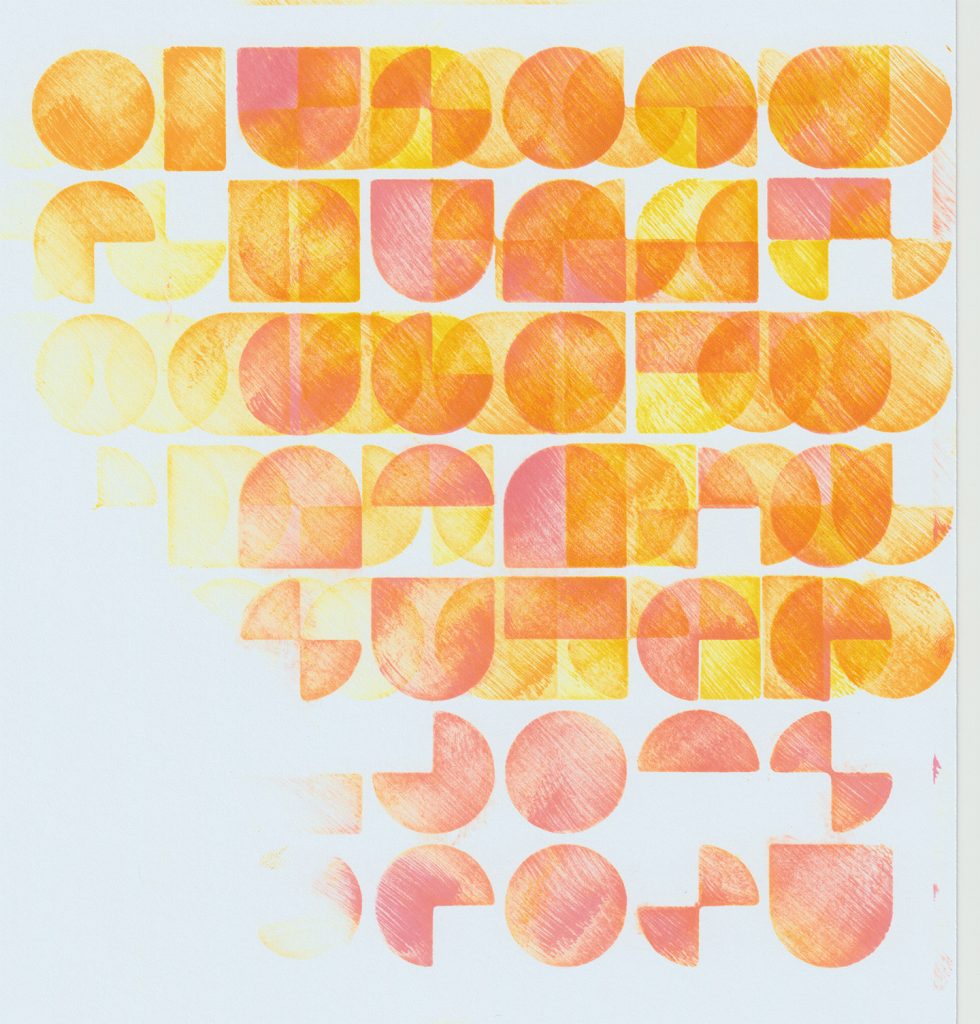
Here are some patterns I’ve had fun creating with some of the stencils. I used an almost dry, quite scratchy brush for these to get a retro textured feel to the patterns.
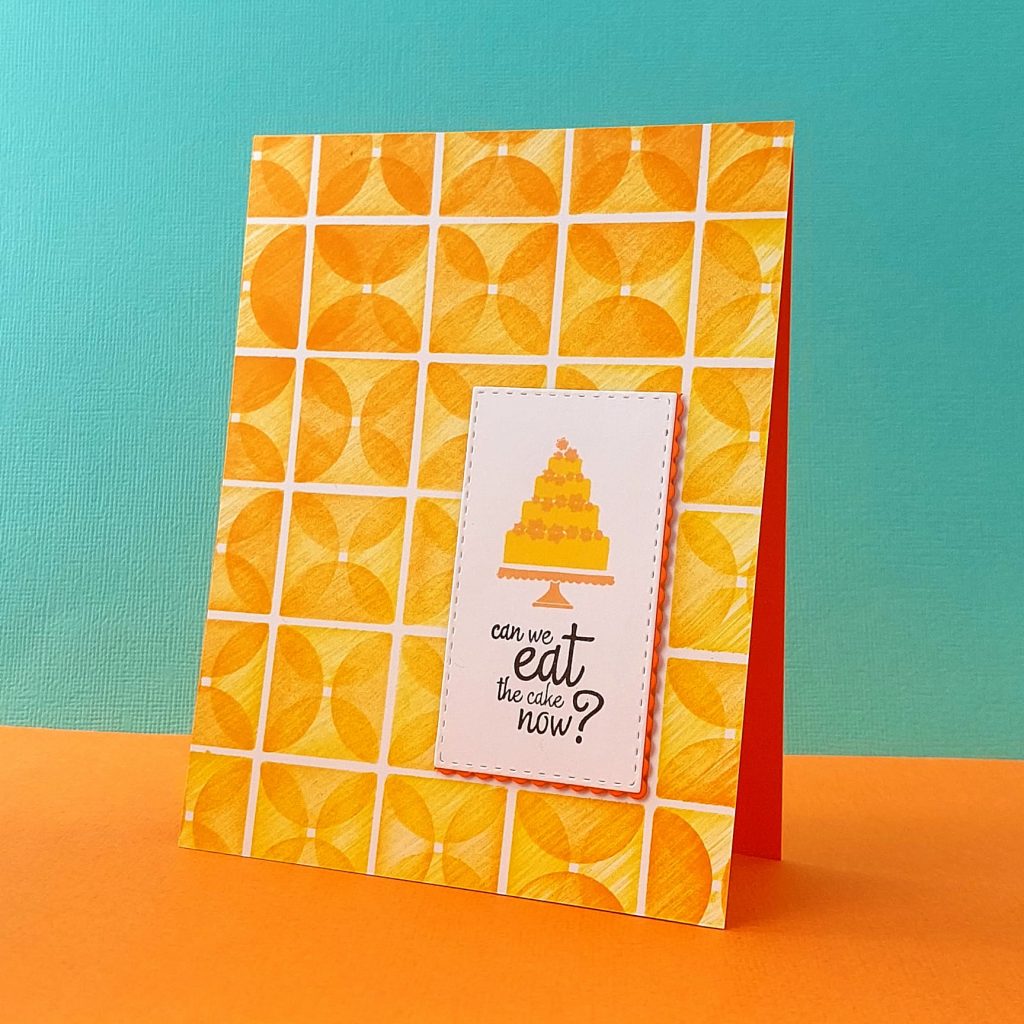
A few more cards I made with the Mid Mod stencils, hope you feel inspired! I’ll be posting samples all week, feel free to pop back tomorrow for some more inspiration! Ta for popping in this evening!
At last, it’s time for some new stamps! Illustratively, I’ve been on a mid century modern kick for a while now and I kinda thought that might translate well into a stamp set. These are the new stamps that I’ve been waiting for, literally. Finally some of them are here and I can begin showing samples. I have three new stamp set to show you, two 8 x 4 sets and a mini set
These stamps will be released for sale on my webstore at www.clairebrennandesign.com after I have shown all my samples. This set is approximately 8 by 4 inches which is a new size of set for us, and I have to say I’m liking it, sometimes I just have too much imagery for a 6 by 4, but not quite enough for 8 x 6.
These new stamps feature a cityscape drawn with a mid century feel. It’s a large card filler image and you can use it in many ways. For today’s samples I stamped and filled the image (more on that later) and then sliced it from side to side and separated to give a space for the sentiment “you’re one in a million” – I like how the idea of a city full of people, and you are one in a million.
What’s interesting about this set is that the outline cityscape is something we are all familiar with, a straightforward line drawing of city buildings. The city filler stamp is something a little different. I wanted to be able to stamp a convincing ‘fill’ in one go, without having to colour the buildings separately, so I made one stamp with different weights of halftone patterns in areas roughly corresponding to the buildings, so that you can ink the stamp up in one colour, but get a variety of tones from just one impression. I am always in a hurry, and this is a neat solution if I need one card real quick, or if I have a spare hour but I need to turn out a batch of cards.
Each of the cards below was stamped once with the city filler stamp in each colour and then once with the black line stamp over the top, and yet each image has a nice variety of tones that just elevates the image from flat colour. the halftone patterns are really reminiscent of the era.
The ‘Thanks’ is stamped in black ink and then the white word is just coloured in with a matching copic marker, the retro shape of the black ‘thanks’ panel is super simple to trim out with scissors.
I’ll be posting more samples of the new stamps here on the blog all week and tomorrow I will post a schedule for when the stamps will be released! Thanks for stopping by! Hope it tickles!
Marking the day for posterity, today I have opened a new stamp store, once again!
On the 21st May 2009 I launched my first ever stamp sets – two little gingerbread sets, that I still love! Here’s what it looked like – back on my old blog – someday I will recover the password…
Here they were – Oven Fresh and Gingerbread Joy, I loved them so much, they represented a lot of things to me, community, creativity, independence and the gift of being able to work from home. Nearly a decade later I had to step away for a bit, but here’s hoping my new stamp store can get some of those good things going again!
It was a massive learning curve and I had a blast figuring everything out the first time,and for some reason I thought that doing it again would be a walk in the park. Dear reader, It was not.
It’s been another steep learning curve, but you know what it’s really good for me to push myself out of my comfort zone once again. Having began back in maybe November time I am only just ready today to open up a store once again.
I’m opening this time with a couple of old books themed sets, see this post for more info on those, and going forwards I’m going to try to focus more on what we can do with each new release. For this one I have created a free 16 page booklet of templates and instructions to help folks get the best from their stampy investments and if I can get the lighting sorted, more how-tos and videos.
I do have rather a lot of folks who have reached out over the years regarding past sets that are no longer available so I will look into setting up some sort of ‘WMS Most wanted’ lists, I’d be happy to reprint some sets if I knew there was enough interest.
But back to today, it’s another modest beginning, I have two stamp sets and a few bits and bobs of stickers etc, but now that the new stamp store set up is done, I can get on with creating!
There are lots of things you can make with the Old Books stamps that I released recently, but a nice simple project are these little 3D stamped book tags.
These are particularly great as gift tags, and I especially love them gilded with metallic embossing powders and strung up as Christmas tree ornaments or made into garlands. Here is the simplest way to make them.
piece of white or paler cardstock for ‘pages’ about an inch bigger than the stamp all round
piece of coloured cardstock for your book covers about an inch bigger than the stamp all round
adhesive, I use really strong double sided tape, I’ve used Stix2 brand polyester tape for years.
cutting knife and suitable surface such as a cutting mat
ink of choice
embossing powders if you wish
Old Books Stamp set
I have prepared a handy dandy sheet here, showing the steps involved in making the tags – you can screengrab this right from this page and keep it handy when you are making.
If you are adding gilding/embossing, you can use the ‘Classic front gilding’ stamp and the thinner ‘Spine gilding stamps’. I would suggest doing your stamping/embossing/gilding right after step 1, then you don’t have to contend with a potential uneven surface after having added glue etc.
In step Number 5, I use a hole punch and a corner rounder to just finish off the process, you could just snip. these with scissors if you don’t have the tools handy, I liked them for handiness when I was making a bunch of these things. Here are some action shots, because I’m a visual learner and I am going to just go right ahead and assume you are too!
Now that your 3D book is complete, you can punch a hole in it to thread through some ribbon or string, or you can leave it unpunched a pop it up on foam tape on the front of a card, or scrpabook page. Are we still using dimensionals? I’m a little rusty.
The back of your tag is perfect for writing on, or you can use the ‘to:’ ‘from:’ stamps that came with the set to finish off. Enjoy! I’m currently using several of these as bookmarks also!
This is Old Books, and Old books additions – two stamp sets I have designed. These are clear photopolymer stamps for papercrafters, cardmakers and crafty folks everywhere. These sets have been making their way to various folks over the last few weeks and I am hoping to have some stock left over from my wait list real soon. When I do, I can add them to my new store and officially open the store. The store is at clairebrennandesign.com and can be reached directly from this blog by clicking the link in the header.
Years ago – I used to have a stamp company, it was called Waltzingmouse Stamps and I loved it – so I’m reviving the old pencil, and having another go. These sets are based on an idea I had – I wanted to make wee books. I wanted them to look properly old and vintagy, and for that I wanted stamps.
Christmas themed Mini Book featuring decorative stamped endpapers and gilded detailing
Boxets, no less
These sets have exceeded my expectations – Not only have I been able to make wee books, loads of wee books, but I’ve made convincing book shaped tags, and now book shaped boxes, or boxets, if you will.
In every colour, for every theme! The cupboard under the stairs, that I lovingly refer to as my ‘work station’ has been filled with wee tiny mini books. Christmas, Halloween, Easter, Spring, and I haven’t even got started on birthdays and anniversaries yet.
Getting back into the stamping groove has been interesting, and I’m hoping to do things a little better than I did last time – for example I redesigned my packaging – going forward I thought it might be useful for me to include images of the stamps on the insert cards, with any relevant tips or suggestions, right there in your hand, the moment you open your sets. Hopefully this will help folks identify the stamps more clearly in any tutorials I do, for example. I’m producing these inserts at home here, the old fashioned way, by hand.
One of the other things I want to do going forwards, as appropriate, is to provide my stamping friends with as much resources as possible to get the most out of their stamps. There are a great many stamp sets in my collection, and an embarrassing amount of those contain stamps which have never seen ink! I know, I know…
Quality, clear photopolymer stamps
It might be a better idea to hold smaller releases, but really make sure everyone can eke as much use as possible out of their sets. I use only the very best manufacturer to bring my designs to life and you know how the quality thing works, it’s expensive. Added to that the fact that they live half a globe away from me, you can understand why it’s really super important to get the very most out of each set, so you can expect that going forwards my sets will be jam packed right down to the last millimetre.
As always I’m hoping to create good solid usable design that will last you years, trends are fun, but you will be the judge of that, so don’t be afraid to let me know what you think folks!
A really, seriously pretty frontage beckons you into this illustration of The Long Hall, Dublin at 51 South Great George’s Street. I doubt you could pass it without even popping your head through the door to take in the stunning Victorian interior that has remained, unchanged, since 1881.
Ridiculously the day I was here taking pics I didn’t have time, even for a lemonade, I think I took nearly 1000 reference shots all over Dublin that day – it wasn’t anywhere near enough. Return trip called for.
I painted this one for myself, I am a brick enthusiast, there’s probably a name for that. I love that ‘red brick’ can have so many variations. Dublin has a terrific variety of bricks, we’ll chat about that another time. The details are quite small on this picture and I had the benefit of a white gel pen to help pick out the tiling details.
It takes me about 3 to 4 days to paint a picture like this. I know some folks would have this done in a day, but working from home is like a magnet to interruptions. I start with pencil sketches and then go to lineart with a waterproof pen – something like a Mitsubishi uni pin fine liner, although I’m eyeing up a fancy fountain pen online.
First established in 1766 the Victorians obviously couldn’t resist decorating the Georgian brick facade and, in fairness, they did a sound job. It’s one of Dublin’s more eyecatching pubs from the outside.
Named for an interior portion of the bar, a narrow hallway/snug at the back, which has since been lost to restoration, nonetheless this is a good pot in Dublin to take the Guinness.
I couldn’t resist the brick. I was worried about the red, because I’ve found red a little tricky in the past, but I think it came out ok. Watercolours on Arches paper. Prints are available here on my Etsy store if The Long Hall perhaps has special memories for you.