Not a creature was stirring – new Christmas cross stitch chart

Hello thready folk – It’s been mustard here – I finally got a temporary job over Christmas, after spending the last year job hunting. So although it’s only 4 hour shifts I’m out of the house 5 days a week for work as well as doing 4-5 hours worth of family taxi each day. It’s a blur. Currently trying to get on top of cleaning before the decorations go up – I’m putting them up tomorrow hopefully.

Are yours up yet, and if you don’t celebrate Christmas, do you have a big clear out at particular times of the year or just as you go along? – I’m definitely a boom or bust type, I either do the whole lot or none of it.

This little stitchery pretty much captures what state I want to be in on Christmas Eve though, tucked up in bed with the place looking all tidy and cosy.

It is of course based on a line from the Clement C Moore poem “The Night before Christmas” My dad used to be able to recite much of it from memory and he’d normally have a go at it on Christmas Eve, I was chuffed that my husband continued the tradition with our kids. There’s a rather excellent copy of the poem in book form illustrated by the British illustrator Christian Birmingham, if you haven’t seen it you must google it – the illustrations are perfection, I have lost count of how many times I’ve thumbed through our copy just taking in the details.

In my cross stitch chart, ‘Not a creature was stirring’ my little mouse friend is tucked up under his patchwork quilt, in his little wooden bed. His tiny stocking hung on the bedpost. Outside the snow is falling but his neat little apartment is warmed by the pot bellied stove.

I hope people have fun stitching the little details such as the portrait in a frame above the bed and the little mug on the stove!

The chart is available as a pdf download in my Etsy store, Little Nest Emporium.

Even if you are not a stitcher, feel free to pop over for a nosey, general feedback is always welcome!

One of the things I like to do with my cross stitch charts if possible, is to supply an option for stitching on dark fabrics.

New Spooky Spindle cross stitch

I once read an old Irish poem, A spinning Song, by John Francis O’Donnell. He was an Irish poet and journalist in the 1800’s and you can read more about him here on this blog about Limerick Life. The line “Twinkle twinkle pretty spindle, let the white wool drift and dwindle…”stuck in my memory long after I forgot the rest of the poem and the other night, while casting around in my brain for a short Halloween poem to illustrate with a cross stitch idea, I formed this little rhyme, based on that line. Apologies to scholars of literature, but I liked it.

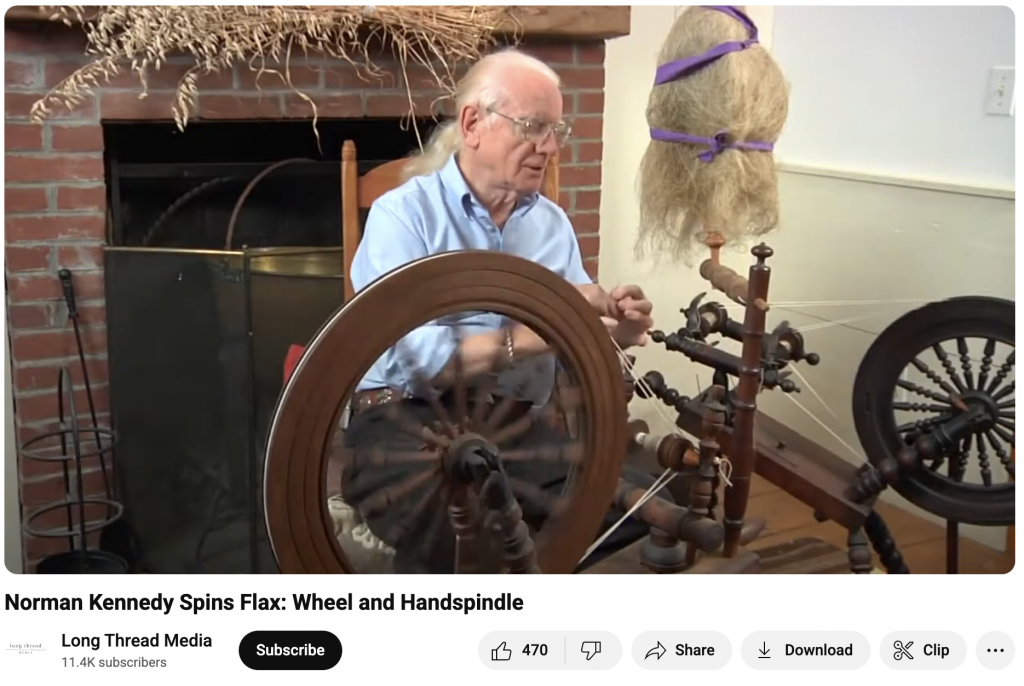
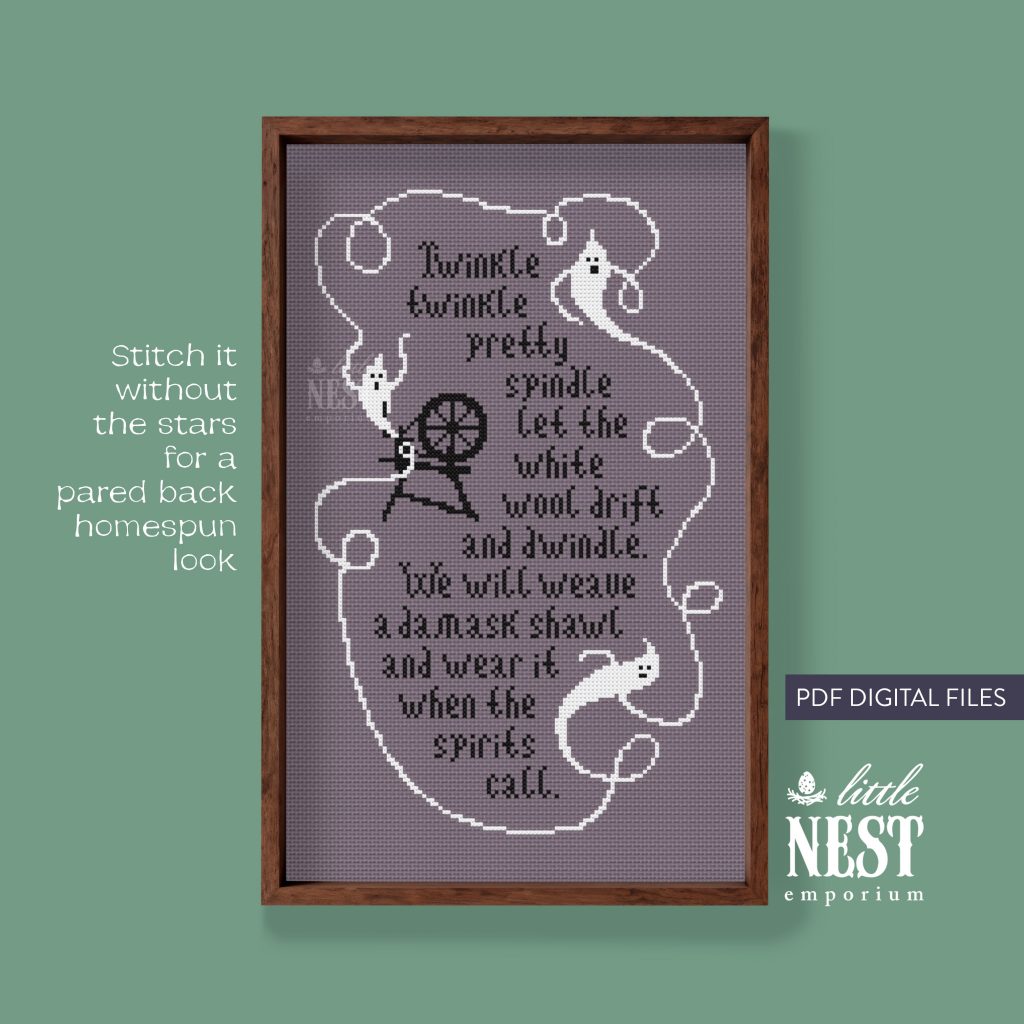
I’ve drawn it up as a cross stitch chart. I kept the lettering simple and twisted the lines around the spinning wheel to echo the twisty, floaty ghosts. One ghost is caught in the spinning wheel. If you’ve ever seen a spinning wheel with a distaff full of wool roving, it does look a little ghostlike. This is a screenshot of Norman Kennedy, a past master weaver at Colonial Williamsburg, USA. You can see the distaff full of fibres there tied up with purple bands. The top is just out of picture, but it generally ends in a slight point at the top. Long Threads media are here if you are interested in any more spinning info.

In my design one of the ghosts is caught in the spinning wheel and is spun out in threads, catching his friends up in the process. The poem is stitched in simple but slightly old world style with the phrases drifting from side to side to echo the floaty shapes of the ghosts. The theady ghosts make a loopy border for the poem. Twinkly stars abound in the chart but it can also be stitched without the twinkles for a simpler homespun feel.

I’m still playing around with the look and feel of the Etsy store since I’ve transitioned to cross stitch charts, I’m trying to avoid the pictures looking like AI but since I can design charts faster than I can sew, it’s inevitable that some of the charts will have chart art only until I get the samples done. If it goes well maybe someday I can get a few sample makers on board, until then, it’s just me.

I’m liking the clean cut style, but I’ll let the images sit for a day or two before I make any more decisions, I’ve been at my desk since 10 am this morning, it’s now 2AM so I might take a wee break from screen tomorrow, do some actual sewing! ta for popping in. As always feedback is welcome and if you would like to see the Spooky Spindle cross stitch chart in store, here is my Etsy link.

spooky spindle cross stitch chart, sewn in black and white threads on a lilac fabric

Nobody tells you how addicting Cross Stitch is

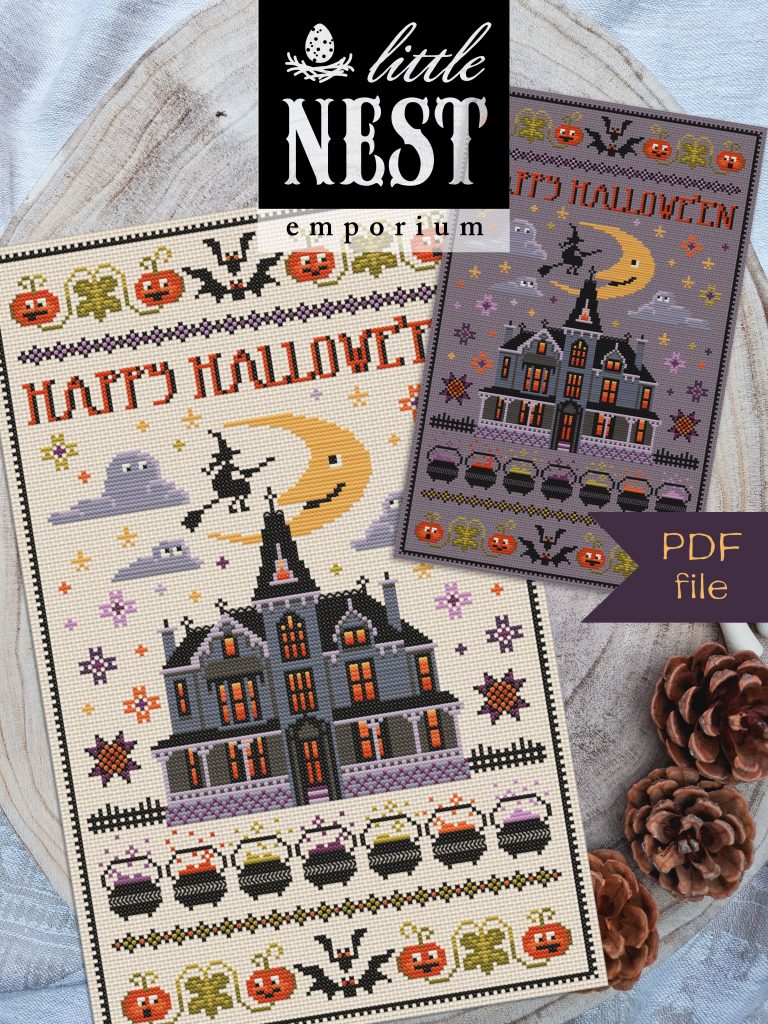
I have always loved the look of traditional sampler style cross stitch, it’s been on my ‘I’ll get around to it” list for a long time, and now – it’s time! I’m drawing up cross stitch designs like a demon and this is a recent one. I’m also stitching it, but obviously that’ll take a moment or three.

Meantime on my shop I’m having a bit of a time trying to work out how best to present them for sale. I notice on Etsy that some Cross Stitch store folks have gone all in with beautiful frames and settings – and that looks great when the product is displayed as a fully stitched up sample. I get that. I’d like to do that. Other times though, I’m seeing chart art – and I know it’s chart art, not real stitchings – and the chart art is displayed mocked up inside picture frames – just like I have done here in this blog post. While I’m absolutely happy to look at that and I’m considering it for the store – is there a downside? – do folks often think these are actual stitched samples – might it be off-putting? If you have an opinion on that, I’d love to hear it. By contrast this is a progress shot of actual stitching:

The reality is that I can design charts way faster than I can stitch. My preference would be to have every chart fully stitched before offering it for sale, but I also need the wheels to turn and for some sales to happen so that I can commit time to doing it. Things to ponder.

I’m happy with how the charts are working out though and I hope I can provide patterns that are interesting and fun. This sampler – Haunted Mansion Sampler, is a joy to stitch so far and I can already see me wanting to complete it on plum coloured cloth. I’ve done a scout of the local stores though and cross stitch fabric seems pretty thin on the ground where I live so I’m happy to hear any recommendations for online shopping.

How about some Halloween Cross Stitch?

I’ve just finished this Halloween themed cross stitch- super chuffed with it. I’m supposed to be making prints, and I will – but this turns out to be way more portable than ink and die cutting machines. It’s all about portability at the moment for me as I get back into school run mode. I have 4 runs a day, representing about 4 hours of my time, split up throughout the day. Factor in cleaning the house and making dinner and I’m not finding chunks of hours together. I like to work in chunks, I love having a bunch of hours spread out in front of me with no cut off – typically I love to work at night and I get more and more productive as people fade off to bed and the house falls into quietness.

It’s not like I don’t have crochet on the go also, but I do find myself casting around for things I can make with a view to selling, and I’m beginning to think that maybe I can design cross stitch patterns. I hadn’t really ever gotten fully ‘into’ cross stitch – I had one sole 30 year old project – still on the stretcher frame with only about 250 stitches out of maybe 6000 actually complete – but this last two weeks or so I dabbled a bit at it and I’ve been loving the results.

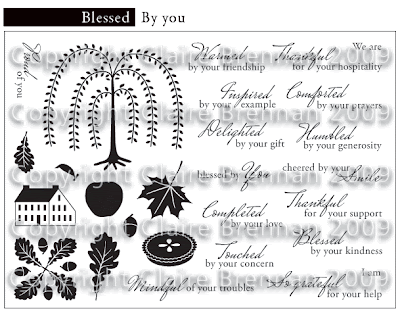
I am drawn to primitive country styles – one of my very first stamp sets designs was this one – from September 2009, there I was knee deep in saltbox houses and willow trees. It’s timeless – the country primitive vibe – and it’ seems ‘s calling me again now that Autumn is on the way!

stamp set design featuring a willow tree and saltbox house
Blessed By You stamp set from Waltzingmouse Stamps (now discontinued)
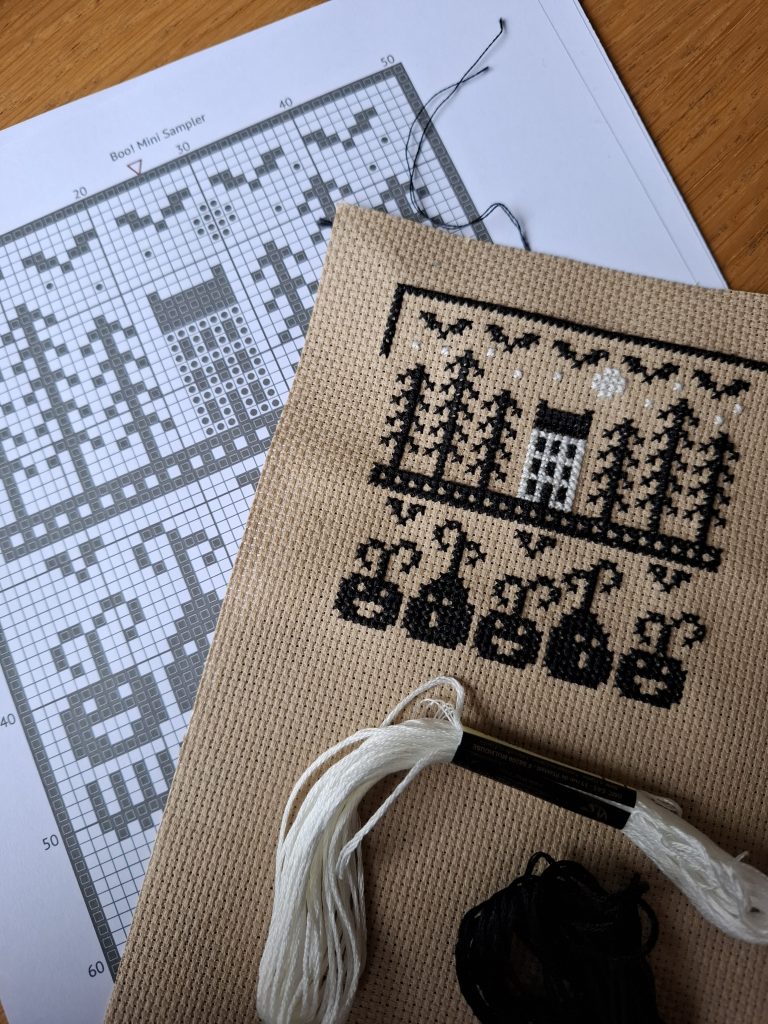
cross stitch in progress, black stitched trees beside a white stitched saltbox house

I think I will try this one out on Etsy, see if it tickles anyone. I’m in the process of updating the Etsy store anyhow, maybe I’ll pop a few patterns in there, see what happens!

I stitched this one on 14 count Aida, and I might stick to that, I think anything smaller would be tricky for my eyes, I might look into some linen even weave at the same scale though. I’ve used DMC threads for this, finding those rather nice to work with also. Might look into a magnifying glass also..

Fancy a little printmaking? Try Collagraph with a cuttlebug.

I think it’s time to get back to my arty roots – since the whole business thing is a no – go I’m not feeling very stampy, but I am feeling printy. There is just something about printing that interests me. I remember getting a tiny art set as a kid, it was one of those Remus play kit sets that the local supermarket sold – it was a little set of red rubber letter stamps and it was for a while my most favourite thing in the world, applying ink to something and then getting an impression was magic to me. It still is.

Lately I’m getting the magic via collagraph. I first did this at art college in the 90’s along with screen printing and in those days screen printing was my preference but I stumbled over a facebook printmaking group just before Christmas and rediscovered collagraph. What I like about it is that it uses the process of intaglio and relief printing in one process.

If you are new to collagraph it’s super simple, or as complicated as you want – here are a few pics from my rediscovery sessions, I’ll talk you through a simple version of the process.

In collagraph, you make a printing plate by hand. Typically folks use a piece of mounting board (the stuff you use to surround a print before framing it to hang on the wall). You assemble the plate by making a collage of the image you want to print. In this example I created a collage of a little local gate-house and some trees. I started by drawing the basic shapes of the scene and cutting into the mounting board and adding other layers oof other materials to enhance the image.

Its a scene I pass every day and I like the period building and the trees. I use things like crumpled up tissue paper, bits of old wall paper, crafting paper, sellotape and there’s even a wee bit of moss in there – it’s the green foliage on the edge of the house there.

I also cut into the mounting card and strip away layers of it – the tree trunks are a good example of this – stripping off the top layer of smooth card reveals a fluffier layer of the mounting card – this softer fluffier layer will absorb more ink and will then yield a darker shape than the surrounding flat surface area.

Creating a collage is an interesting way to create a scene, and some things to bear in mind are: the printed image will be the reverse of the collage so bear that in mind while creating. The materials matter – shiny materials like sellotape will print differently to absorbant materials like ripped cardstock. I’m still experimenting and it’s great to make some nonsensical plates to see how different materials react.

I wanted to have a go at making a scene so I winged it and tried to guess what way the scene would print and for a first attempt I was pretty happy with how it went.

Before printing though it’s a good idea to seal the plate, I’m using button polish. The plate is made from paper and card and degradable materials so sealing it helps it to last longer and not fall apart before you have been able to get at least a few impressions. I brushed on once coat and let the piece dry over night.

Inking up is a little scary, but having worked the printing inks into every groove, you then remove the excess before printing.

Just to keep things simple I first attempted an evening scene – here is the plate with the excess ink wiped off – I used sellotape in two of the windows of the cottage, which meant I was able to remove the indigo ink completely from the window panes and pop on a little orange before running the plate through the press. – I wanted my windows lit! I also cleaned off the sellotape moon completely so that the moon would appear inkless and thus, white.

And here is a finished print side by side with the plate after it came out of the press. The masking tape I used on the cottage roof printed lighter than the other areas giving a nice moonlit highlight and the windows have a warm orange glow. The smoke was created by painting on some wafts with a glossy varnish, this was done before the plate was sealed. You can see how all of the different materials result in different shades and textures. I love the process.

These are my favourite of the prints I pulled from this plate.

So – what type of press do I have? I don’t – I’m using my little cuttlebug die cutting machine, I know lots of crafters have these and it makes a decent wee press. Here it is with another little trial plate – this one is going through with no ink – I think it’s a good thing to run the plate through on it’s own with no ink first – this helps compress the plate and it helps me figure out how many shims I need – this is the tricky bit – getting the shims right – depending on how high the relief of the collage is, you will need to footer with shims. Best to do it before the sticky ink is applied.

The sandwich I used for my mounting card plate was different from what I’d use for die cutting etc, and I added a printing blanket (I’m using some cotton quilt batting) which is essential to help with making sure the paper picks up all of the printed details – it also helps absorb moisture – the paper I print onto has to be wet to pick up the inks – if you are interested in the process let me know and I could do a post on using the cuttlebug.

Here’s a few more sample pieces I printed just to see how different marks and textures work – an abstract landscape made with crumpled tissue and masking tape, torn in strips and overlaid. Print on the left, plate on the right.

Another abstract, testing how fine I can go with detail, the lines are just scores in the card made with a scalpel. Print on the left, plate on the right.

And finally a test window, using different wallpaper scraps to show different stone textures in this gothic window trial. print on the left, plate. on the right. Ta for popping in! Below is a close up of the plate being created.

Black Friday Sale and the end of another Era

Folks I can’t believe that I’m doing this again, but I am having to close my Stamp company, again.

Some folks might already know the story, but if you don’t, here’s whats happening: I’ve been trying to get my photopolymer stamp company going for about a year now. I’ve had really solid support from a few folks who were with me first time round at WMS, and I’ve had a tiny but increasing number of folks who discovered us ‘as new’ just recently. It was a really slow start due to the fact that I live in an area of UK called Northern Ireland. We are geographically part of Ireland, but governmentally we belong to UK.

Back a while, the UK decided to distance itself from the EU trading block and mishandled the set-up for us here in NI, it feels like we are in a bit of a no-mans land. Something called the Windsor Framework was supposed to cover the gaps in procedure but in reality, unless you are operating a standard business, the folks in charge here really don’t know what to do with people such as myself who are trying to run businesses that are just a little out of the ordinary. It took me a third of a year to get the necessary documentation to export and import properly.

I live in Northern Ireland and the vast majority of stampers live in USA, so I was always going to be shipping something in or out of USA. I loved my USA stamp manufacturer, they really are the best, but Importing to NI is super expensive so my margins were never going to be that great – fine, I wasn’t looking to purchase a mansion, I just want to be able to pay my bills, eat in a restaurant for my birthday, that sort of thing.

The next largest block of stampers I could find are in EU. Due to the fact that NI is a sort of no-mans land, exporting to EU is a nightmare. Many EU countries imposed duty and tax on my customers, even though they were not supposed to have to pay it – and all because the official postal system here is UK run. The result of this is I that I either use a courier company, which is ridiculously expensive for small orders, or I drive across the border to the Republic of Ireland and post my orders from there. Seriously. I drive to the next country along. Those are my options. The alternative is shipping orders as though they are gifts, which is illegal.

I’ve spent over half of my first year in business wrangling with post offices, researching compliances, dealing with protocols and generally doing everything other than drawing stamps.

This has resulted in only a few stamp releases this year. The first one, I waited over two months for the stock as the UK and Irish postals services played a game of tennis with my boxes of stock trying to decide between them who would actually deliver. For subsequent releases I used another manufacturer, a great manufacturer but a manufacturer whose minimum quantities were simply too much for me.

If you’ve ever been in any type of business you will know that buying in small quantities is terrible value and that unit prices go down the more you can buy. That just has not been feasible for me, so all of my costs have been huge in relation to the size of my business.

Now, two huge things are on the horizon. The first is the GPSR safety regulations that will come into force on the 13th December. Immediately this affects my suppliers, the folks I get my mylar from, for stencils, will not longer ship to NI after this date. Ridiculously I am unable to source mylar in NI. This might mean no more stencil making. What it will mean to my stamps, I do not yet know, I am unable to locate specific information regarding that type of product. I have spent hours searching, but there’s probably another few weeks worth of research for me before I figure out how to be compliant with that set of regulations.

The other thing on the horizon is January. In January the new US administration will almost certainly apply tariffs to products from outside USA. Since most of my customers reside in US I’d need to be an idiot not to know that this will probably wipe out any chance I have of selling to folks in USA, after January.

Having been out of the stamping community for a number of years I came back into a totally different landscape. The larger design led stamp companies are being preyed on by mass producers from areas with no copyright laws. People are purchasing stolen designs cheaply, en masse. It’s that simple. I’ve operated on a limited budget all my life, I see the appeal of cheap products, but the market is being decimated by cheap off brand versions of legitimate designs. I can’t support that and I cannot compete with it.

Every stamp set I sell has cost me upwards of 70% of the retail price just to get it to exist and thats not even counting my time in hours researching, drawing and making samples and running a store, my time is factored in nowhere. I have counted myself lucky to have been able to do what I do from home so that I could still see to my home responsibilities, it was the price I was happy to pay, but I can’t absorb the sort of losses that are heading my way.

So here I am again. Im closing out my stamp business, just as I was getting going. I’m gutted. I’m beyond gutted.

To anyone who recently purchased this week from my new release, I will be in touch.

My Black Friday stamps sale will begin right away and once the stamps are gone, they are gone. The sale will see prices reduced for stamps only. Stencils are things I cut to order and are not reduced. Stickers and art prints are also not reduced.

What this means going forward? I don’t know. I might keep the store for a while as I look into shifting towards a digital offering, we will see. Thank for reading this far. If you have been a customer, thank you so much. If you have not been a customer, I’m sorry we never got the chance to connect, my customers are, and have always been, the very best bunch of people. Thank you so much.

Christmas Tree Sleigh Ornament

I am making a batch of these later, but my tester turned out kinda cute, so I couldn’t resist popping it up here. It’s the sleigh from the new Sleigh Bells Ring set and I adore it. I’ve stamped it with Stampin’ Up Real red ink for the sleigh carriage and Versamark Pinecone for the runners. The Santa sack is also stamped in real red. The shapes are cut with the free digital cut files that come with the set, I love the versatility of the cut files.

I made some bonus cut files for the latest release and those will be emailed out to all the folks who purchased, hopefully later today! The bonus files include options for hanging ornaments – you can see from the pic of the reverse of the sleigh ornament that I have stuck one of the ornament cut shapes onto the back of my sleigh and sack. I stamped that a few times with the circular Sleigh rides stamp from the set. A little Tim Holtz Antique linen Distress Ink was sponged around the edges because I love the vintage look at Christmas.

Once the sleigh was all constructed I applied glue to the front of the ornament and dumped on a pile of glitter, this one is ‘crystal course’ from an old Martha Stewart American Crafts set. What I like about this one is that it doesn’t obscure the image too much, those tiny dots of glitter are pretty transparent, and it has that retro feel that I love! Hope you like it, Ta for popping in!

New Stamps for Christmas

Welcome to our Christmas release for 2024. It’s been quite the week, there’s been much excitement in our house around the new goodies but we are also mindful that there’s a lot happening out there in the world beyond stamping that hugely impacts folks.

I really appreciate you taking time to pop over and look at our new goodies, the virtual kettle is on, the tea is brewing. I don’t know if anyone fancies it but I might run a card challenge soon, I know some folks turn to crafting to soothe, while others just can’t get up the inspiration, but might like to look at some ideas – we will see, we will chat about it after the release.

We have 3 new stamp sets and 3 new stencils in store here for you, if you do find yourself in need of new goodies – and we also have some samples to browse if you just aren’t feeling with it at the moment due to world events, or indeed any events. Hugs to you.

Here are the New Goodies

Cut files to match stamps

Please note, you will automatically receive free cut files to compliment your stamp set upon purchase, it will come to you via email download. Look out for the email notification.

Bonus cut files for card frame and hanging decorations

I am preparing an extra FREE BONUS cut file bundle to include the decorative card frame and extra shapes for making hanging decorations such as the Sleigh and reindeer garland, plus a few other goodies. This extra bundle will be finalised over the next few days and I will manually email that to folks who have purchased the stamps that it will suit.

Santa is coming to Town

Santa is coming to Town. Clear Photopolymer stamps, Set size 4 inches by 8 inches. £14.95 GBP

The Jolly old Elf returns in this little set with a retro flavour. The solid Santa stamp stands with arms outstretched, ready to show you Christmas trees, put up wreaths, and even hold the reins of the sleigh. The outline Santa checks his list, are you on it?

The retro Christmas tree comes with tiny decorations, there are some for the wreath also, but this is your opportunity to dig out your glitter and your pearls and get to embellishing, remember when we used to do that? heck maybe even get the ribbons back out! Whatever you do, have fun!

Sleigh Bells Ring

Sleigh Bells Ring Clear Photopolymer stamps, Set size 4 inches by 8 inches. £14.95 GBP

Sleigh Bells ring, are you listening? It’s time to create cards, place card, gift tags wrapping paper, whatever you like with a sleighing theme! The detailed sleigh can be stamped simply to fit in with modern or retro themes or you can add a little pencil shading or sponging to give it a more antiquated feel ,see the green card below. The sleigh is two separate stamps so you can have the carriage contrast with the legs – picture golden gilded legs with a deep red carriage, you get the idea.

Fill your sleigh with gifts or Santa sacks and create all manner of Christmassy things. Add bells and bows or not as you see fit.

Jingle All the Way

Jingle All the Way Clear Photopolymer stamps, Set size 4 inches by 8 inches. £14.95 GBP

Reindeers with bells on, or without. Reindeers jumping, walking, trotting, you decide.  Solid and dependable stalwarts of Christmas, this team have delivered magic for as long as I can remember. Make cards, bunting, gift tags, place cards, pair them with a sleigh and create your Christmas! Make the whole team, add a Rudolph! Add a sassy robin or two.

New Stencils

We have 3 new stencils this release, Candy Stripe, Peppermint Swirl and Ho Ho Ho.

Each stencil is A5 and priced at £4.95 GBP

Box Frames

Some of the cards I have made for this release feature a box frame, I will be including cut files for that in the Free Bonus cut files bundle. Here’s what it looks like on the cards, its super simple to add to a card and gives a nice pop of dimension, turning your card into a fun piece of home holiday decor. It squashes down flat to let your card fit into an envelope and it pops up nicely again for display once the card is delivered.

Thanks for popping in, I will be sharing some more samples from these sets over the next week or so – do pop back for more inspiration.

The Jolly old Elf returns, but new

Continuing the samples for the upcoming release, Santa makes an appearance in one of the new sets “Santa is coming to town’. If you’ve just joined me, I’m gearing up for a release of 3 new stamp sets plus new stencils on Wednesday night next. I know a lot of my US friends have other things on their minds right now, but alas, I had this release all prepped and set up from well before last weeks events and unfortunately my small business just doesn’t have the resources to shelve the release for now, and so I must motor on even though a lot of my friends aren’t feeling so crafty right now. Hugs to you.

The Jolly old elf from the original WMS set makes a return. This time he’s showing off the Christmas tree, and putting up wreaths, right after checking his list! He’s the same character, but he is different to the old WMS set so if you won’t be repeating stamps if you already had the old set.

In this card Santa proudly displays the tree he has decorated just for you. The retro style tree lends itself to a load of decoration possibilities – time to get out your embellishments, old school deco is back. The elf himself is the same character as the Jolly old Elf WMS set, but he appears in this set in a different pose, and the pose is all important, you’ll see why later. The pose is perfect for showing off trees, or hanging wreaths, among other things. This Santa stamp is a solid stamp, here I inked him up in red ink and then went in with a black marker and blackened his boots, belt and gloves. I added a little shading with a standard HB writing pencil to give him a little dimension.

I created some Christmas stencils for this release also, featured in this card is the peppermint swirl stencil which makes a suitably retro background, here stencilled in red and hot pink. Fun!

Also in the set is an outline Santa, for folks who like to colour in, I inked him here for this card in a pale grey ink which disappeared nicely behind my copic marker colouring. I used the peppermint swirl stencil again because it’s such fun to use and it nicely highlights anything you want to pop in the centre of the swirl. I cut out the figure and the word ‘Santa’ with my silhouette cameo and the cut files for these will be free with the stamps.

The wreath stamp, also from the ‘Santa is coming to town’ set is one of my favourites, I really love the retro feel of the tree and wreath, they are so versatile. You can decorate the wreaths as well. Min decoration stamps are provided in the set, but it’s great fun to use up my long neglected embellishments, such as these sticky pearls, which I coloured with copic markers. As before Santa is stamped in red and I used a pen to scribble some black onto his boots and belt. The red panel is the central shape left over from when I cut out the frames for yesterdays cards, scroll back to see. I have heaps more to show you, call back tomorrow for more samples! Ta for popping in today!