Briefly Interrupting my release samples to do a quick giveaway while I wait for better lighting conditions! Release is Wednesday evening! more samples in next post!
So if you and I are old friends, you might recall this set, Jolly Old Elf – it’s one of my favourites, and I have one pristine, unopened set that I’m going to offer up as a prize – If you would like to be in with a chance to win, then visit any of my social media sites, Instagram, Pinterest, Facebook and look at my recent stencil or stamp postings. Pick one project that you really like and share it.
In order to be in with a chance of winning though, you must come back here, to my BLOG and leave a comment, here on this post, telling me what you sharedand where, otherwise I won’t know that you entered.
The Giveaway will run from now until Next Wednesday 18th September, when it will close at 11.59 pm UK time.
The winner will be chosen by random number generation according to the comments on this blog post and will be announced on the Thursday at 8pm UK time.
The giveaway is open to folks in UK, Europe, USA, Canada and Australia etc, HOWEVER if you come from a place that the Royal Mail does not deliver to please do not enter this giveaway as I will be unable to get the item to you and will have to withdraw your entry.
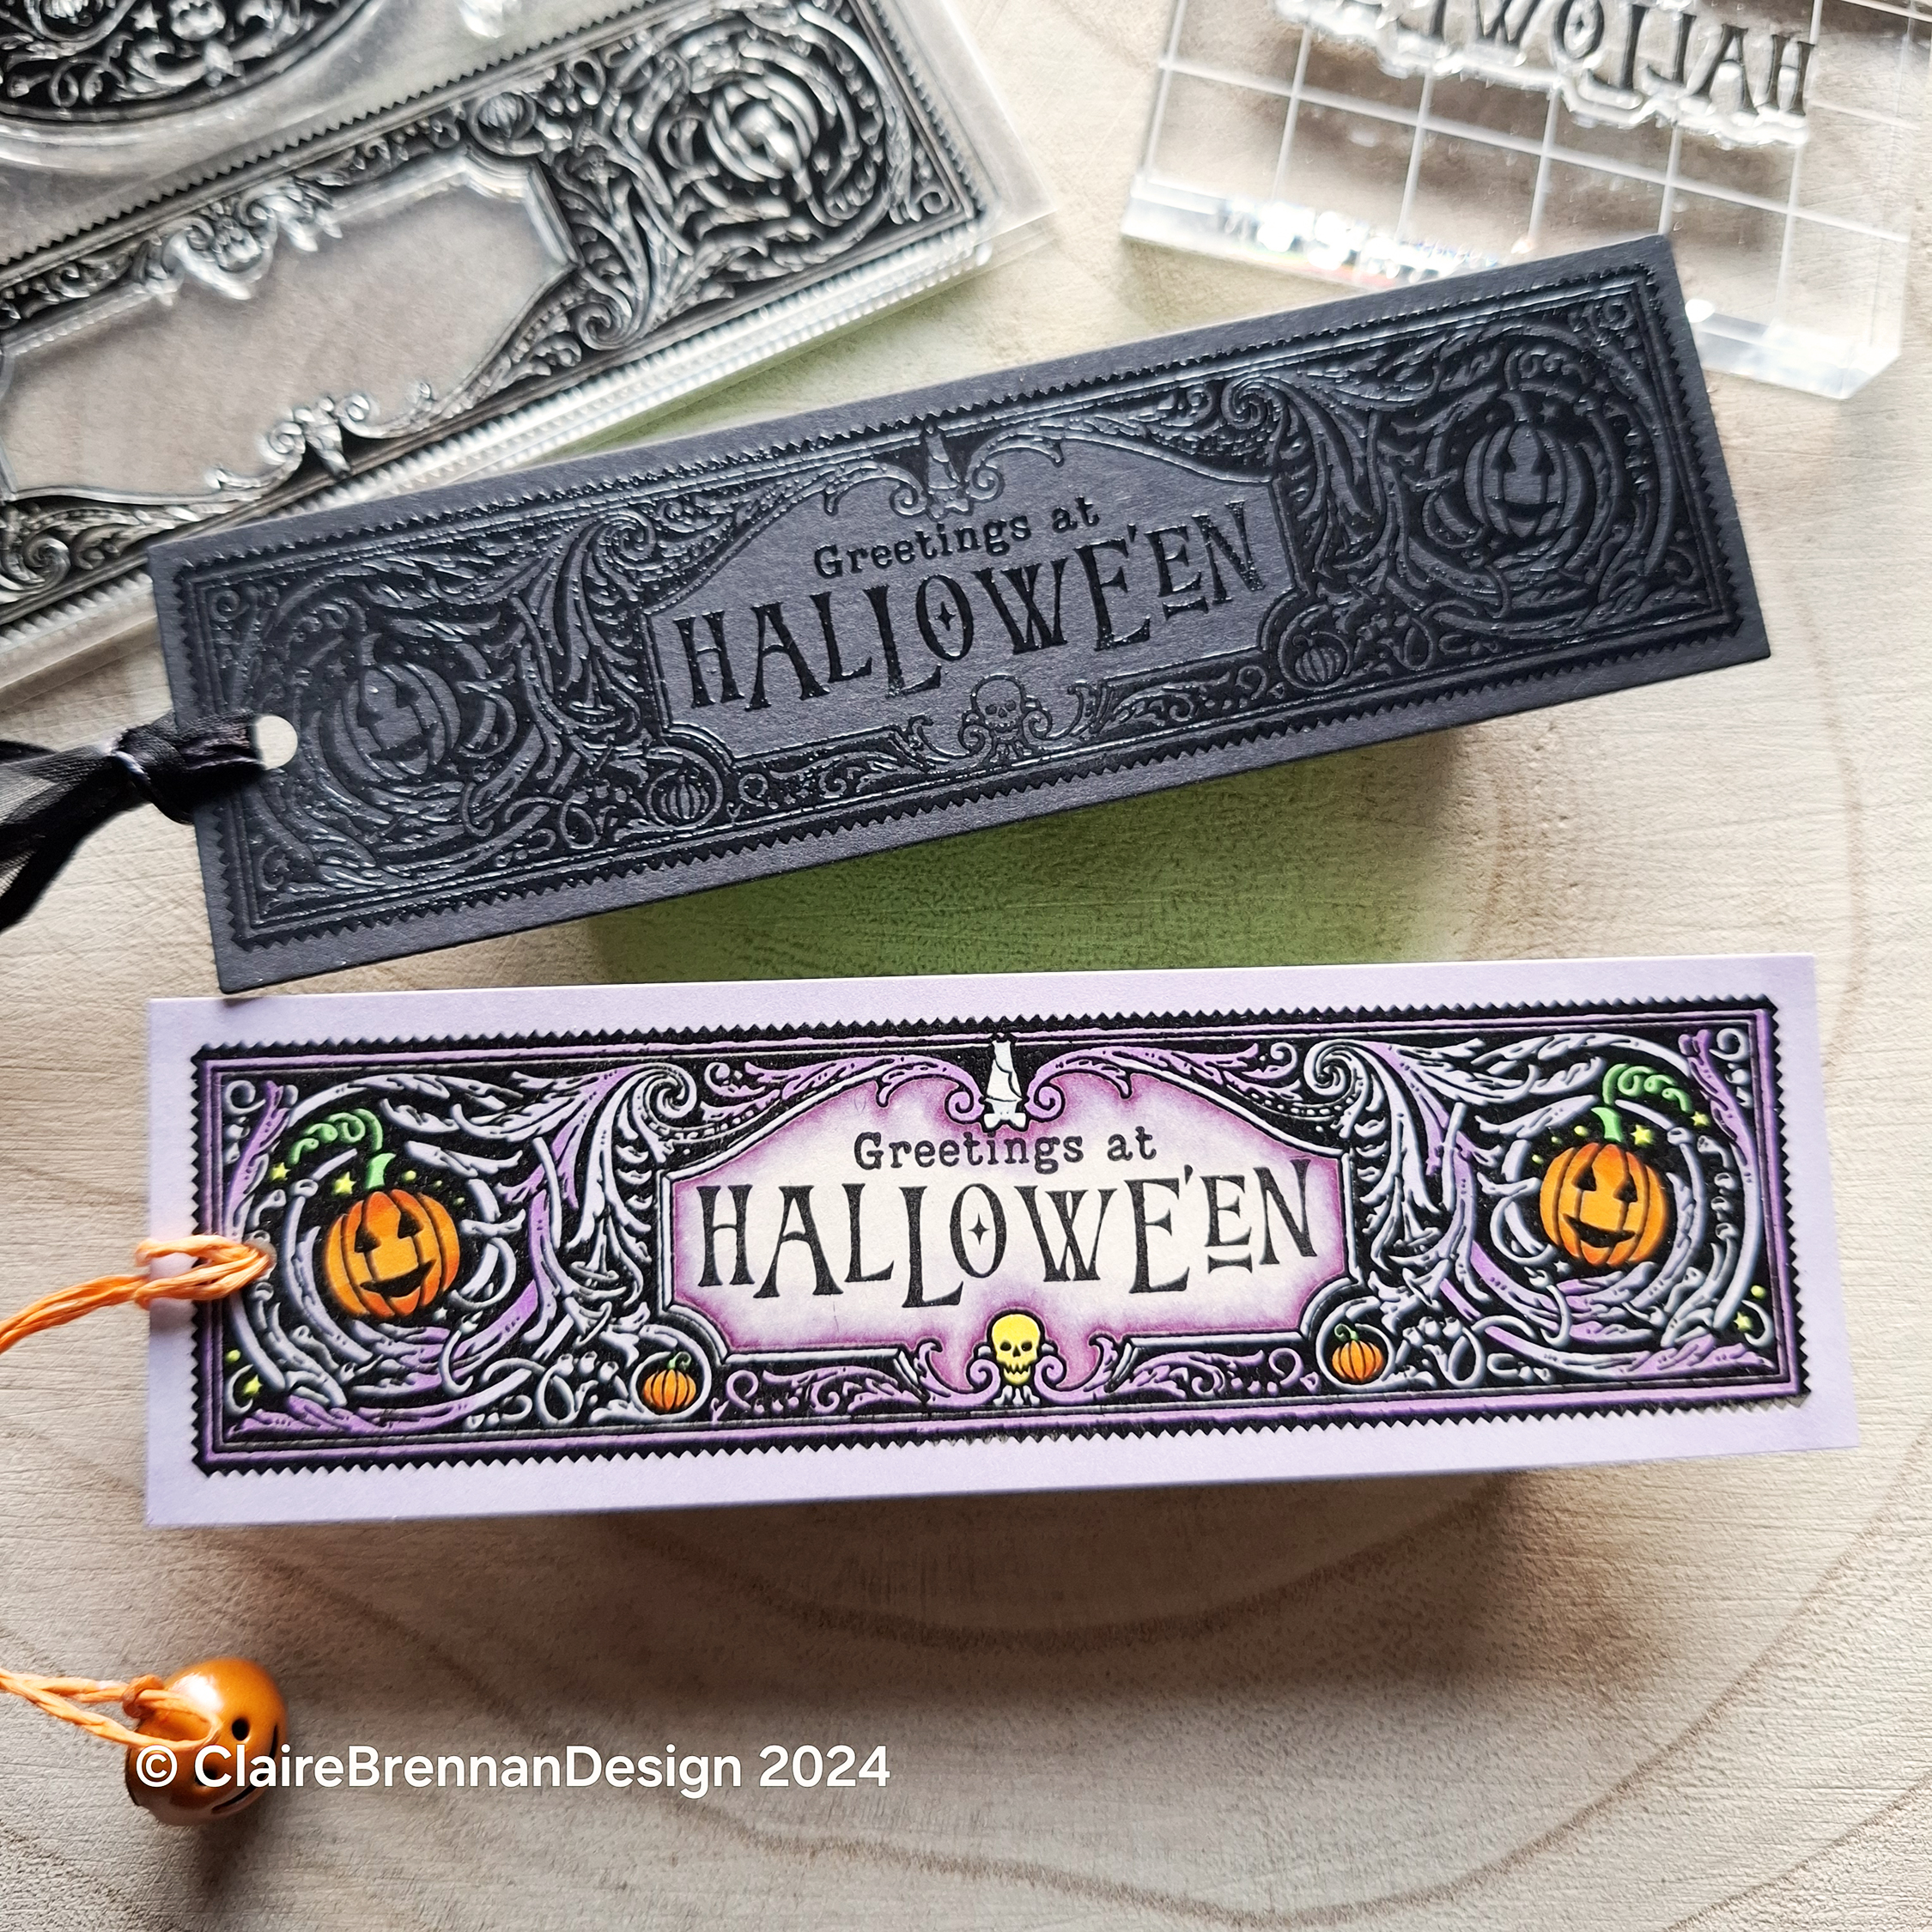
Two diminutive bookmarks this afternoon to continue my samples for my upcoming new stamps release at the store on Wednesday night, next. Both bookmarks are made with the same stamp. To me, nothing says Hallowe’en like black on black and I’ve been waiting to get my hands on the actual stamps to do my favourite thing, heat embossing. The stamp used is a long label/tag stamp from the new set, Haunted – the stamp produces an image just under 5.5 inches long by just under an inch and a half wide.
Serendipitously, it fits lengthwise into a standard spellbinders rectangle die (2 and 5/8 by 5 and 1/2) I have in my collection and because it’s narrower, I was able to push it along the die and cut it again to get a perfect cut out.
There’s a ton of detail in the stamp so I kept the black bookmark ultra simple, I stamped the label image, and clear embossed it, then I popped in the ‘Greetings at Hallowe’en’ sentiment and clear embossed that also. Punched a little hole at one end and threaded through some black ribbon, super simple party favour idea. I’m using it as a bookmark, but this will also make a great treat bag tag. I love the dark academia feel of this bookmark, it’s detailed and tactile, and subtly spooky.
This stamp is also great for folks who like to colour as well, here’s one version I did with it. I first stamped the image in black versafine ink, because it’s great for detail. I immediately clear embossed it, I love the texture embossing gives and it also makes it easier to colour, by keeping the black pristine.
This stamp and indeed the rest of the set are based on antique decorative printing blocks that I have redrawn, rearranged, and added Halloween details to – there are pumpkins, skulls, stars and a tiny hanging bat hidden in the design, colouring these things really makes the design pop. I used copic markers, which I cannot believe are mostly still good after 7 years in storage!
The centre panel of this label stamp is blank, so you can really add whatever you want in there, I added the longest greeting from the set, but some of the words from the Old books stamp set would work particularly well here also, words such as ‘Wisdom’ and ‘Lore’. Add whatever colours you want to match your party theme, I went with lilac. I love that the design is spooky but not gory, I’m more of a cottage core Halloweener myself, what’s your preferred vibe?
The upcoming set is a large set 8 x 6 packed with 25 stamps. This is the largest stamp in the set, which is designed to cover your needs from party invite, to gift giving, come back over the next few days for more samples before the release goes live on Wednesday evening at 8pm UK time. Ta for popping in!
So I have my mitts on a bunch of new stamps, a small bunch mind you, so anyone who is tickled better make note of the release date:
New stamps will go live in the store on Wednesday September 11 at 8pm UK time
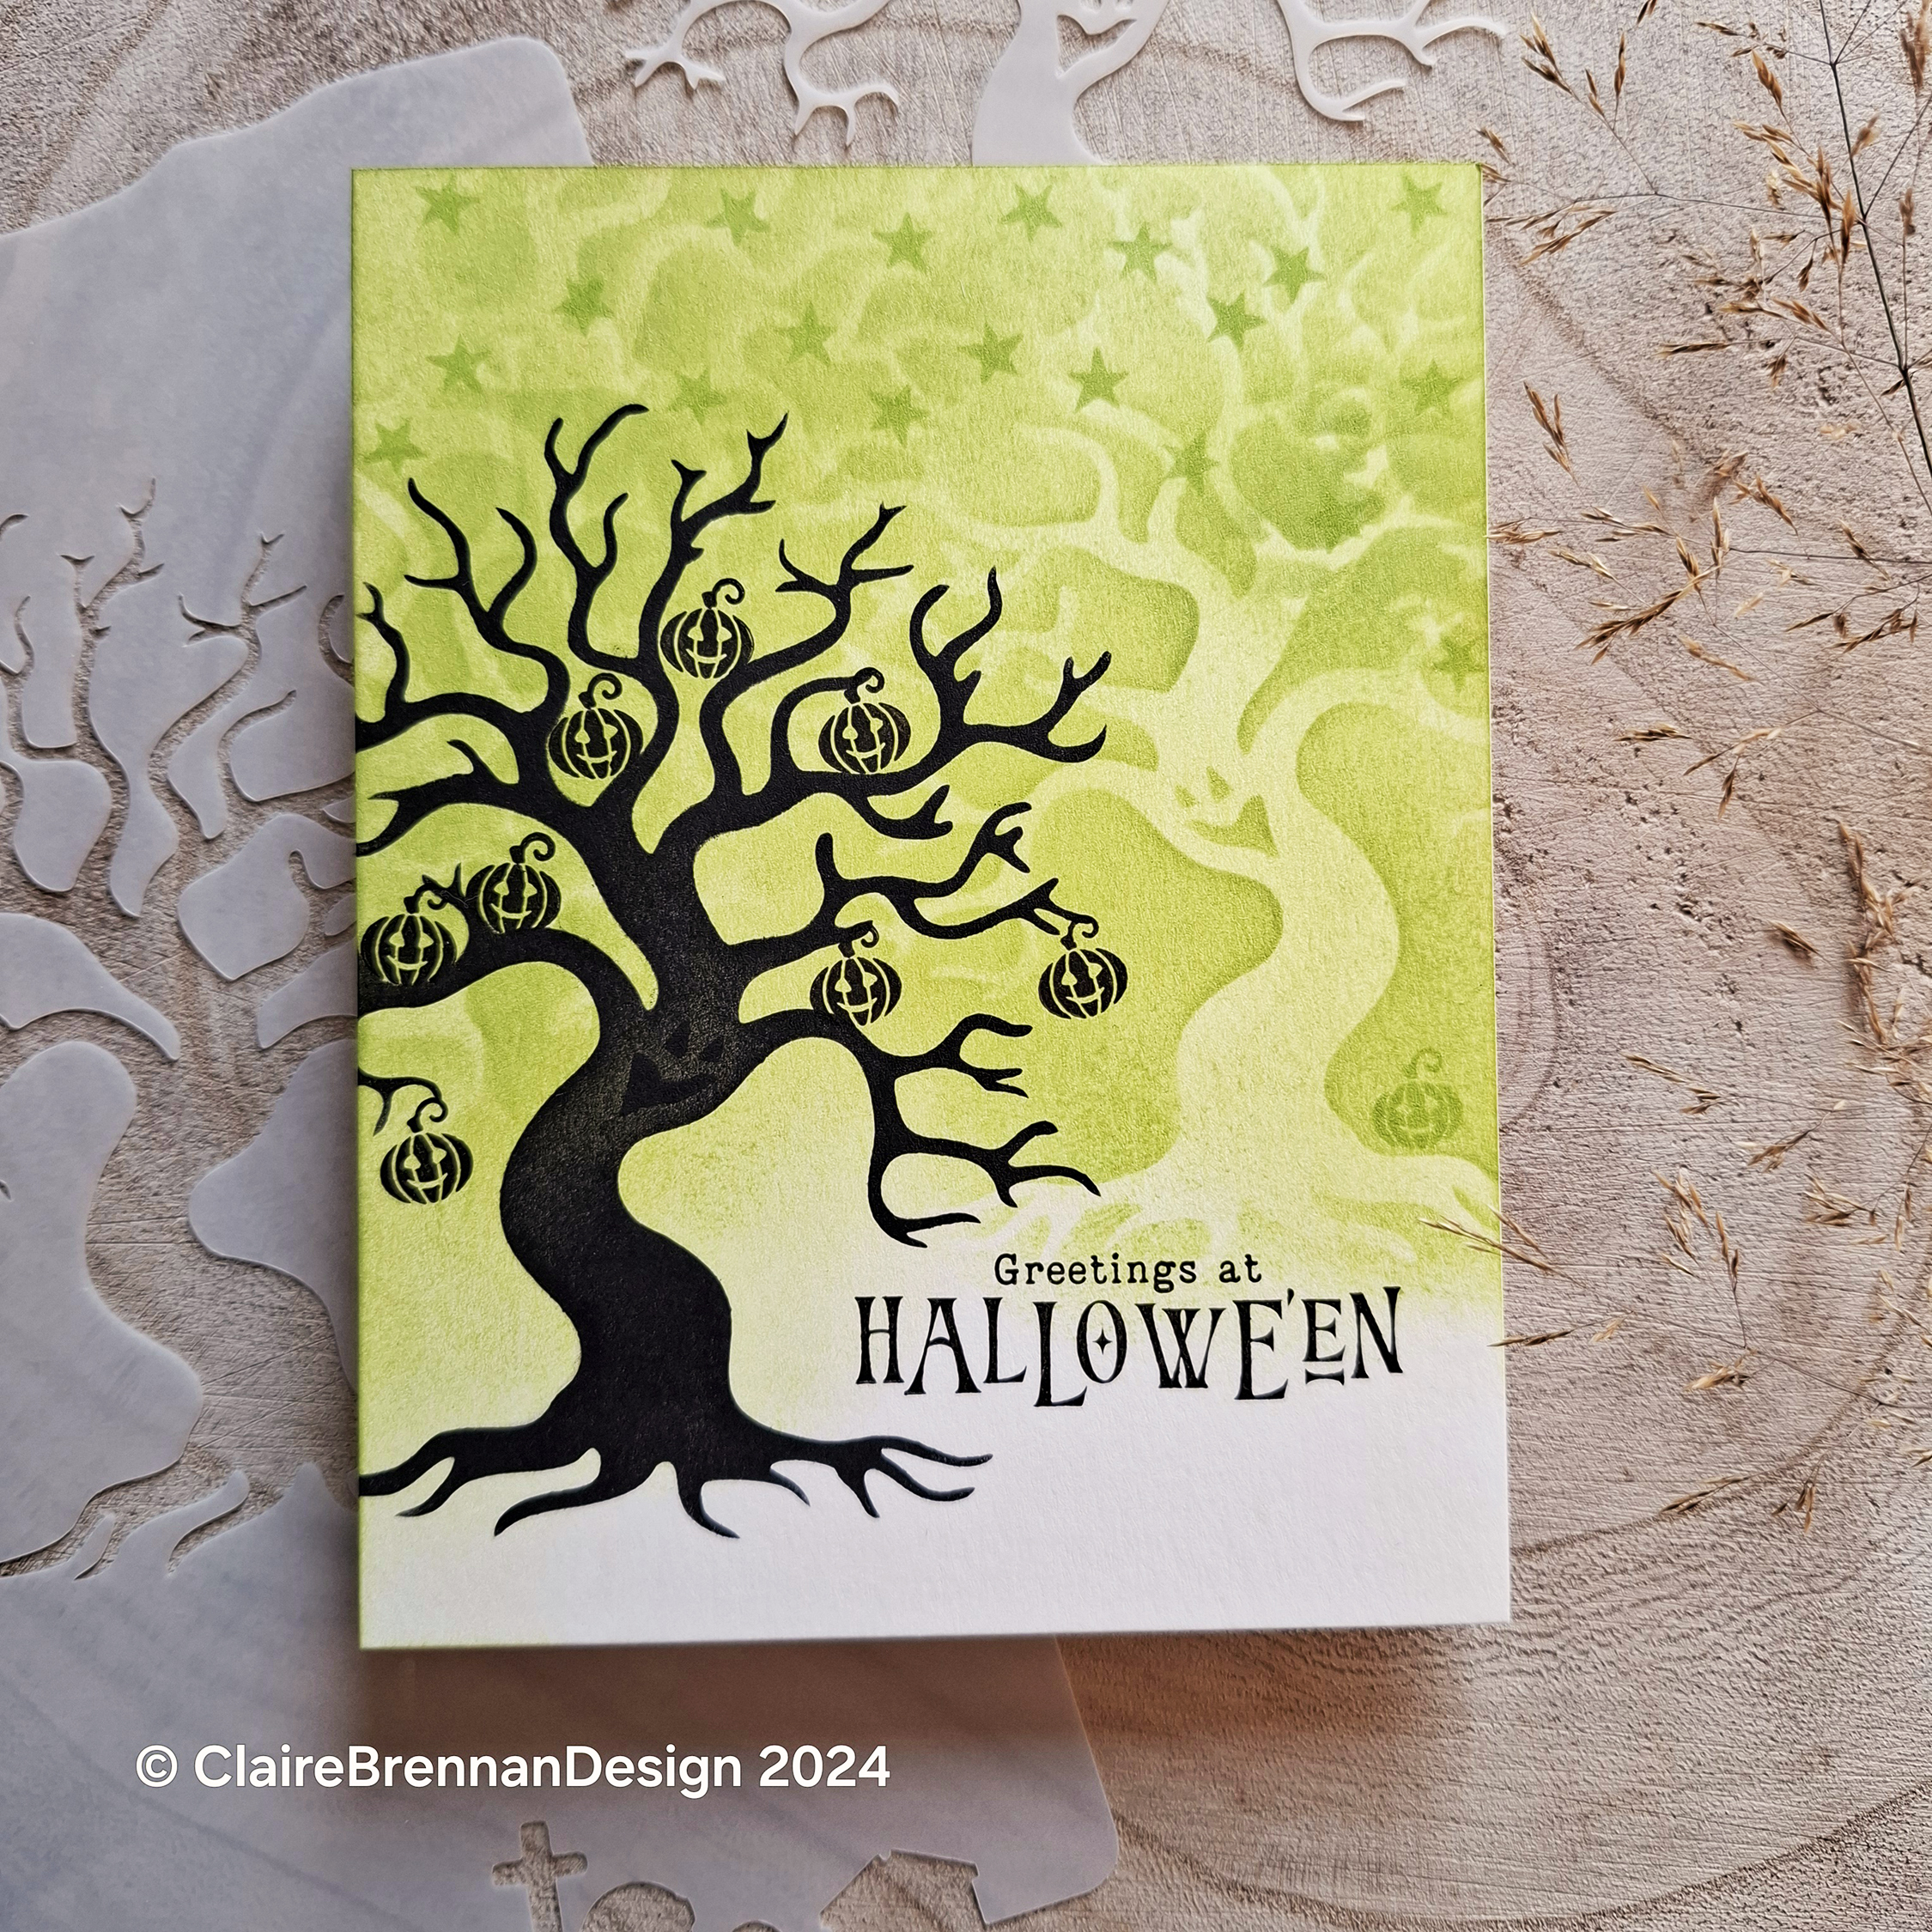
There will be new stencils also and today’s card features one of those – Spooky Tree stencil will release on Wednesday evening also. I’ve paired it with some of the little tiny incidental stamps from the upcoming stamp set, which is called Haunted. Here’s a sneak peek of the set.
This card is super fun to make – revisit inky fun with this easy-to-batch card design. Get yourself a card front – I’m using a piece of cream cardstock cut 4.25 by 5.5 inches because my brain is wired to US sizes. Start with the tree-face mask from the stencil set – Now – thing to know – the tree-face mask is a fun piece of stencil that comes in the exact shape of the tree in the stencil. It’s carries the face detail – so you can add a face to your stencilled tree or not, that’s the purpose of this piece. The stencil material I use is thin and bendy, I use it because I can get more detail – thicker stencil material would not cut so smoothly. A bonus function is that you can use this piece as a tree mask, but the branches will move unless you use stencil adhesive.
I actually don’t mind that since I’m making a spooky background forest here and I use a long fibre brush so movement was actually minimal. People with short fibre brushes will find the branches move so I’d definitely suggest an up and down sponge motion if you want to use finer detailed stencil and masks.
I started by putting tree-guy on the card at the right hand side with his face roughly in the centre of the side of the card, facing into the card with his butt sticking out to the right hand side. Then I brushed on some orange, I wasn’t too careful as a sort of hazy feel is what I was going for here.
Next I repeated the process on the left hand side of the card, randomly brushing more orange ink on in between tree impressions to get a little depth. I cannot stress how un-careful I was. Once that was finished, my card looked like the first pic in this block of six pics.
Next, I laid the actual stencil on top of the card, positioned towards the left, to leave room for my sentiment. I made sure the stencil was facing the opposite way to orange tree guy. I brushed black ink into the tree shape, see centre top pic. In top right pic you can see where tree guy has been popped back into his space on the actual stencil. Bottom left pic, you can see me adding his face with a heavier layer of black ink. I’ve switched to a smaller brush at this point. Look at his wee face, he’s so excited for Halloween! The card front now looks like the bottom right pic and I can add the sentiment and any other bits and bobs that I fancy.
For the orange card I stamped bats and stars, all tiny incidental stamps conveniently supplied in the new upcoming stamp set! The sentiment is from the new stamps set.
Tiny pumpkins infest the tree in the green forest
Wee little bats hang from the branches in the purple forest – this was so much fun to stamp.
There’s a hamster in my brain that just spins the idea wheel all day long. Usually I’m not even done making a stencil before the idea for the next one is beginning to hog all the enthusiasm. I had Halloween stamps on the boil (due later this week) and fancied a stencil for making suitable Halloweenish backgrounds. Given that one of the stamp designs features a diamond, I thought a nice harlequin pattern might be a good idea and so I made one up. Aways wanting more, I added a stencil for creating an argyle pattern, with the diamonds, I have yet to show this because right as I was taking the the pictures, folk art flowers were blooming in my brain.
Now, normally background patterns are created larger than the card front, I like a bit of overspill, so that when I’m trimming out the card front, I can get it perfectly positioned for myself.
One simple way to do this is to use a viewfinder. I make my own. It is literally a sheet of A4 cardstock with a rectangular hole cut in the centre. The size that I cut the hole depends on my project. For example I am making a lot of US standard size cards that measure 4.25 by 5.5 inches, so I cut my aperture 4.25 by 5.5. So long as it’s roughly in the middle of the sheet of card, it will work, the important bit is that the aperture is accurately 4.25 by 5.5 inches. The point of the viewfinder is to help you choose which bit of the stamped or stencilled pattern that you want to trim out for your card front.
If I were making a European A6 card, I would make a viewfinder that had an A6 aperture. I normally make two, I’ll make one out of a dark card and one out of white card, they are reusable, I’ve been using the same one for over a decade. The reason for this is that sometimes I’m making pale background patterns, and I use the dark viewfinder for those because it better isolates the view. If I’m making a dark pattern, I’ll use the white viewfinder.
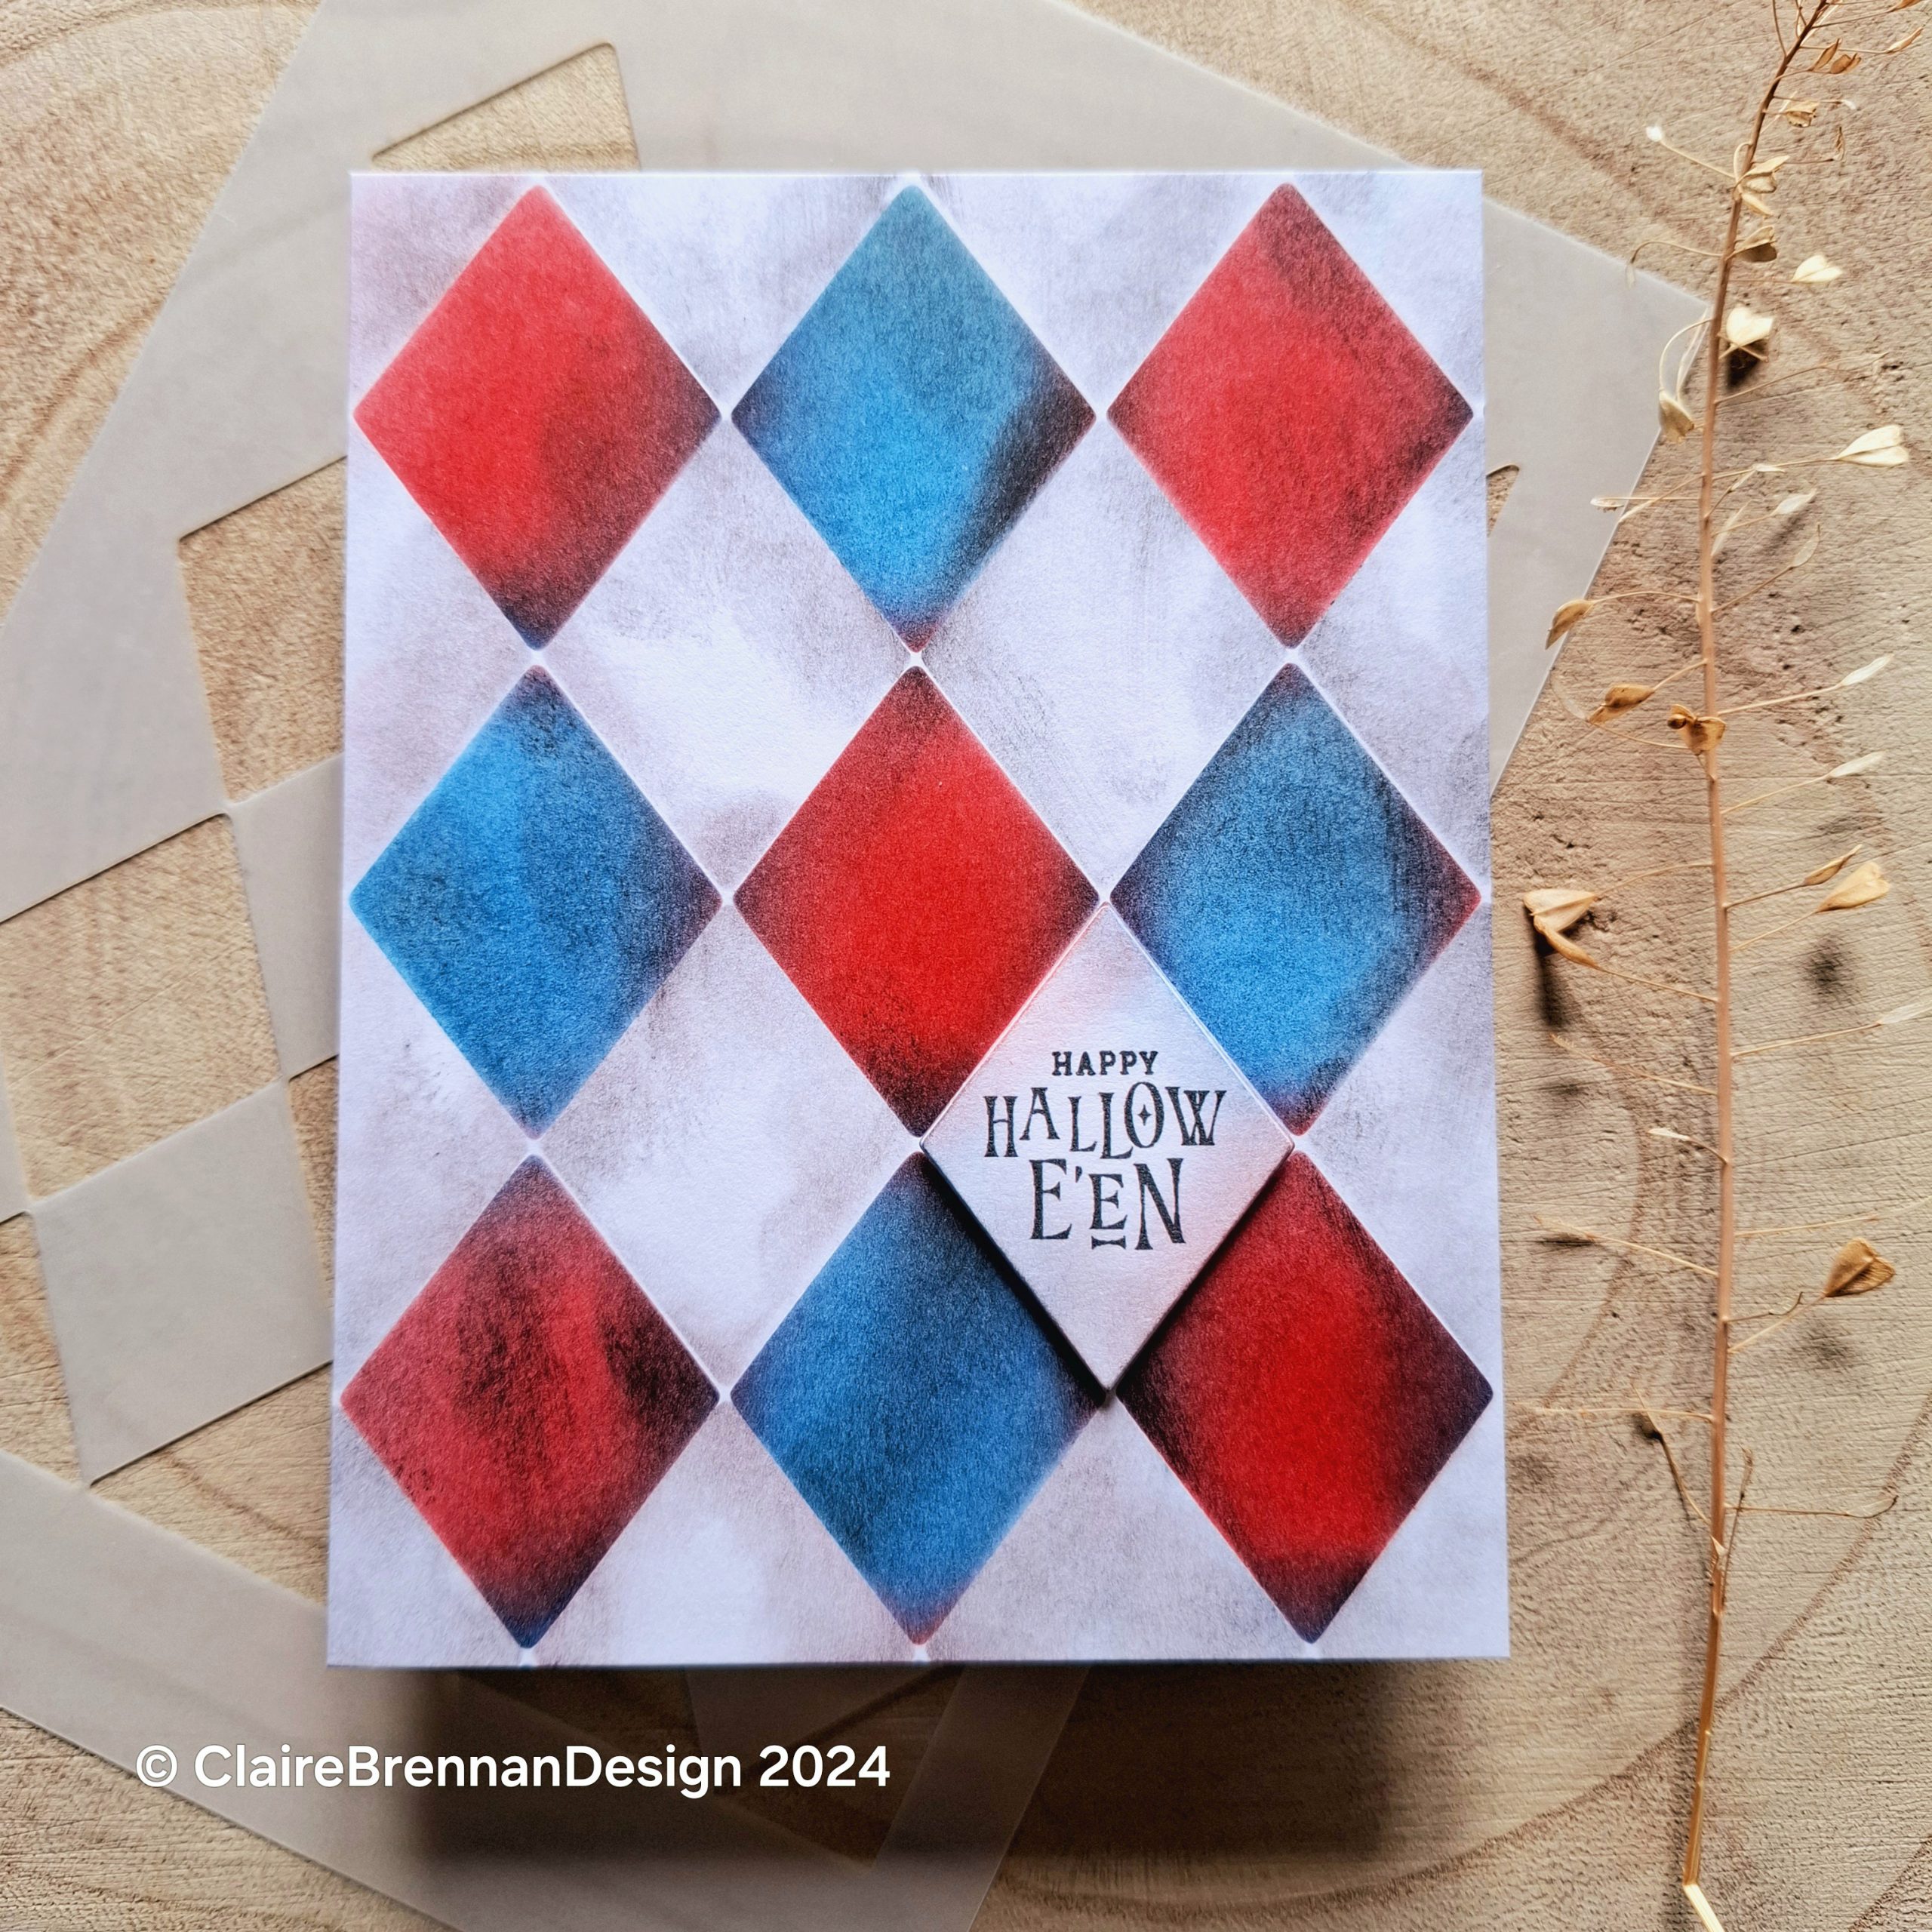
Here are some pics of the process, I start out by creating my background pattern. I’m using the Mini Harlequin argyle stencil here and I’m making a sort of creepy harlequin pattern, so I’ve used red, blue and little black to kind of creep things up a little bit. When I’m happy with the pattern, it’s time to decide where to start cutting it up to be the correct size for the card front.
Next thing I do is whip out my handy dandy viewfinder to help me decide. I lay the viewfinder on top of the pattern – here I’m looking at the difference between having the diamonds be sliced through the middle at the card edges, or do I want them centred in full diamond shapes? I decode I want the full diamonds, so I take a pencil and just make a dot on the pattern, right in each corner of the aperture. I use these dots to line up my ruler, but I also make sure the are 4.25 and 5.5 inches apart before cutting.
Some folks can just do this with a clear ruler, but I find the markings distracting so a viewfinder works best for me.
Here is the finished card, with the pattern lined up just as I wanted it. The Boo sentiment is from the upcoming Halloween stamp set.
Here is the viewfinder in use when I was making the other Halloween card with the larger Harlequin Argyle stencil diamond pattern, it was especially useful for this.
August kinda got away from me there. I spent quite a bit of August looking for a part time job, landed one only for it to pan out in a completely different direction than planned, so I had to abandon that. Back to paddling my own canoe for a while. I’d love to be at the point where running my own business was all I needed to do, but it takes a long time for new businesses to support themselves and we are not just at that point yet. Some day.
Since abandoning ship though, I threw myself into a wee project that was dancing about in my head this last while – folk art flowers. I intended to make one stencil and I ended up with 4 sets of two layered stencils.
I always start sketching with whatever is nearest to me, never really got into a sketchbook groove. Usually I’ll raid the printer paper stack and grab a biro, so my sketch collection is not really display worthy, it’s just a stack of tea cup ringed, biro scribbles, much like this. In between sketches there will be notes, often day to day stuff like what time I have to pick somebody up at, a telephone number for the dentist etc. It’s a little chaotic and not pretty. I’ve always envied folks with beautiful sketchpads full of stunning art. No can do. I’ll move quickly into drawing on the computer, that’s kinda where I live unless I’m doing watercolours.
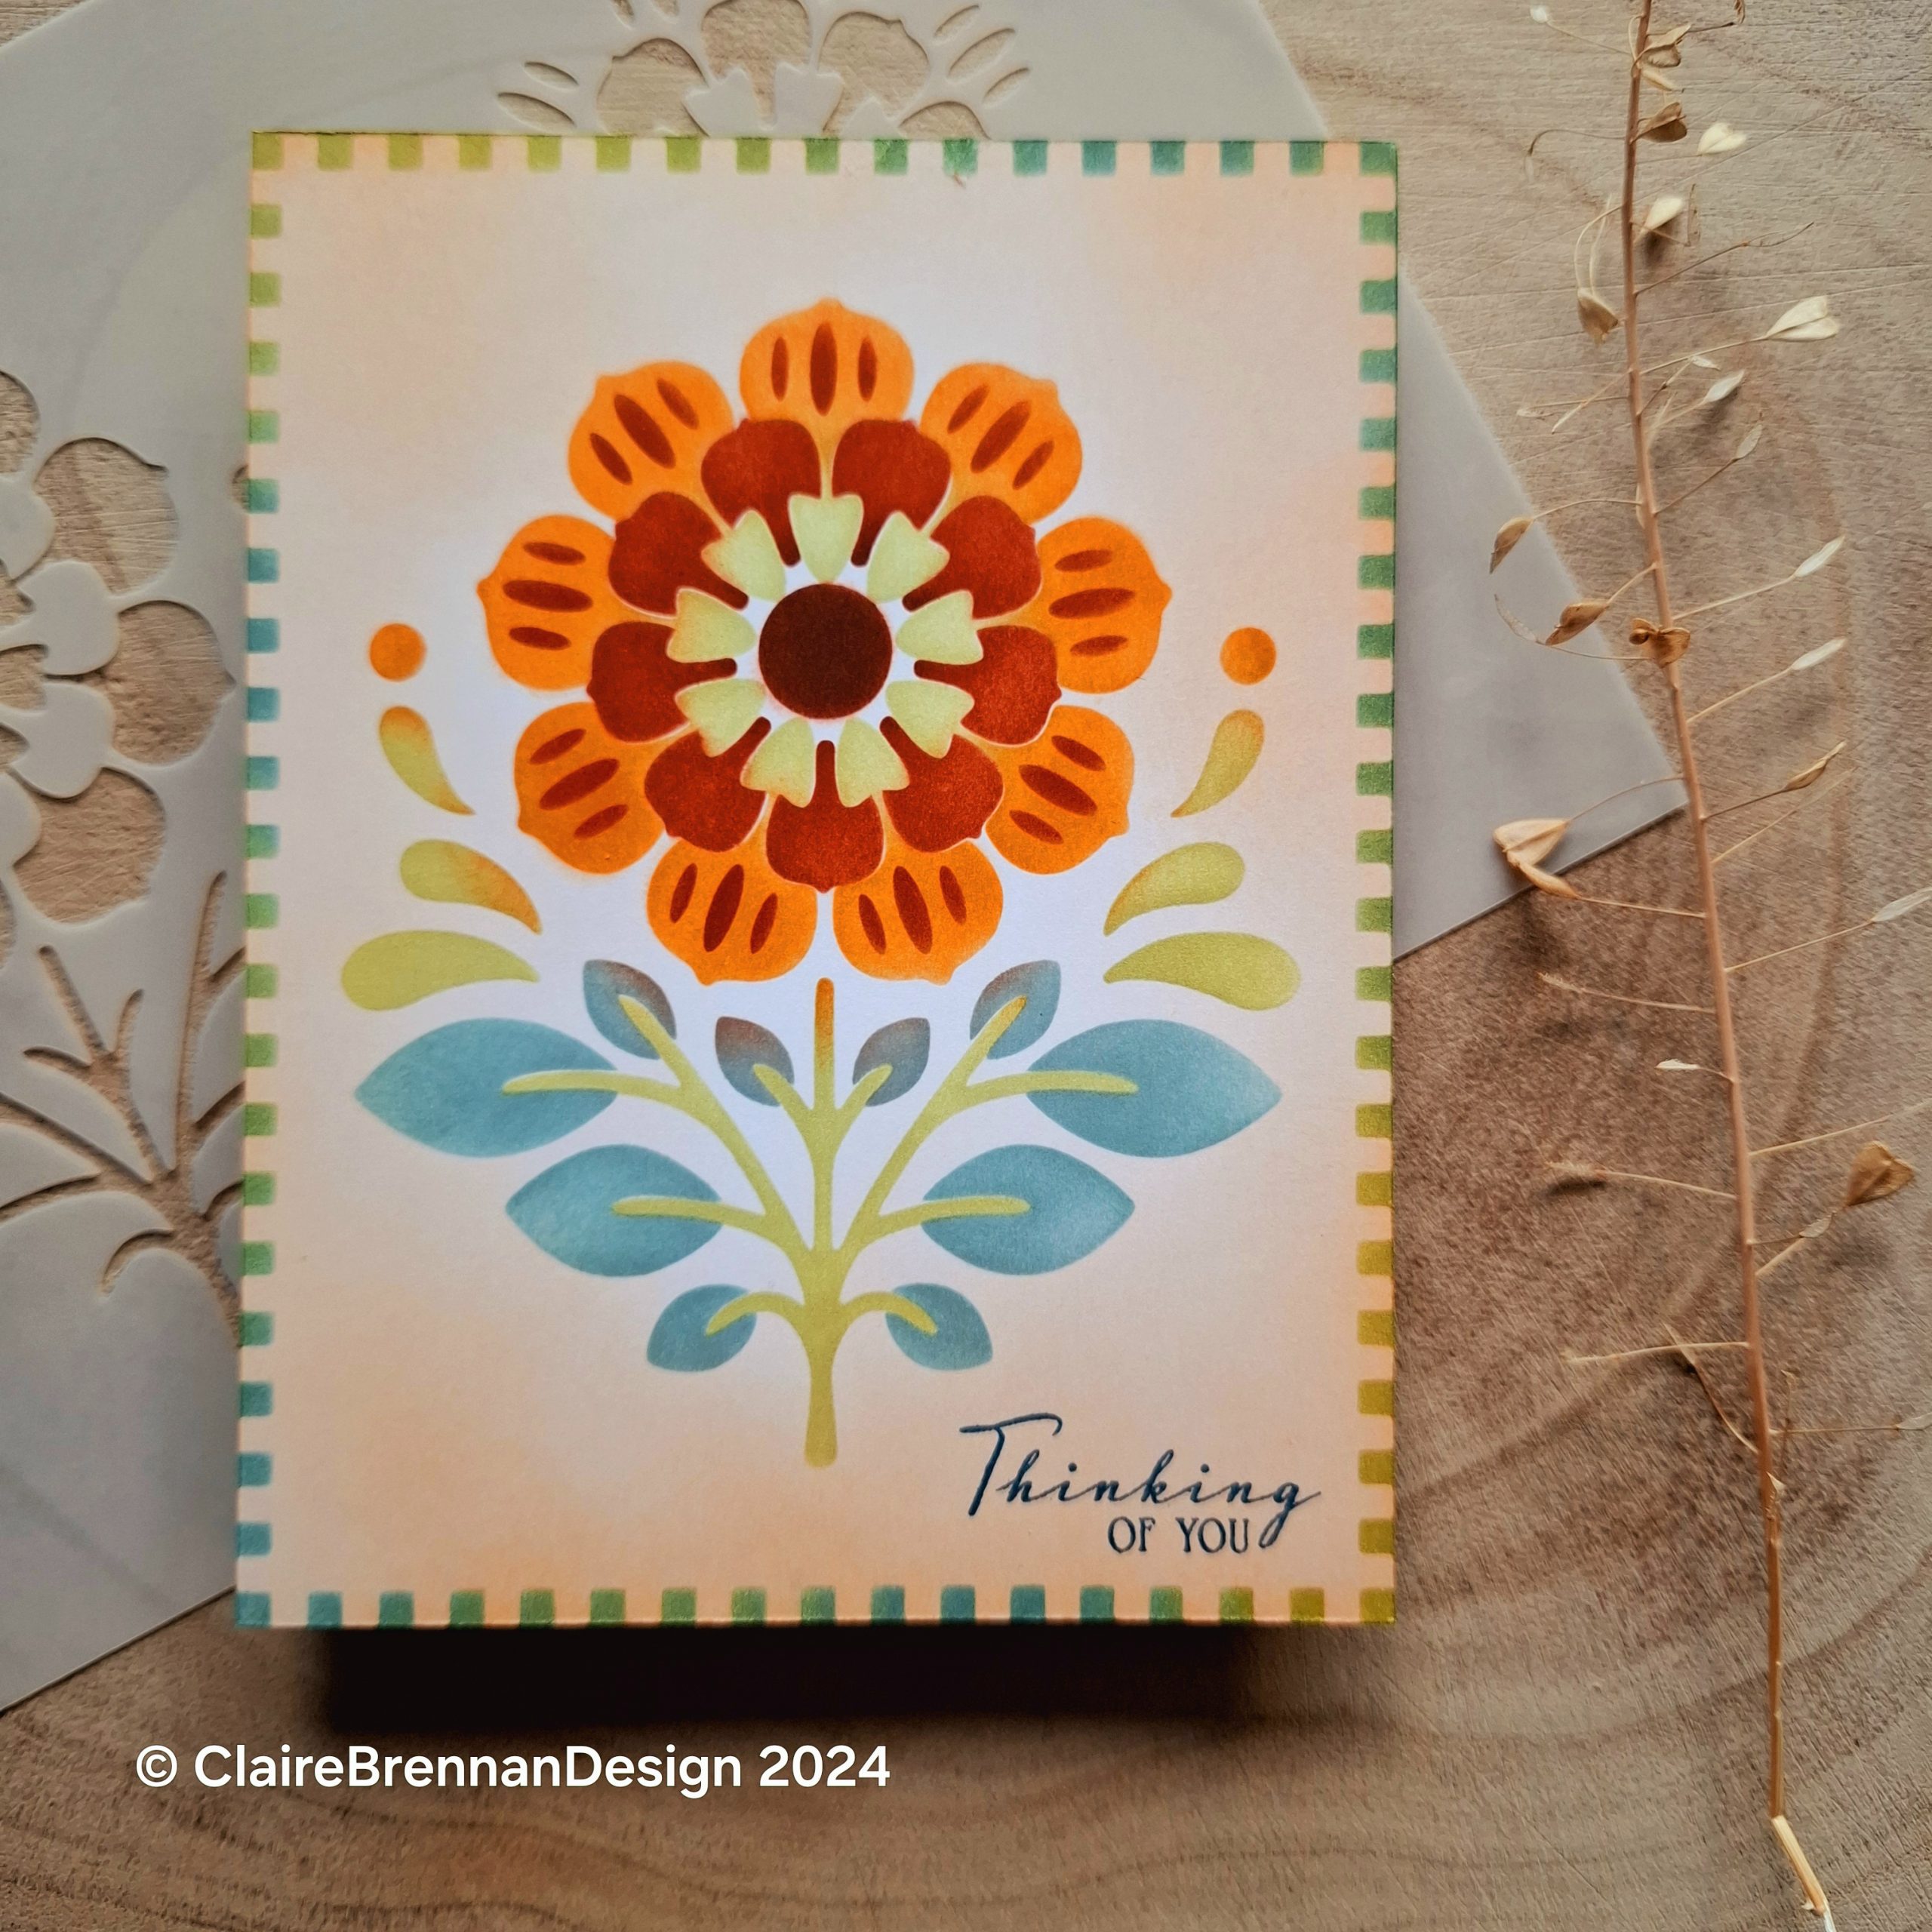
I love a straight line, or an elegant curve, I love sharp edges, defined shape, communication quickly. Designing stencils indulges the graphic designer in me, my favourite thing was always drawing logos. Simple shapes that communicate the most ideas are my thing….but…I also love fuss and ornamentation, more is more is also my thing. Stencilling is interesting because you can sort of have both things together. The overall shape of this stencil design are quite simple, you can keep this image simple if you keep to just two colours, or you can make this shape busy if you use lots of different colours on different parts of the stencil, like I did here.
You can vary the tone of each colour in different areas depending on how much colour you brush on, and how often you brush in a particular direction. Colour collects in different areas of the stencil like snow drifting agains the hedge, it’s fascinating and it gives each image a lovely illustrated look.
Every time I design something, I pretty much design it for myself – I know, I should be thinking about what other people might want, but I have a really hard time working that out, so I mostly answer my own questions. One of my most frequently asked (of myself) questions is “how can I make something that looks like I put in a lot of work, but quickly?” These floral stencils do that for me. I made a series of them, each flower is large enough to be a main feature on the front of a card. One of them is a panel that fills a card entirely.
Once the stencil is cut, it is the work of moments to colour it with a brush and an ink pad. I can do a one colour version if I’m really short of time, but the results look fab I think. Also, because it’s a stencil I can mass produce things, a wee bundle of notecards for example, for a gift. Everyone is getting handmade from me this Christmas!
The stencil in the post is Folk Flower stencil 1 and honestly I spent more time choosing ink colours than actually making the card. Super fast, but I think it looks considered and like it took a bit of time – what do you think?
This is what the set of stencils look like and soon as I find my camera stand there will be a video.
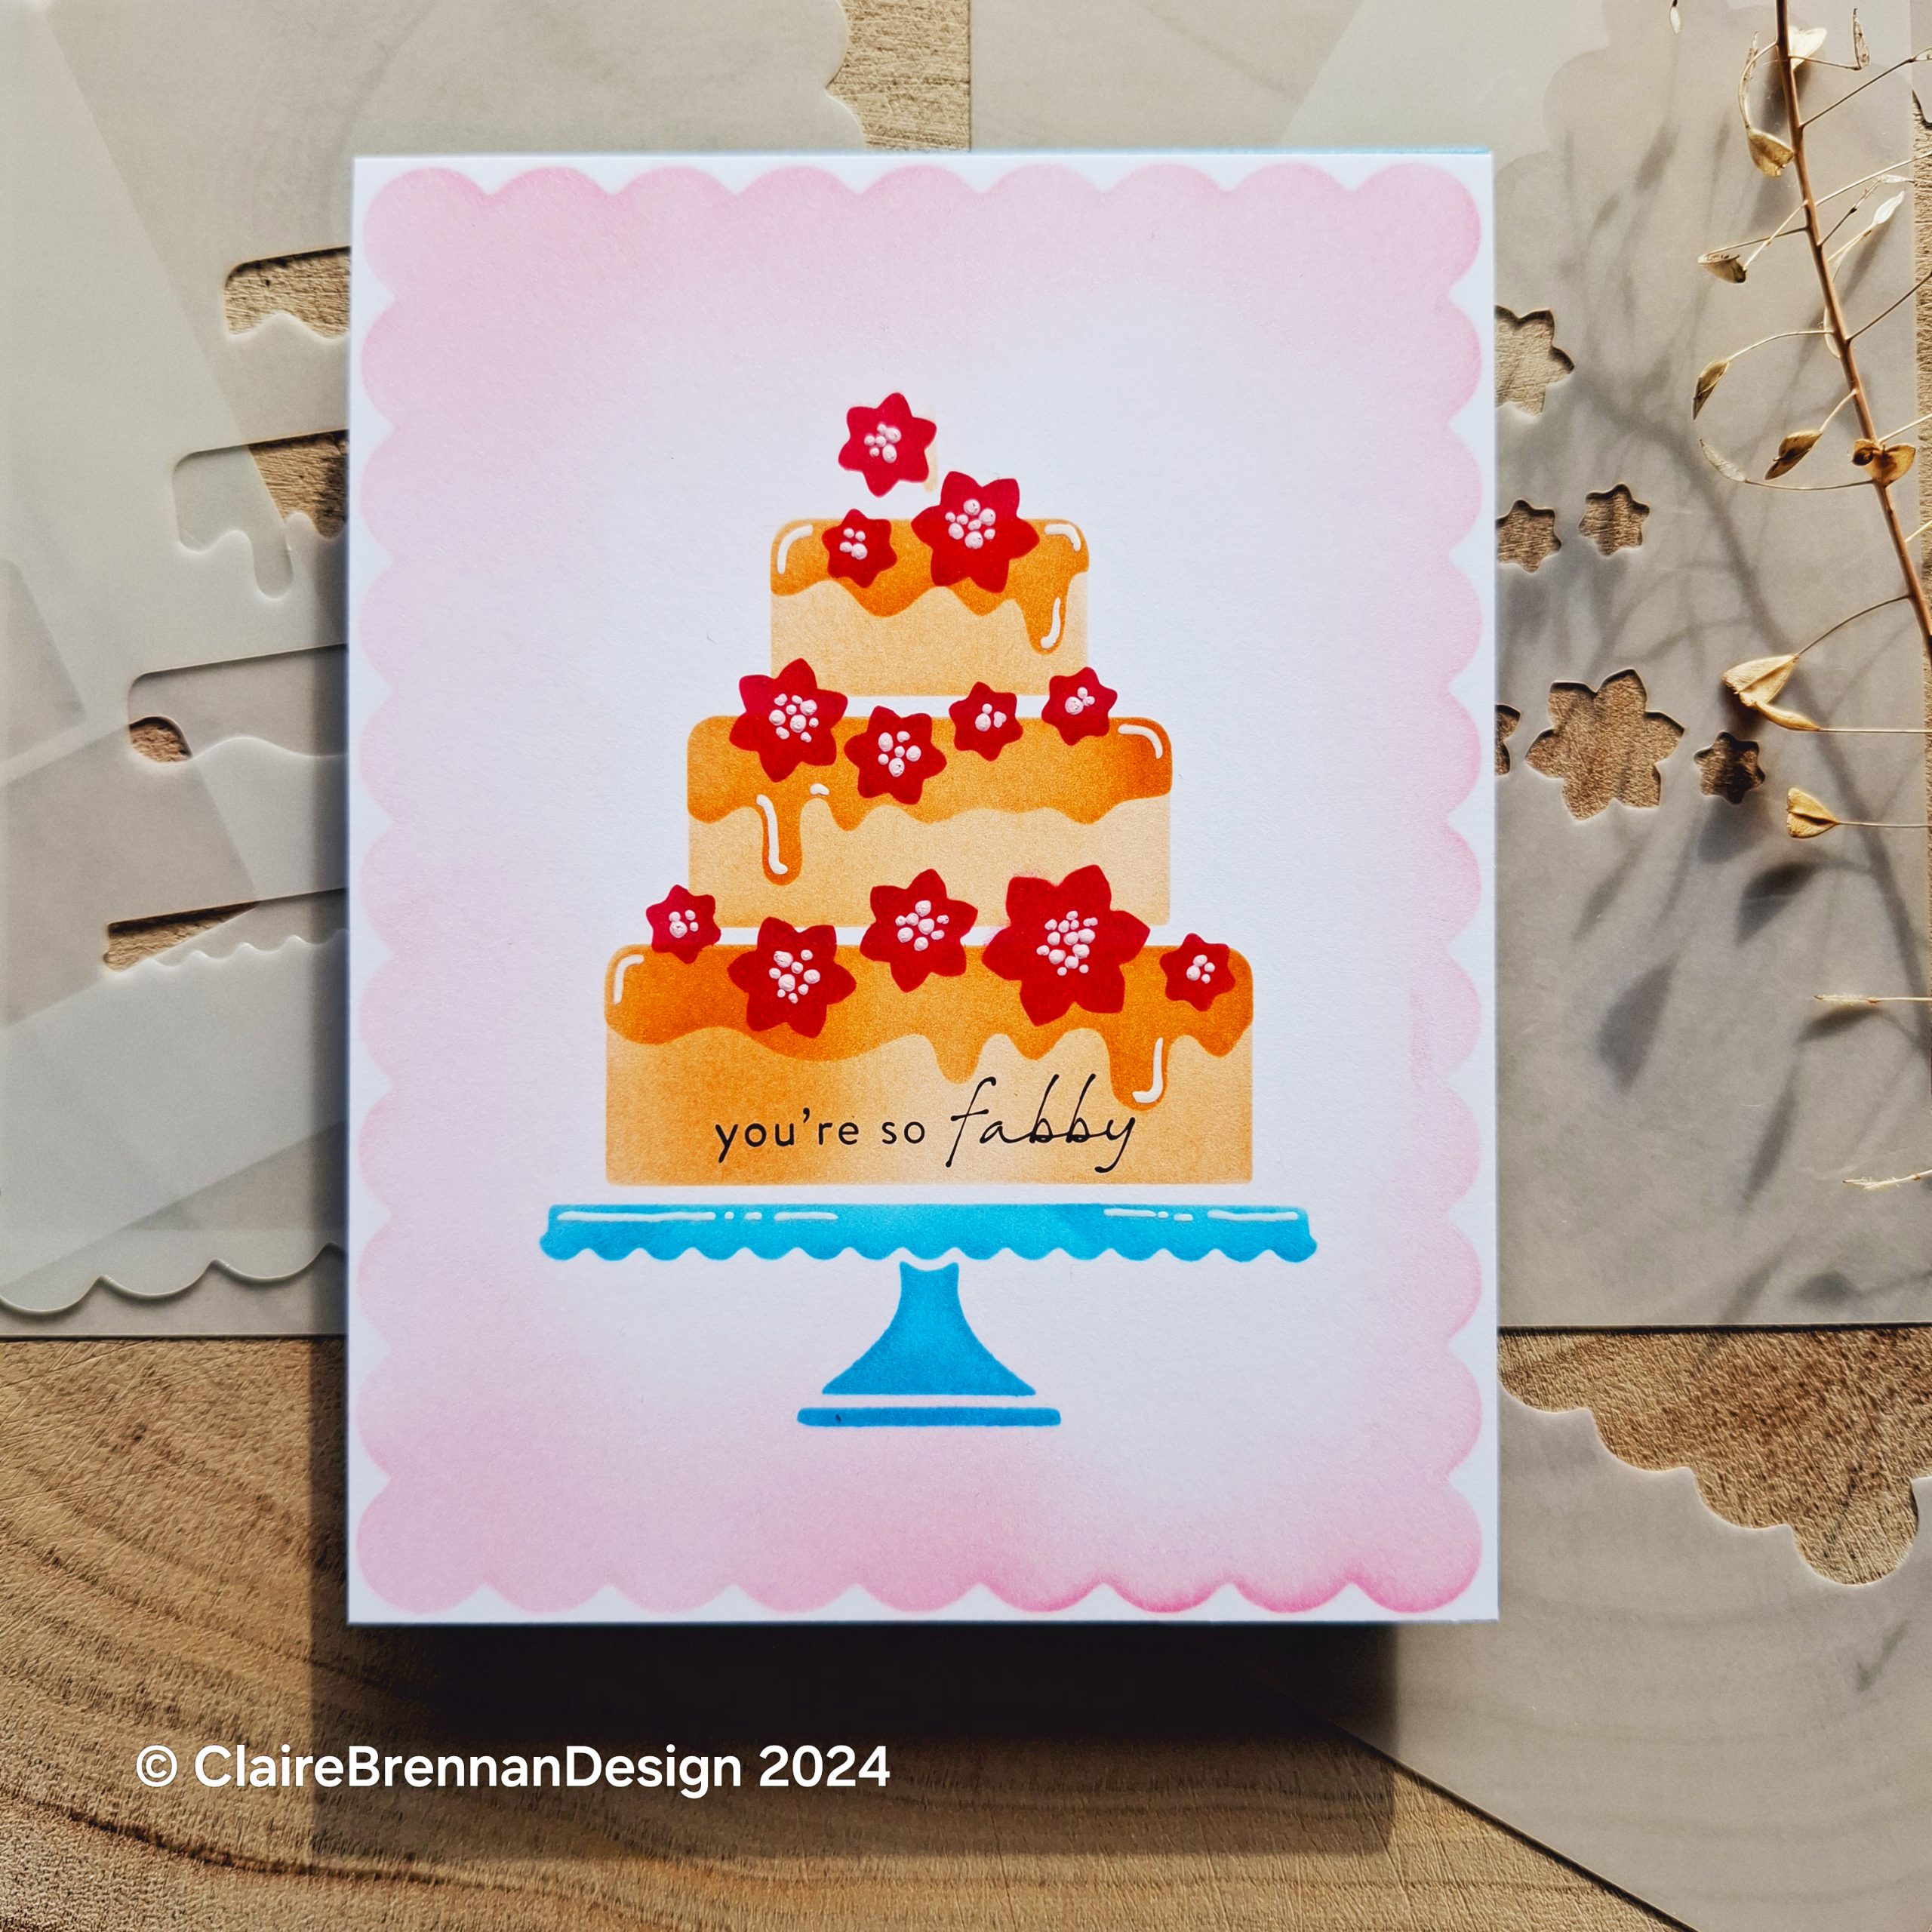
I’ve been creating border stencils recently and I liked to add an image to them, some shape besides borders, but something that kinda fits with the theme. I’ve had sawtooth borders with a halloween cat, checkerboard borders with a snowflake and as I was drawing a scalloped border, it was kinda giving me cake vibes, I don’t know why, but here we are. The Scallop border and cake stencil set is here if you would like to see it.
Been thinking a lot about stencils recently since I started designing them and wondering why I never really ‘got’ them before now. One of the things that might be ‘it’ was lack of detail. I’m a huge details person. The nitty gritty, the millimeter-to-the-left, the line-width, the smoothness-of-the-curve, it’s where I feel most comfortable.
One reason I may have pooh-poohed stencils slightly because there is generally not a huge amount of minute detail, but the thing that is kind of converting me is colour. Colour and soft brushes. What a combination for fun. Look at this cake, with that honey glaze dripping over the edge, look at the lightness and darkness, the transparent sort of overlay that you can get with stencils, it’s a really tidy, but textural finish, and it’s one that I have not been able to get outside of watercolouring.
Unlike watercolouring though, I can get that effect but also have smooth clean lines – my most favourite thing! I love it, I love how colour looks brushed on to open spaces with a soft brush. I love the overlay of semi transparent tones. I love how it stops neatly at the boundary! I’m addicted! I would love to hear what your favourite ‘finish’ is in terms of artwork.
Also me and my cutting machine ‘Rupert’ (the name changes every week) are kinda pushing the boundaries for just how much detail we can get. Every artistic process I have ever tried has boundaries and it’s kinda fun to experiment there and see how far that can be pushed. For example, I made a really detailed set of stencils with super thin shapes and extended areas, it’s the Forest Path layering stencil set, and it’s not for the faint hearted! I feel like that set probably contains the finest detail I can make in terms of thickness of shape and fine lines, Rupert done good! However, if I ever get my hands on a laser cutter…
This cake stencil is an opportunity to show off ink colours and fill out a card really quickly. Minimal sentiments will work best with busily coloured cards, but I can’t wait to make a minimally coloured cake card and pair it with some fancy lettering.
The cake is made by layering two of the stencils in the set. I normally start with the stencil containing the cake stand and icing, and colour those in first. In the pic above the cake stand is cherry red and the icing is deep chocolate.
If you then position the second stencil, containing the cake layers (here in lighter chocolate colour), you can choose to butt the layers up to the icing, (as in the first cake with honey glaze, at the start of this post), or you can slide the stencil down so that you cake layers butt up to the cake stand – this works best when your cake is lighter colour than your icing. It’s your cake, you decide if you want that classic stencil look, or if you want a more solid option. I had great fun playing with colour on these! The sentiments are from retired WMS sets ‘Eat Cake’ and ‘Frame-It’. Inks are a mixture of Stampin’ Up and Distress Inks. White gel pens for details. Ta for popping in!
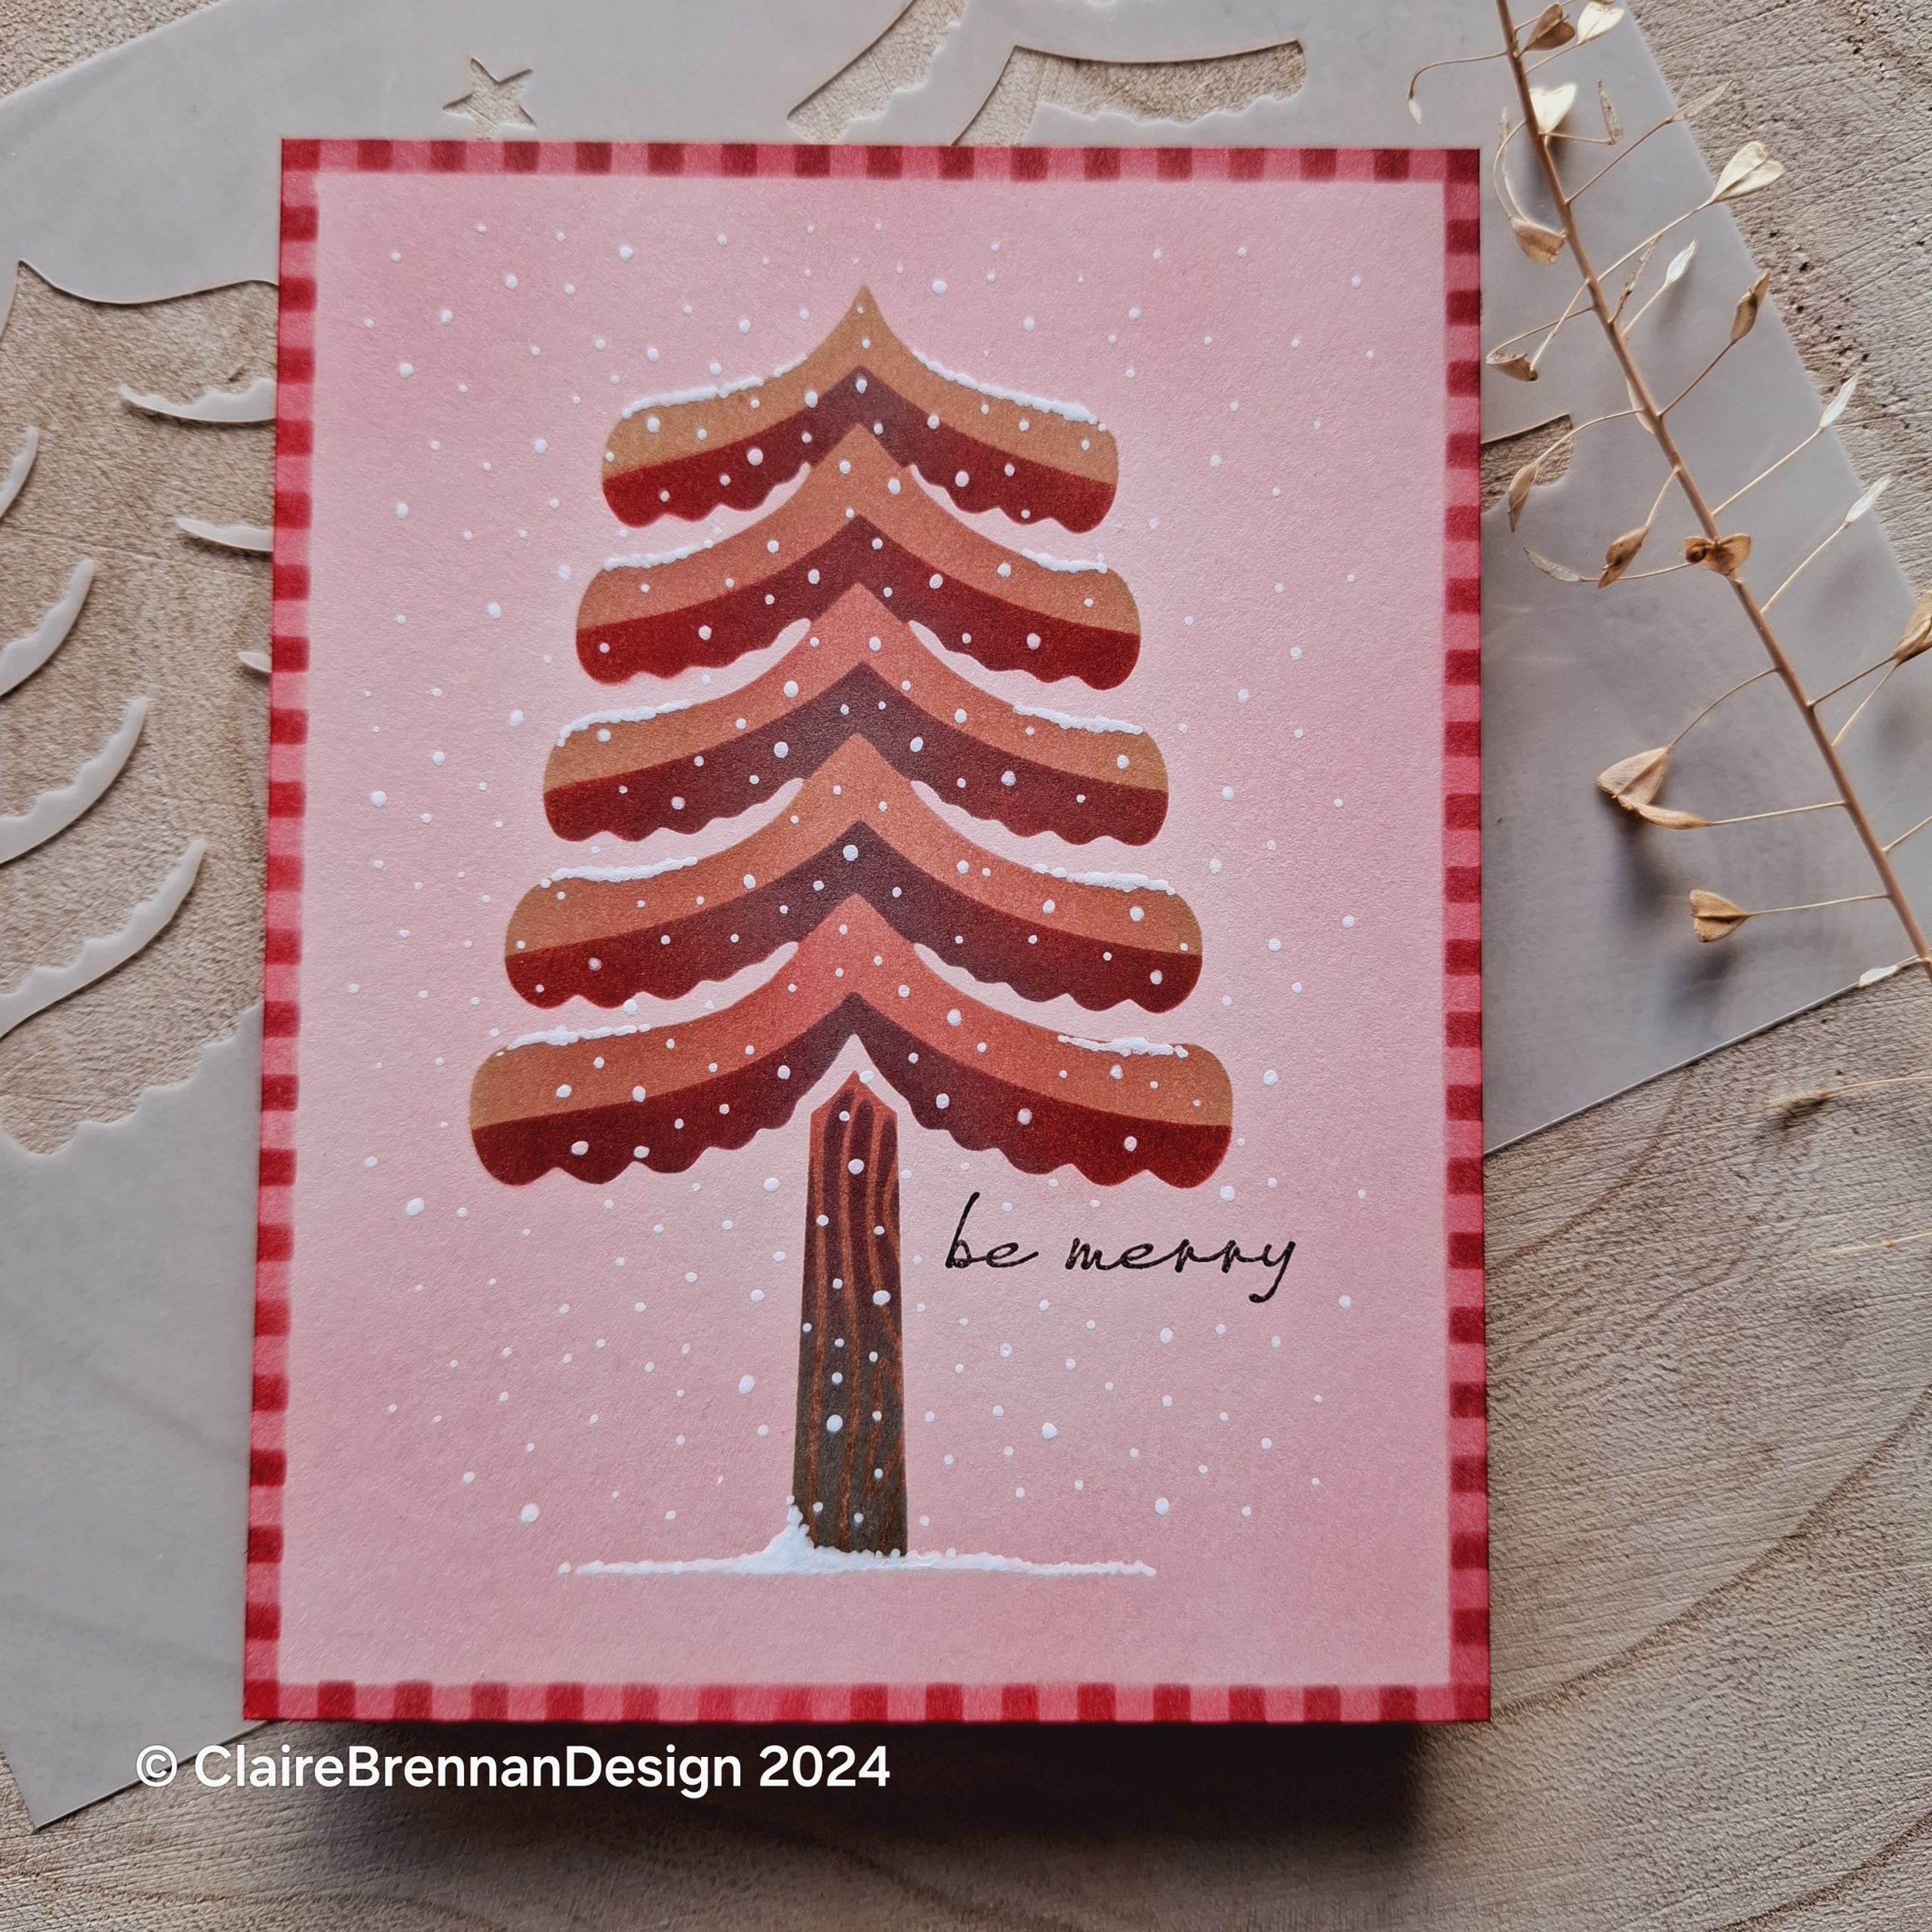
Sometimes it’s just nice to post a card – it’s one of the things I miss about my old blogger blog – it’s still there, but I cannot access it any longer. Back in the day I used to be able to just pop up a quick card post without having to fulfil a list of SEO objectives lol, WordPress is great an’ all, with it’s hints and suggestions – but sometimes it’s enough to just pop up a card – this is such a card. This is my favourite card that I have made since I got back into crafting. It’s super simple, but it pleases me.
At the moment I’m seriously considering making a batch and actually sending out Christmas cards this year I love it so much! lol. It uses my current favourite stencils – the Folk Tree 1 stencil and the Checker board Christmas borders stencil set. White gel pen for details, simple sentiment from a now retired WMS set. It was very therapeutic, making this card! For instruction on how the tree stencil works see this post.
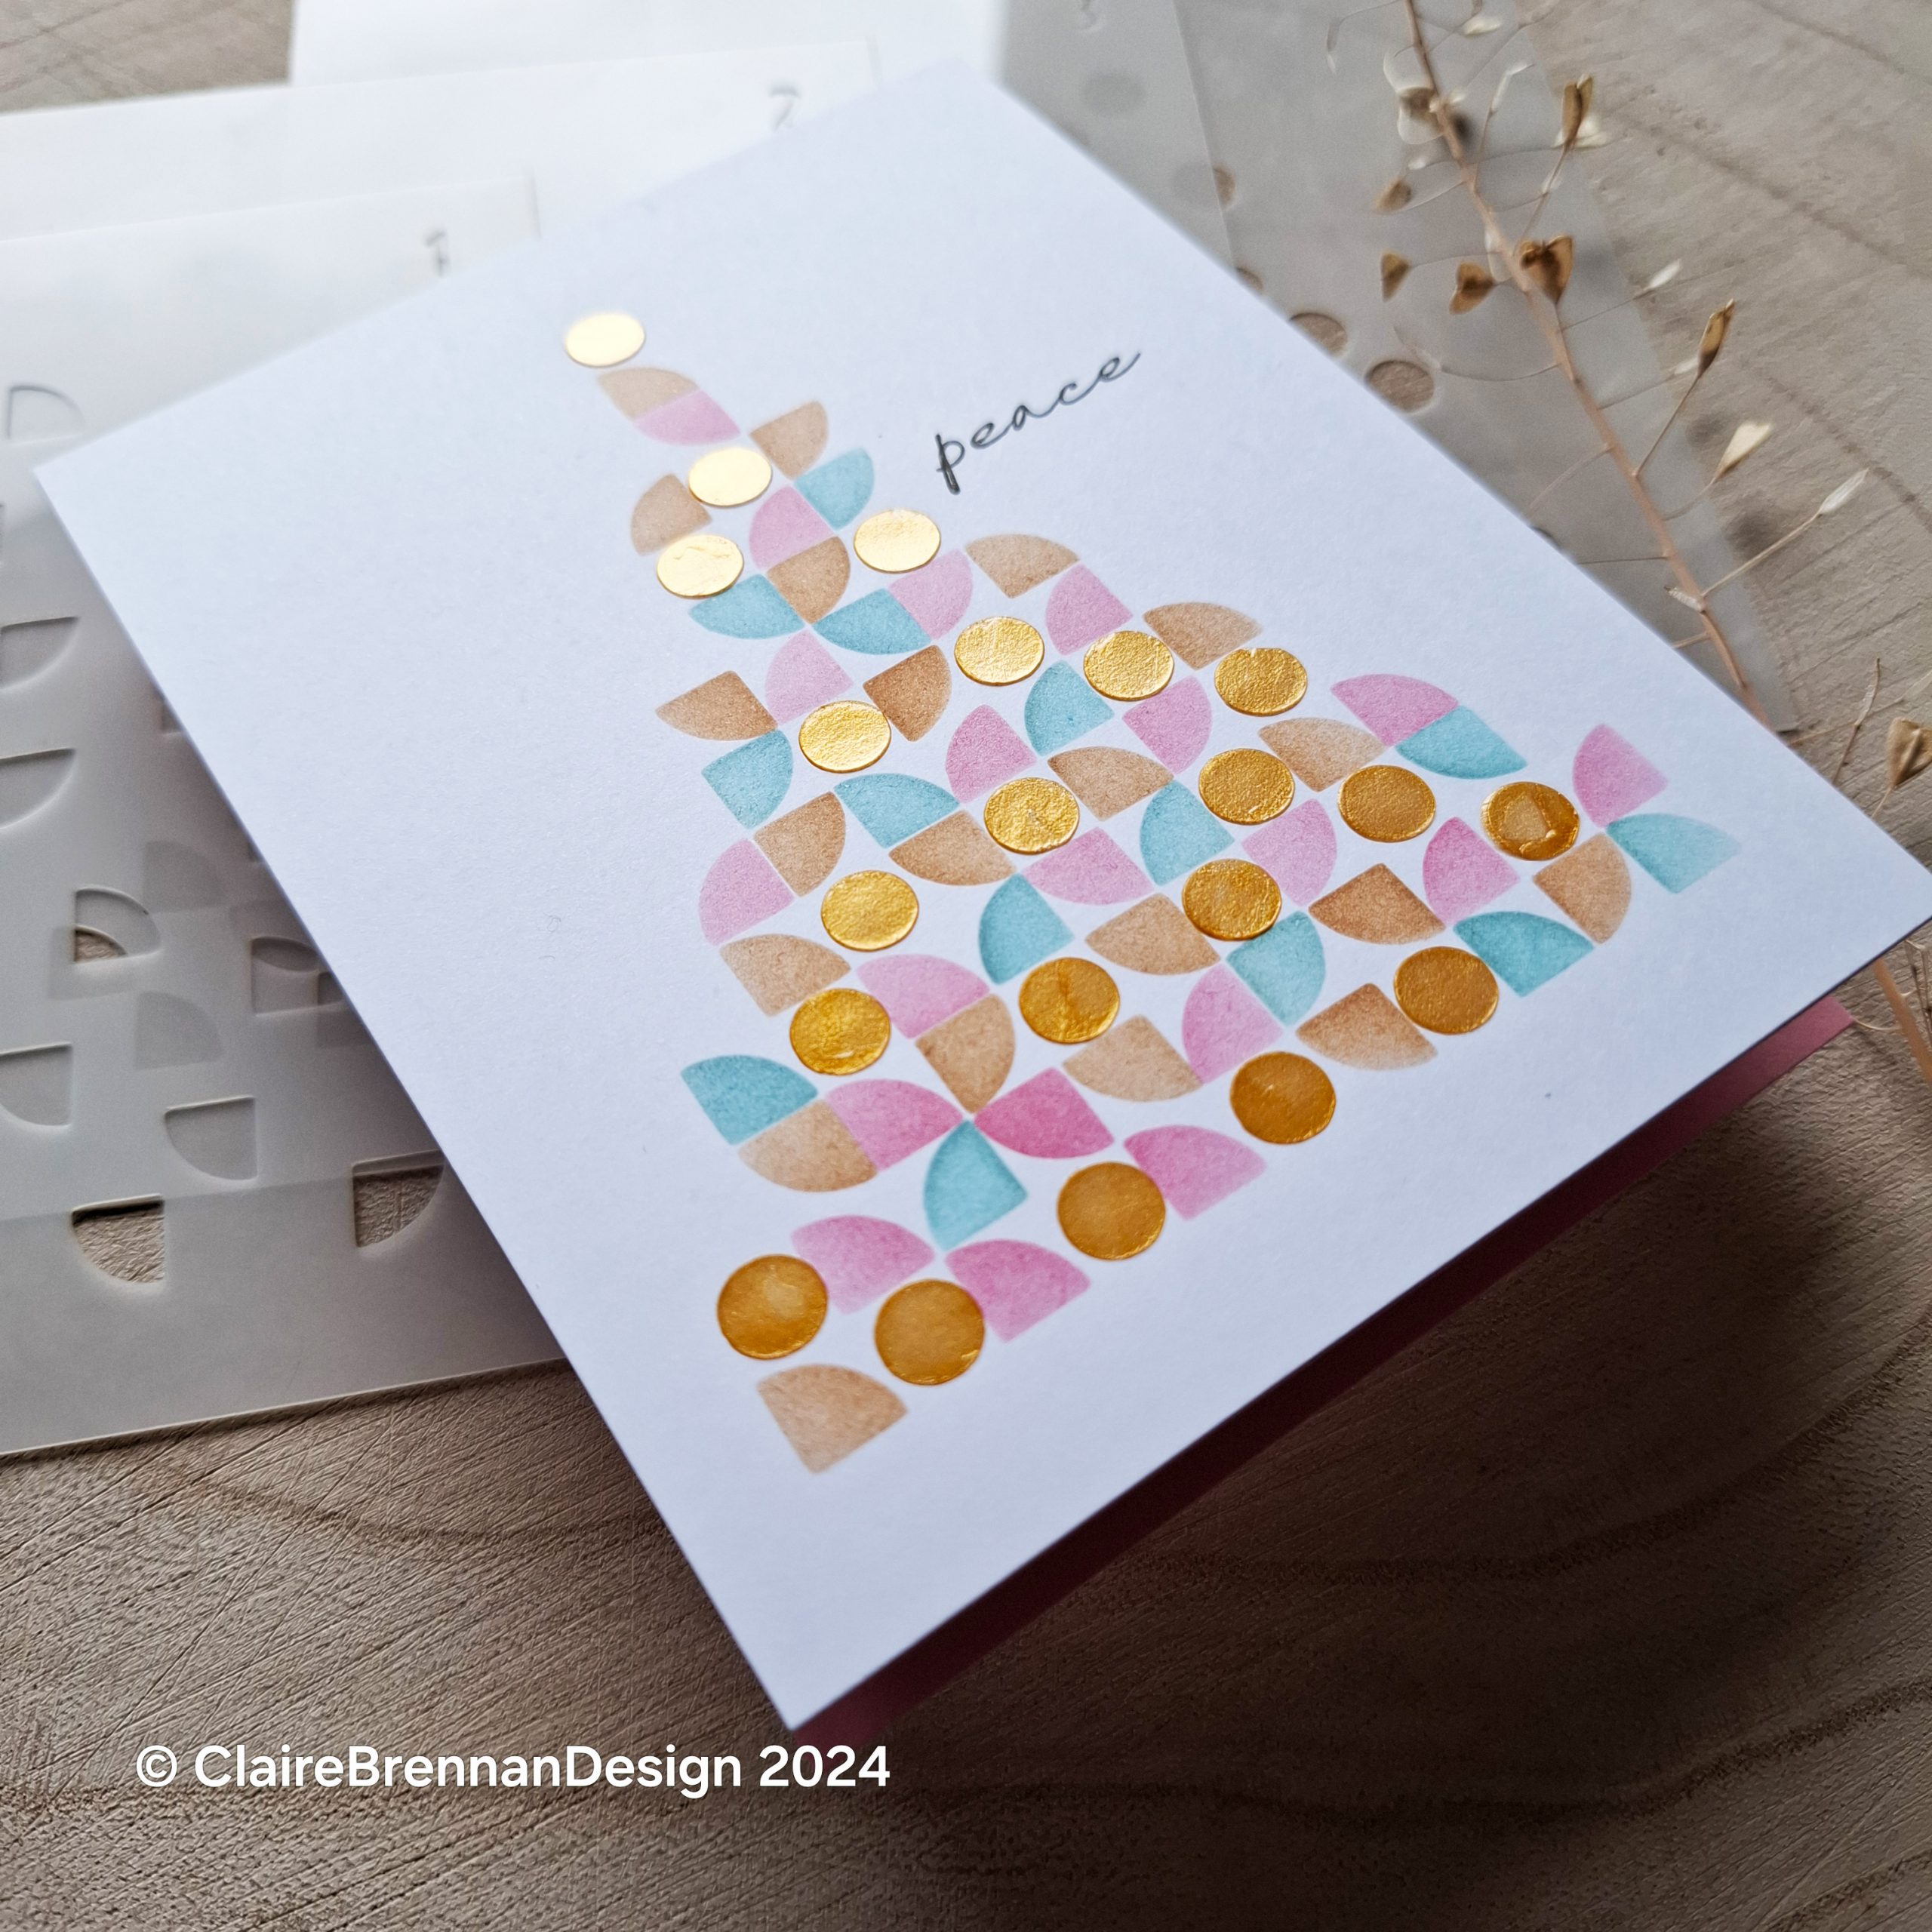
Yes I’m a stamper, but yes I’ve taken a bit of a side-quest into stencilling recently and this card is the result of an idea that’s been floating in my head since I made a bunch of geometric mid mod stencils for the store. This is my idea of Mid Mod Christmas, in a hurry.
I designed a wee set of 4 layering, card sized stencils to allow me to create a Christmas tree design, super quick, because at Christmas, I have zero time, like, minus time. The fact that this coincided with me finding my long buried gold lustre embossing paste seemed like the sort of serendipity I shouldn’t ignore. Here it is, my super simple, super quick, but (I think) super stylish Mid Mod Christmas card, complete with gold baubles!
Having 4 little layering stencils enables me to create a multi coloured tree. On the last stencil, which is circle shapes, I used the gold embossing paste, honestly haven’t been this chuffed with anything since the night I discovered that my ink pads were still juicy after years in storage!
I cut the stencils to the same size as a card front (I use US card front sizes mostly 4.25 by 5.5 inches) and I stamped onto a pre-cut card front panel, that way it is super simple to correctly position the stencil each time, see this sequence of photos below – I begin working with a piece of card 4.25 by 5.5 inches in size, and I just set the stencil on top each time and hold in place with my left hand while brushing on colour with my right hand.
This may be one of the simplest cards ever. I tend to use minimalist sentiments with this design, I think they work well. The “peace’ and ‘joy’ are from an old WMS set (Festive foliage, and I know there’s a ton of folks out there who have that set!) – Here’s one I made on coloured card, I brushed a little extra orange around the card front (yellow card) before I began stencilling and then I kept it tonal to pinks and oranges, I think this looks great with the gold lustre baubles.
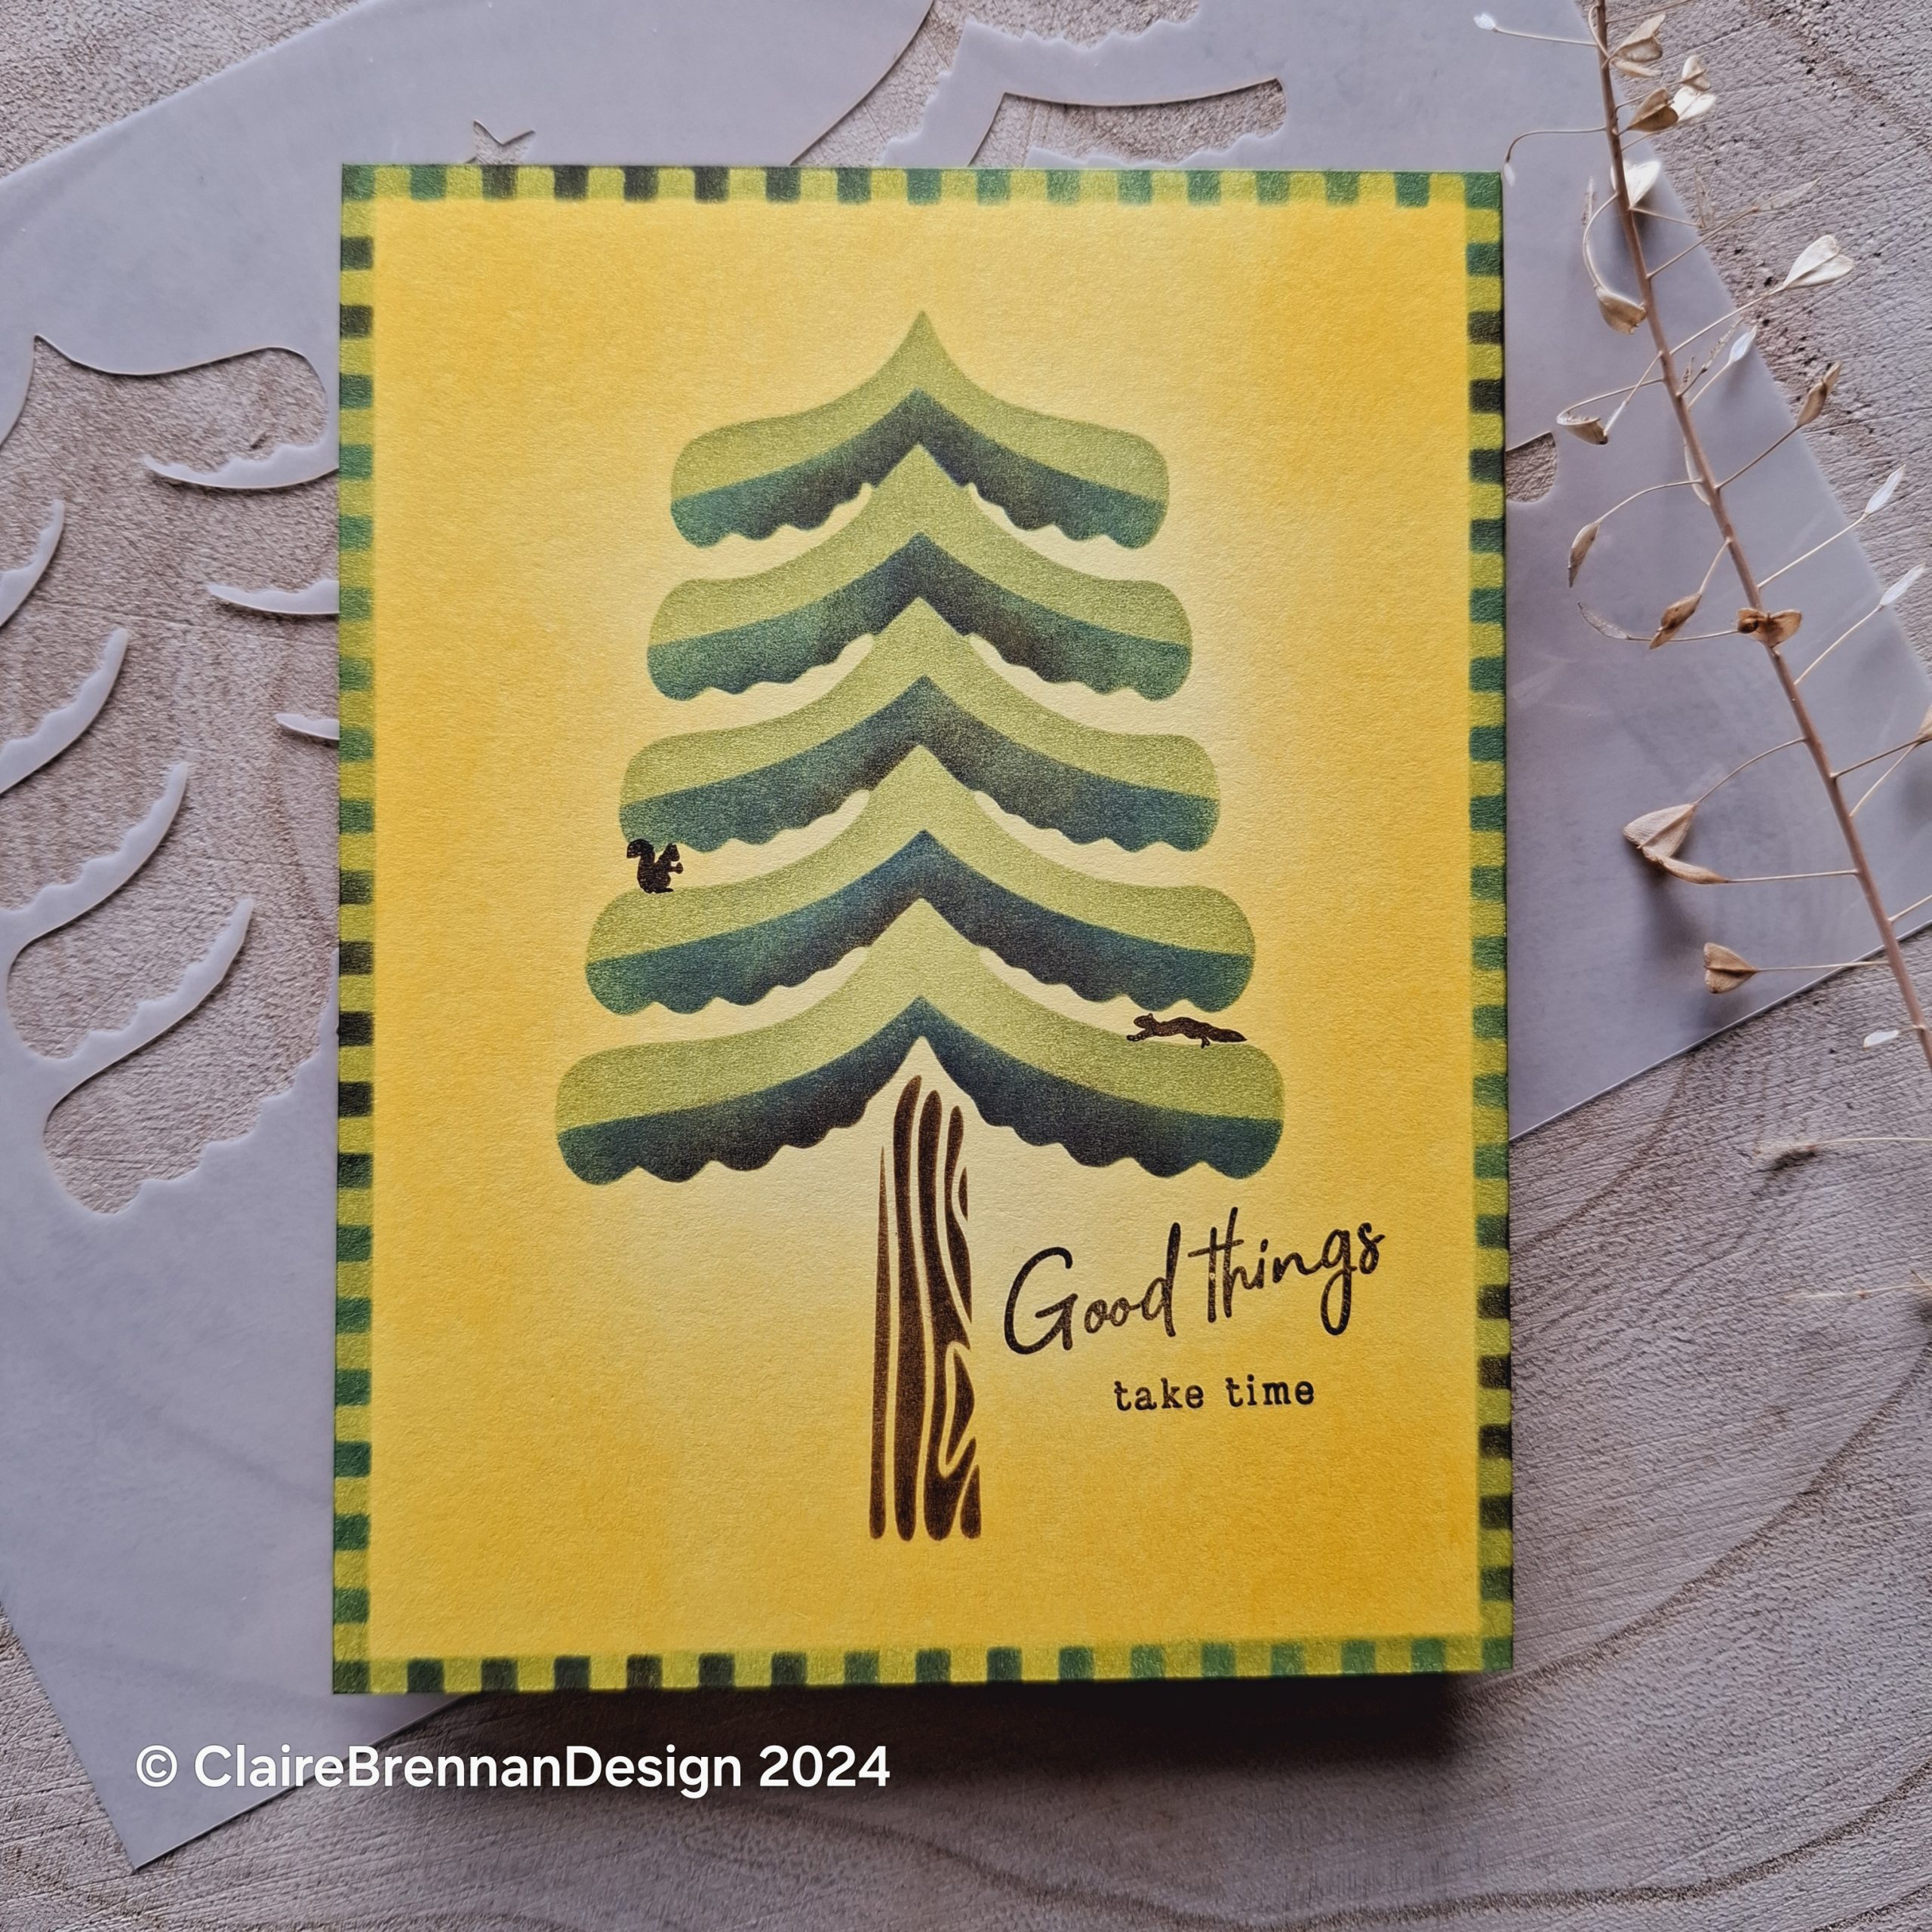
I’ve made a bunch of new stencils for the store recently (see here). This one is a bit of an obsession. It’s called Folk Art Trees 1 because I’m planning more. Super simple, so simple that I made a ton of cards in one sitting, here’s a few pics from the process of this card. I also used the Checkerboard borders stencil to get the little block border around the outside of the card. I really love how the inks look almost like soft pencil shading, or soft watercolouring, I felt very artsy making this.
The tree is ridiculously easy, you just position the stencil, brush on your colour (pic 1, top left) and then you can decide if you want to go in with the secondary part of the stencil to give shadows (pic 2).
I’m using a prototype in these pics, so my tree trunk grain is under the main tree boughs, but here is what the stencil looks like now that I’ve finished the revisions. The left hand cut-out is the full tree, the right hand side cut out is the tree detail. you could actually use these independently but I’ve used them together so far. Included with the stencil are the negative cut shapes of the. tree, which are useful for masking.
I stated with a piece of yellow card, cut to 4.25 by 5.5 inches and i brushed on a little stronger yellow ink around the edges (Daffodil delight from SU). The main tree was brushed in green (certainly celery SU) and the underside of the boughs was brushed in a blue shade (Baja breeze SU) The tree trunk was a rich coffee shade of brown.
Changing to the Checkerboard border stencils I used one of the frames, which is slightly smaller than the card, to mask a border around the edge of the card, which i brushed in the green. It’s then super simple to lay over the indented frame and brush again in the blue, to get that cool checkerboard effect, I absolutely love this combination for making simple frames around my card to match the focal point. I brushed a little brown around the edge also to give some nice variation. I love the thinness of the frame, it picks up the colour detail without being overpowering.
The last things I added were a sentiment (from my latest stamp set Mush love) and some teeny tiny squirrels from an old WMS set, Cottage Garden. Hope it tickles!
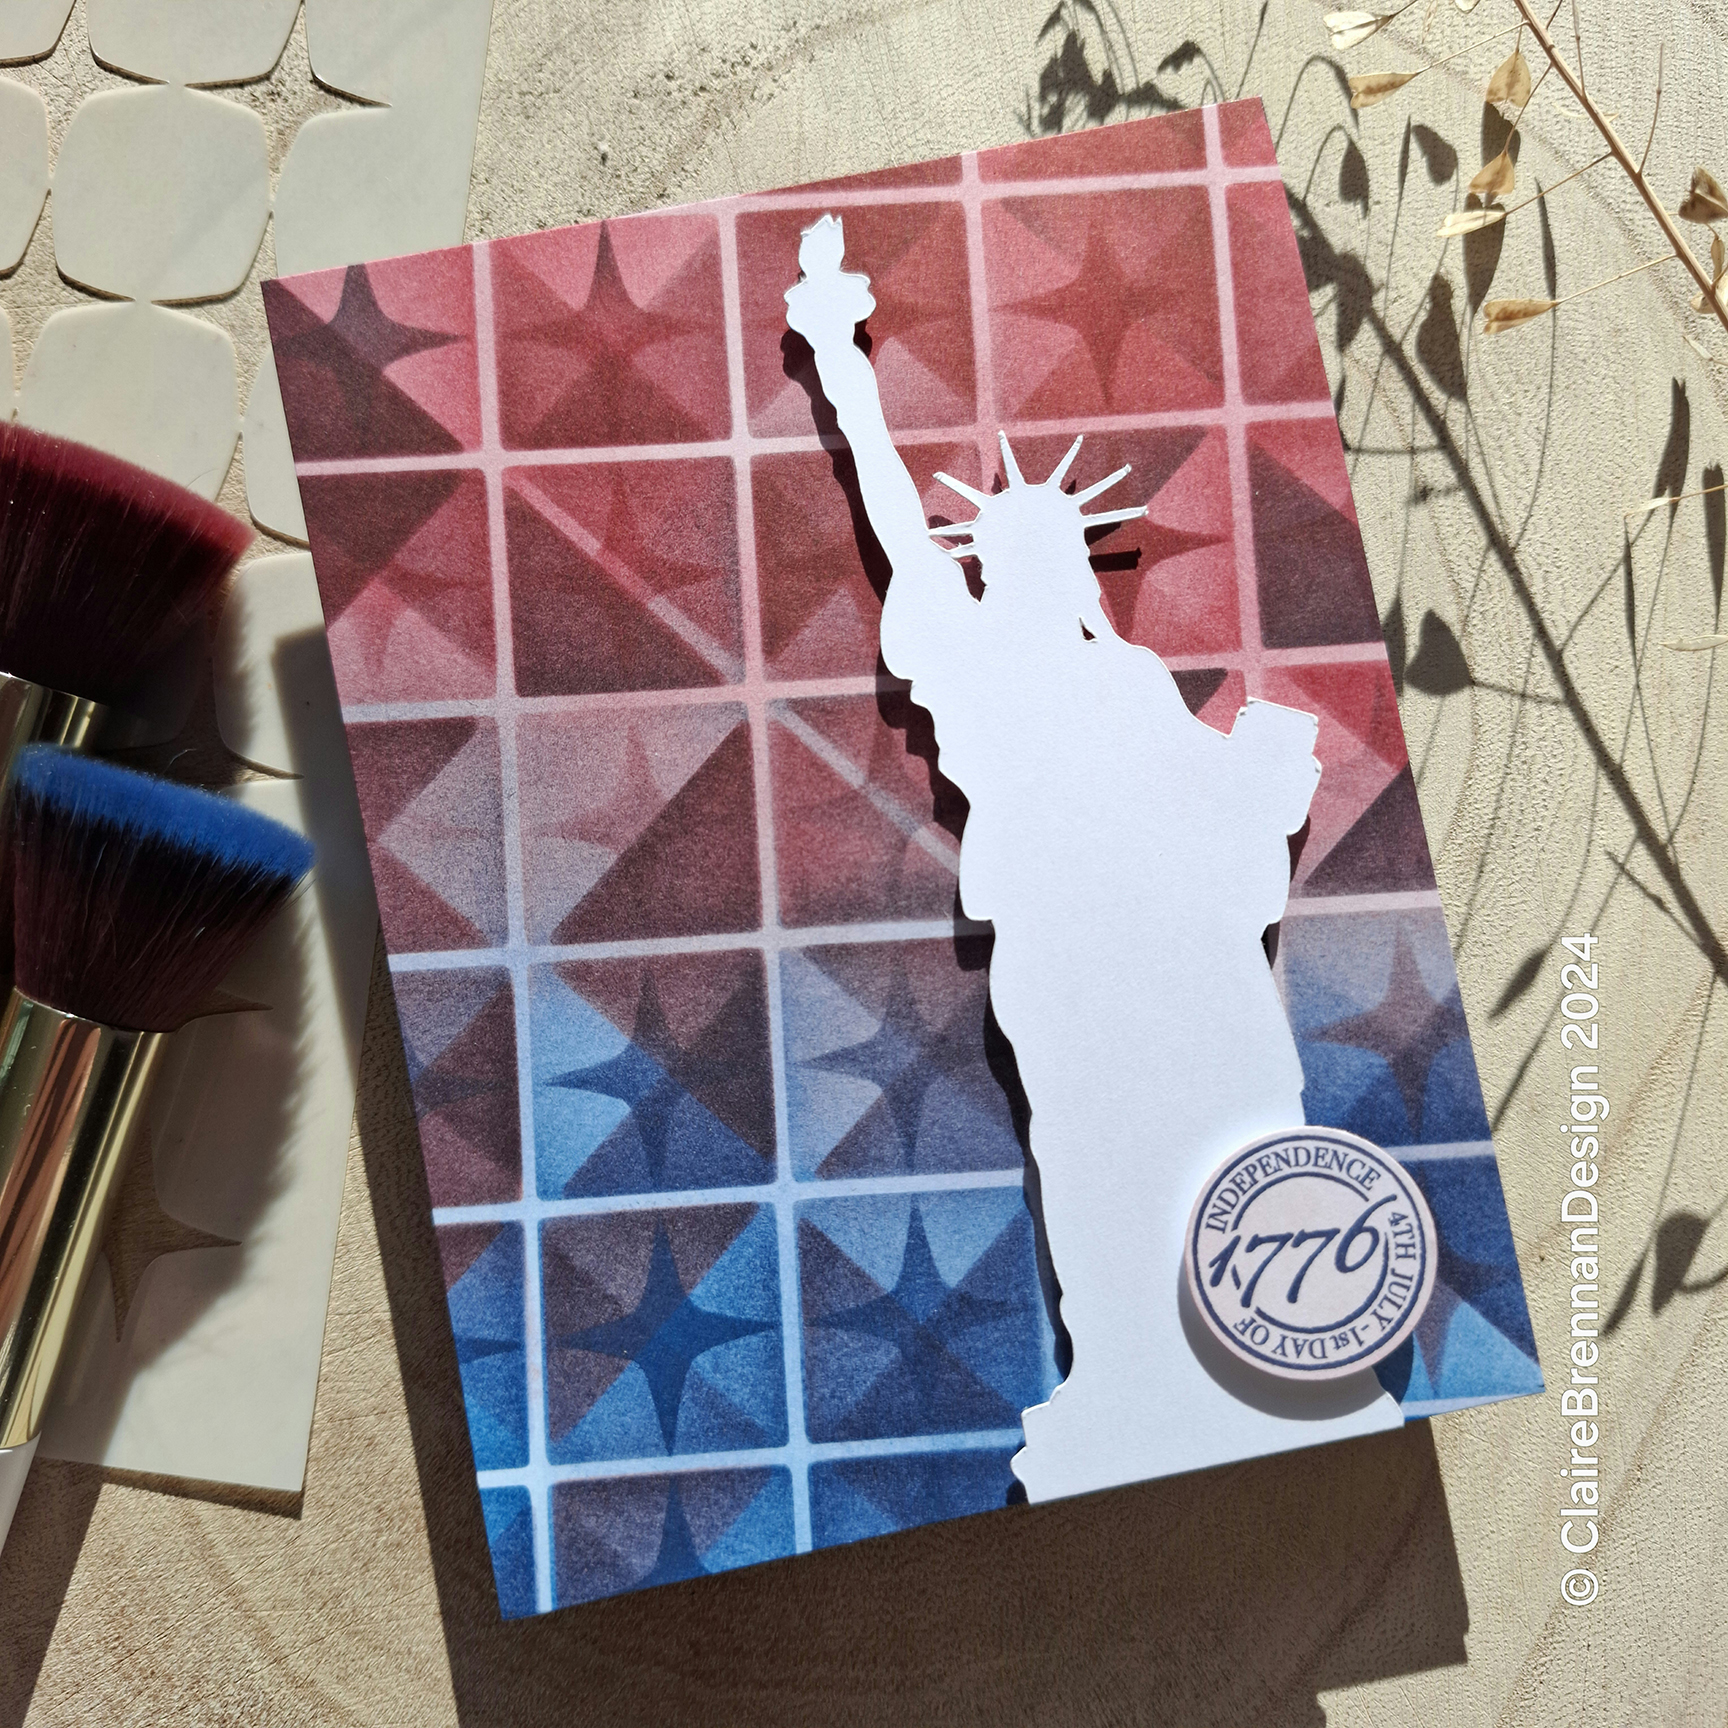
I’ve been layering my geometric stencils to get some cool patriotic patterns. I even went as far as creating another Youtube video. You can watch it here though, beware production values are infantile, but it saved me a heck tonne of typing. Brace yourself, Mozart was the only track that fit.
The retro style of these geometric stencils really lends itself to patriotic and superhero style card patterns – here’s another I finished off with a sentiment from an old WMS stamp set.